Contact: Rich Kurz Page content last updated May 18, 2024
The Construction Diary
2015
JANUARY-FEBRUARY
The weather is cold, so not much luck working outside or in the garage.
Instead, I began to figure out how to get 3D dimensions and contours off of the Chevy Jr. go-kart body.
The nose, tail, and sides look to be a close match to the original.
My first thought is Hugin, but it is very cumbersome and time consuming to first find the sweet spot where one can go between the front/left/top views.
And then to plot a point from one view to the other is incredibly tedious.
What's more, the variance from photo to photo only allows me to hope for a 95% accuracy at best.
Time for another approach - a quicker one.
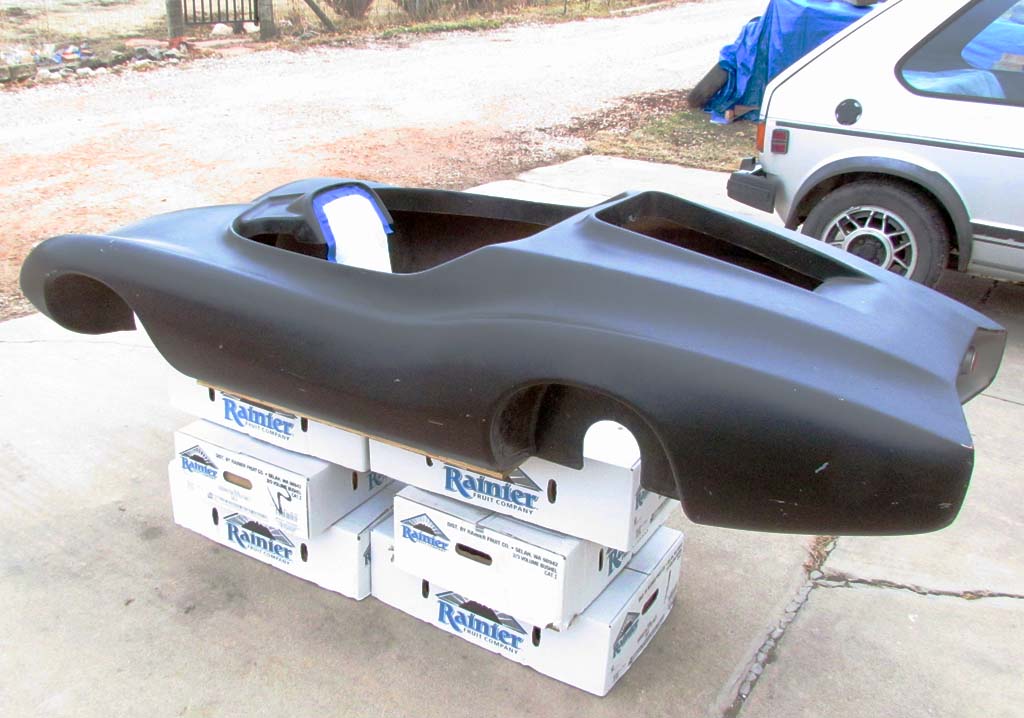
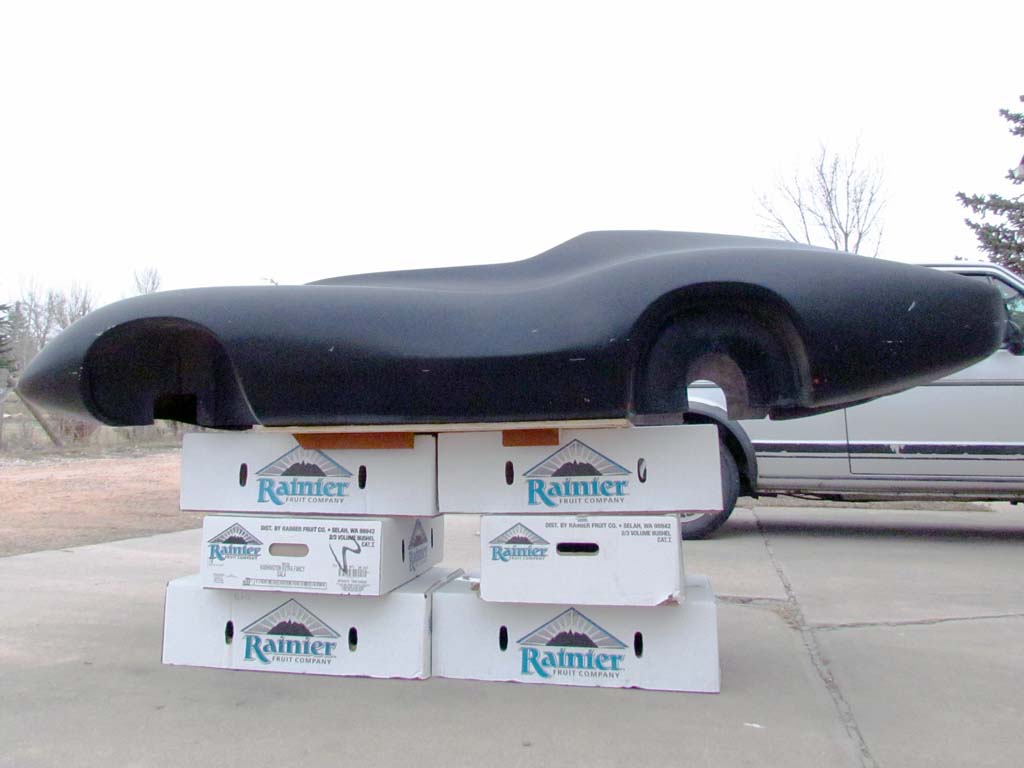
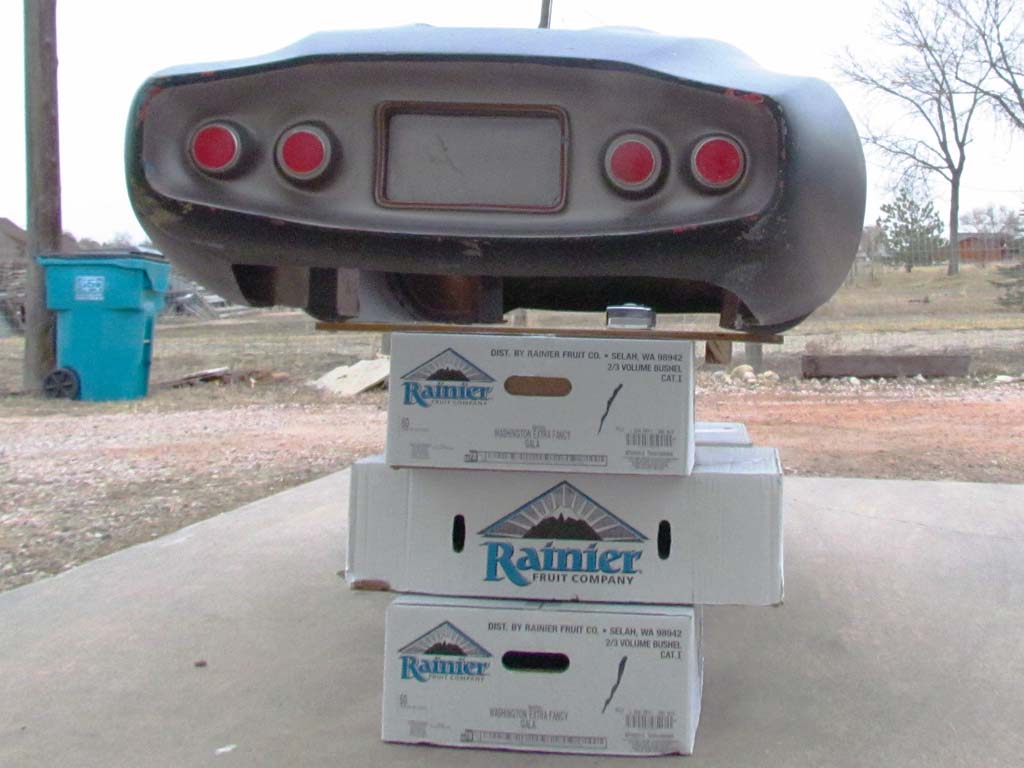
So I set up the go-kart body in the drive on a pedastal of boxes and took a series of walk-around photos - high, medium, and low.
I ran a set thru the free site run by Autodesk, Autodesk 123D (no longer available), and did indeed get a 3D file of the mesh of points with surfacing texturing.
But the result was way less accurate than Hugin.
There has got to be a better answer!
MARCH 28-MAY 30
The weather has warmed up and time to plan what to add to the chassis.
But in trying out the seat position, I find that my feet are RESTING on the front crossbar.
Where will the pedals go? There is no room for pedal-play!!
This is serious.
My neighbor, the welder, is good-natured and easy-going about it. If I want to cut out the front floor and redo it, that's okay.
I do, and he does. Well, I cut, he welds.
The biggest issue is working with the front suspension arms that protrude back under the car, which take the stabilizer bar attachment points.
They would actually protrude into the floor space.
We decide to cut them as close as we can and then angle the floor up over them. It appears to work.
JUNE 21
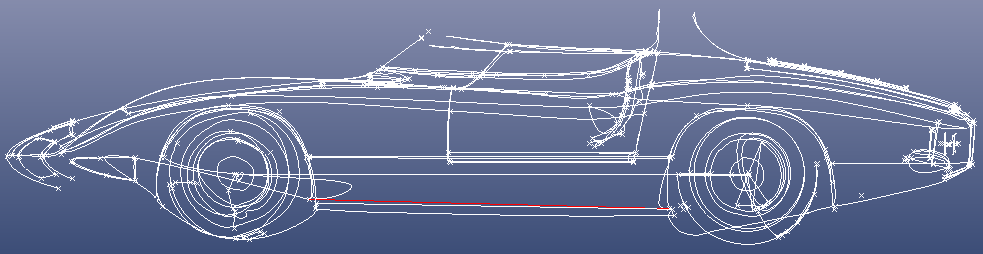
Back to the go-kart body. I decide to try as best an orthographic side view as I can photograph.
I set up the body across the yard about 170 feet away and use my digital camera to make a telephoto shot.
It gives me something, but even at 170 feet, there is stil depth distortion from the side to the middle to the far side of the body.
There has got to be a better answer!!
JULY-DECEMBER
I decide to spend the money and buy Photomodeler to create accurate 3D points based on photographs.
There is a learning curve of course, but it begins to work early on and just gets better.
I have contacted the GM Heritage Center and they provided me with a set of high res photos from various angles.
These were the bedrock of the recreation.
By November I had moved into the interior and seats and dash.
By December, although the interior was having distortion issues, it was good enough to work with.
SIDEBAR: Hugin vs. Photomodeler
I described briefly Hugin's shortcomings.
Still, it is a freeware program with a powerful ability to create orthographic views of any specfic plane defined by two axis, be it XY, XZ, or YZ.
Another similar and easier-to-use freeware app is Microsoft's Image Composite Editor (ICE), found on their store.
But it is less exact in the sense that specific planes cannot be precisely established nor rotated as precisely as Hugin does.
But there are two difficulties with Hugin.
One, as already mentioned, is the tediousness of dialing in the the precise angle of the viewing plane of interest.
Sometimes, I just can't seem to get there.
If I do find the precise angle, then it rotates nicely 90 degrees to a side and top/bottom views.
Otherwise, one ends up microscopically adjusting each view to get the best set of right angles.
And it also is not always proportionally correct.
That one is easy to fix by disproportionally scaling the resulting image in an image editor.
The second issue is that the user MUST keep in mind that ONLY what is on the plane is in correct relationship to each other.
True, if one goes forward or backward relative to the viewer those planes with be orthographically correct, but they will not be in the same scale to each other.
So you better know what is in that plane and what falls outside of it!
Hence the benefit of a 3D plotting program like Photomodeler.
But there are some requirements.
One is time. Each point must be plotted on multiple images.
That is the way the program accomplishes its goal.
Another is the need for a set of overlapping images.
Each point must be shown in at least two images and the images must be separated by enough of a viewing angle.
I would say of at least 15 to 30 degrees minimally, and no more than 60 degrees if it can be helped.
And finally, one has to establish what will be the 0,0,0 point and the major orienting axis and plane, plus one known dimension.
It helps if that dimension shows in as many images as possible.
The end result is a set of points, a point cloud, that are plotted in 3D space, and which can be made into a surface.
If you can get them surfaced, then you can do cuts anywhere and get a contour line thru the object.
And if you can get enough contours, you can recreate the shape of the object in real life at any scale.
JULY 11
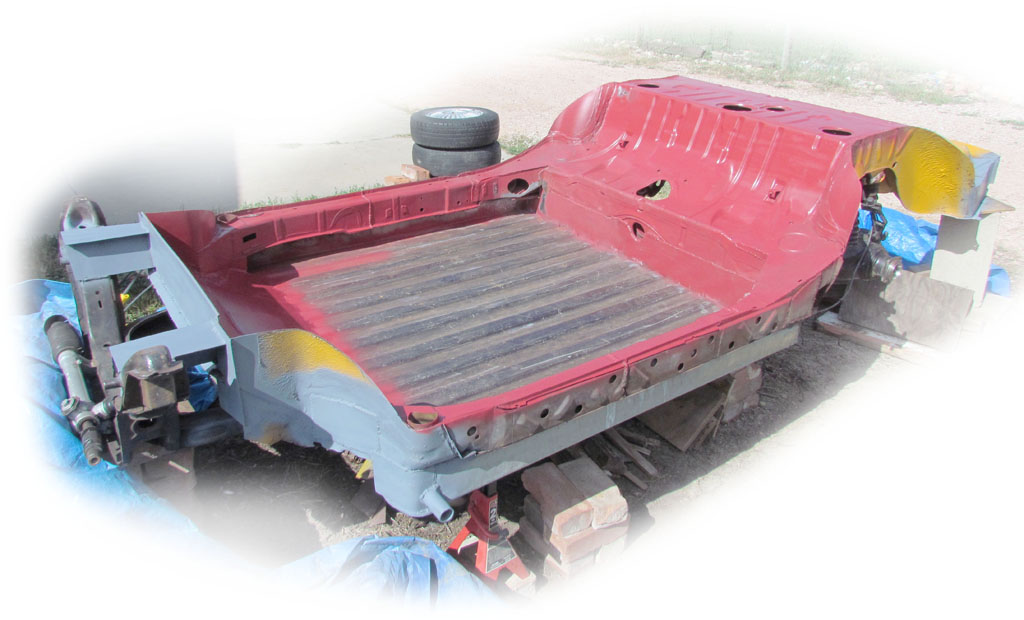
I begin derusting (again) and cleaning up the chassis.
I even paint it with a deep shade of red and am amazed how much better it looks.
JULY 25
I contacted a man on TheSamba website who has lots of experience rebuilding the VW 411/412s and shares that with others.
He has rebuilt the transaxle about eight times so far and knows what the problems and solutions are.
I made contact with him and discussed the countershaft, which is the primary culprit to fail.
I will need to replace the counter shaft or replace the bearings with torlon bearings, custom-made.
I will have new bearings made. Now to find torlon and a machinist.
SEPTEMBER 13
I REALLY put something back ON the chassis!!!
Today I replaced the shocks. Thanks to my TheSamba contacts, I have an alternative to the no-longer-produced originals.
The 1982 Ford 1/2 ton Econoline truck front shocks will closely match.
That's what I put on.
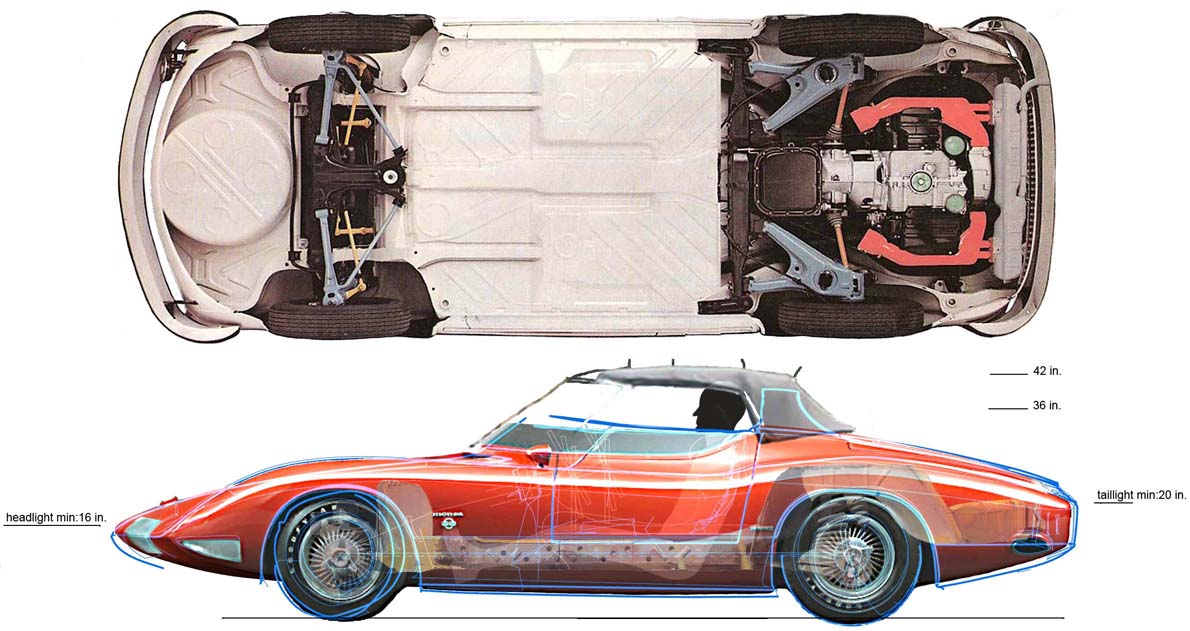
Note the maximum extension with them on.
I discovered that the sectional painting I have been using actually showed the wheels NOT in the neutral postion, but in the MAXIMUM compression position.
I had to edit my master Photoshop file of overlays to correct that one. It does change where things fall vertically.
OCTOBER 5
"We" clean up the welds on the chassis and then flip it over to begin working on the underside.
OCTOBER 10
I begin derusting the underside, especially the engine compartment using a wire brush wheel.
I then spray it with a rust encapsulator.
OCTOBER 14-20
I apply body seam caulk everywhere I think water and road salt will get to so it won't get to it.
It needs pretty heavy application around the ends of the pickup bed floorpan, but so do all the nooks and crannies of the front end.
OCTOBER 24
And finally I apply engine red paint and engine gloss black paint to the engine compartment underside,
primer to the pan, and engine gloss black to the front suspension member.
And it sure looks purty!
Check out 2016 for more progress!
SIDEBAR: Hugin vs. Photomodeler
I described briefly Hugin's shortcomings. Still, it is a freeware program with a powerful ability to create orthographic views of any specfic plane defined by two axis, be it XY, XZ, or YZ. Another similar and easier-to-use freeware app is Microsoft's Image Composite Editor (ICE), found on their store. But it is less exact in the sense that specific planes cannot be precisely established nor rotated as precisely as Hugin does.But there are two difficulties with Hugin. One, as already mentioned, is the tediousness of dialing in the the precise angle of the viewing plane of interest. Sometimes, I just can't seem to get there. If I do find the precise angle, then it rotates nicely 90 degrees to a side and top/bottom views. Otherwise, one ends up microscopically adjusting each view to get the best set of right angles. And it also is not always proportionally correct. That one is easy to fix by disproportionally scaling the resulting image in an image editor.
The second issue is that the user MUST keep in mind that ONLY what is on the plane is in correct relationship to each other. True, if one goes forward or backward relative to the viewer those planes with be orthographically correct, but they will not be in the same scale to each other. So you better know what is in that plane and what falls outside of it!
Hence the benefit of a 3D plotting program like Photomodeler. But there are some requirements. One is time. Each point must be plotted on multiple images. That is the way the program accomplishes its goal. Another is the need for a set of overlapping images. Each point must be shown in at least two images and the images must be separated by enough of a viewing angle. I would say of at least 15 to 30 degrees minimally, and no more than 60 degrees if it can be helped. And finally, one has to establish what will be the 0,0,0 point and the major orienting axis and plane, plus one known dimension. It helps if that dimension shows in as many images as possible.
The end result is a set of points, a point cloud, that are plotted in 3D space, and which can be made into a surface. If you can get them surfaced, then you can do cuts anywhere and get a contour line thru the object. And if you can get enough contours, you can recreate the shape of the object in real life at any scale.
The Build--2015

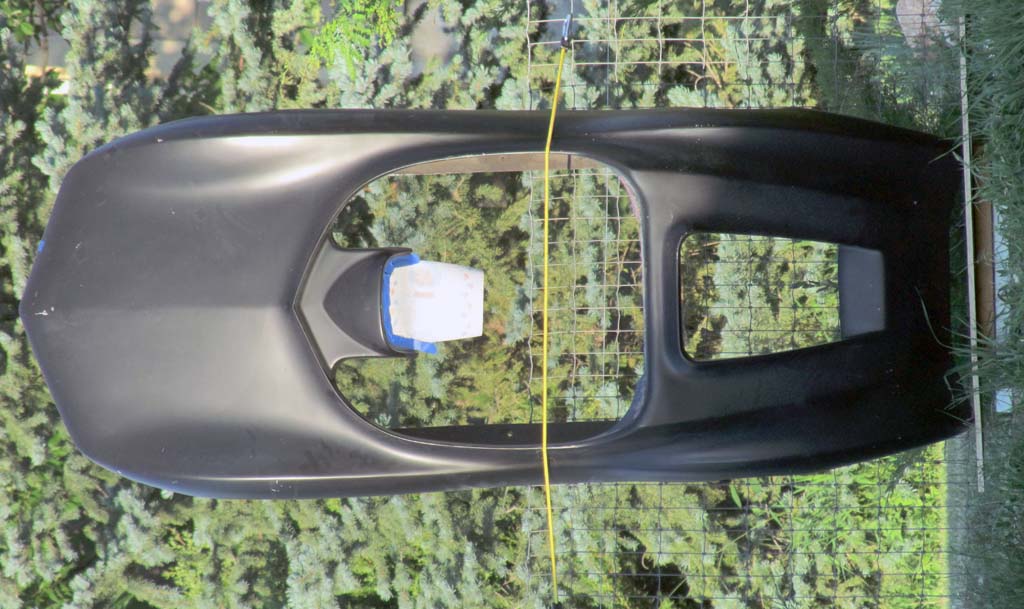
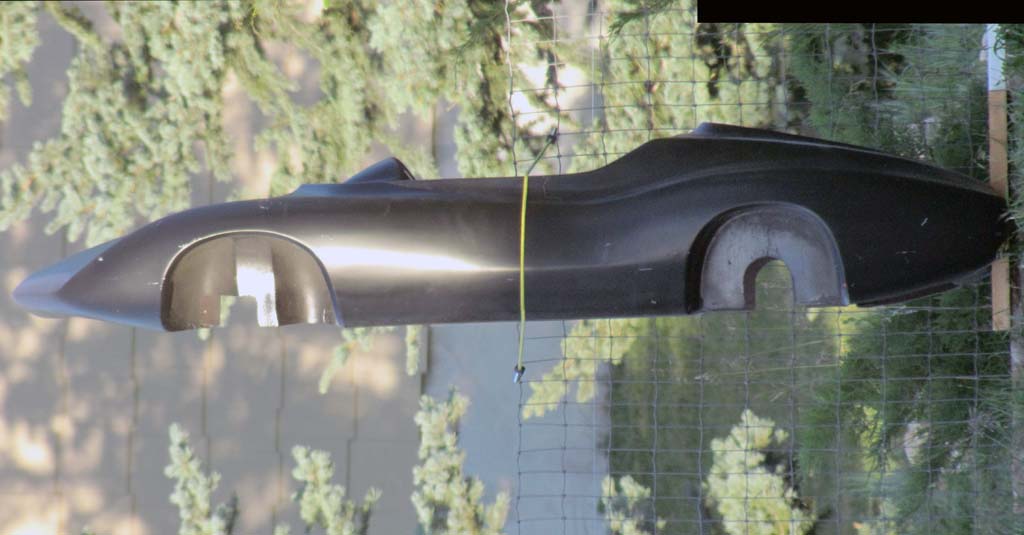
1st ROW
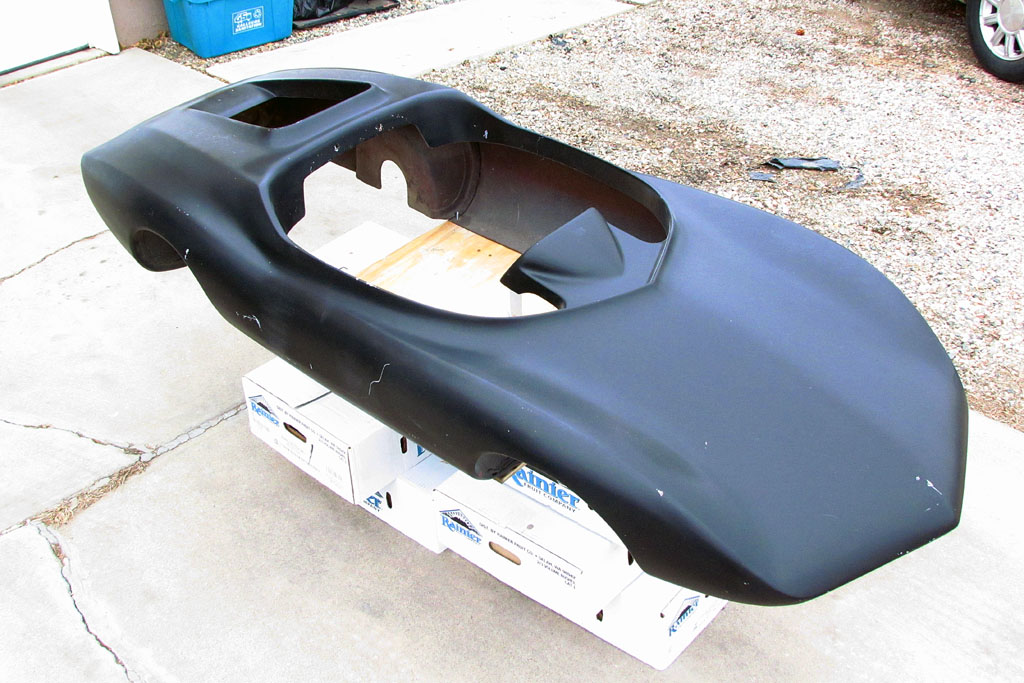
(L) Chevy Jr go-kart, above view
(C) Chevy Jr go-kart, side view
(R) Chevy Jr go-kart, rear view
2nd ROW
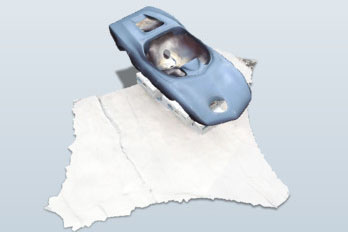
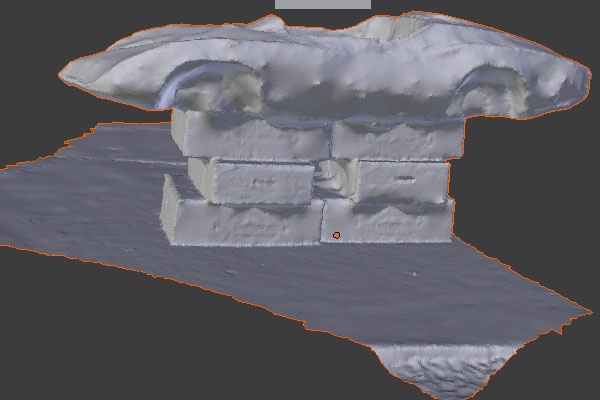
(L) The view I photographed from above - 1 of about 50 I entered into the 123Catch engine
(C) And the preview image of the processed and rendered 3D file
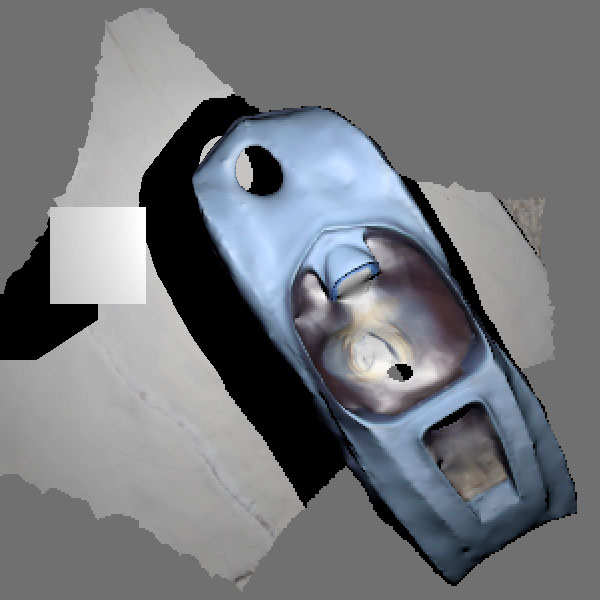
(R) And a top-down view in Blender of the 3D file - a view I did NOT photograph!
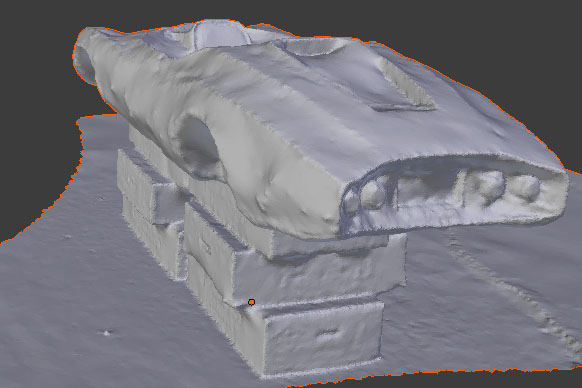
3rd ROW
(L) A shaded rendering in Blender without the photograph texturing - front view
(C) Rear view
(R) Side view... it is just too rough textured to be accurate.
1st ROW
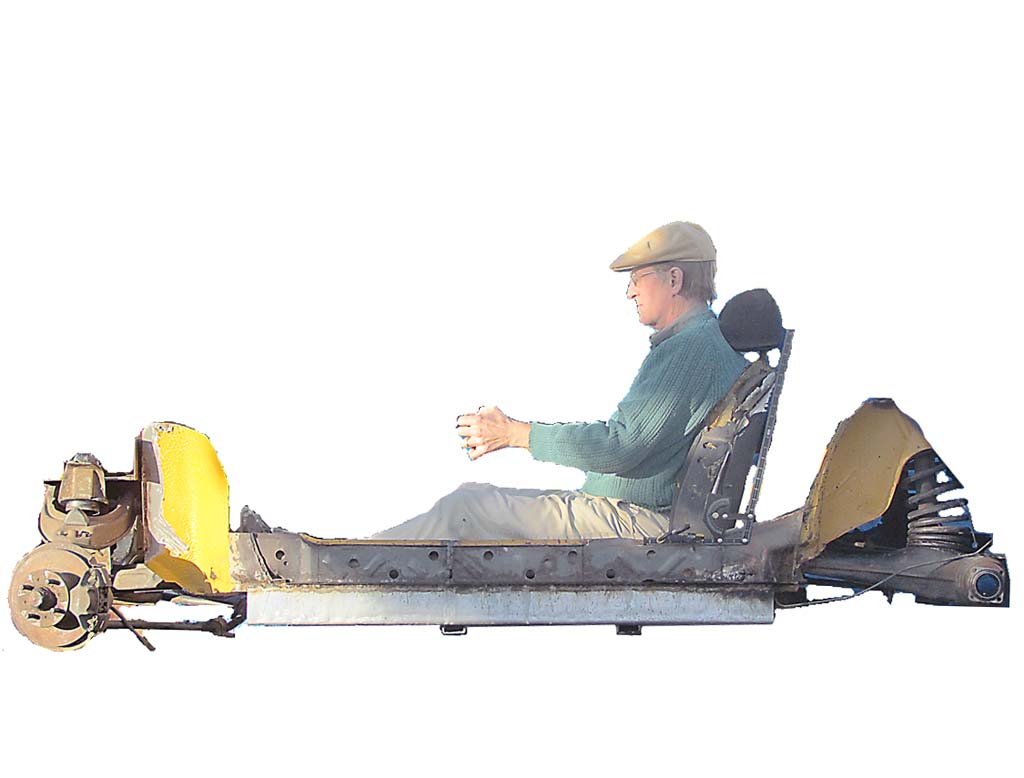
(L) Seat test in situ
(R) New footwell with side plates in place
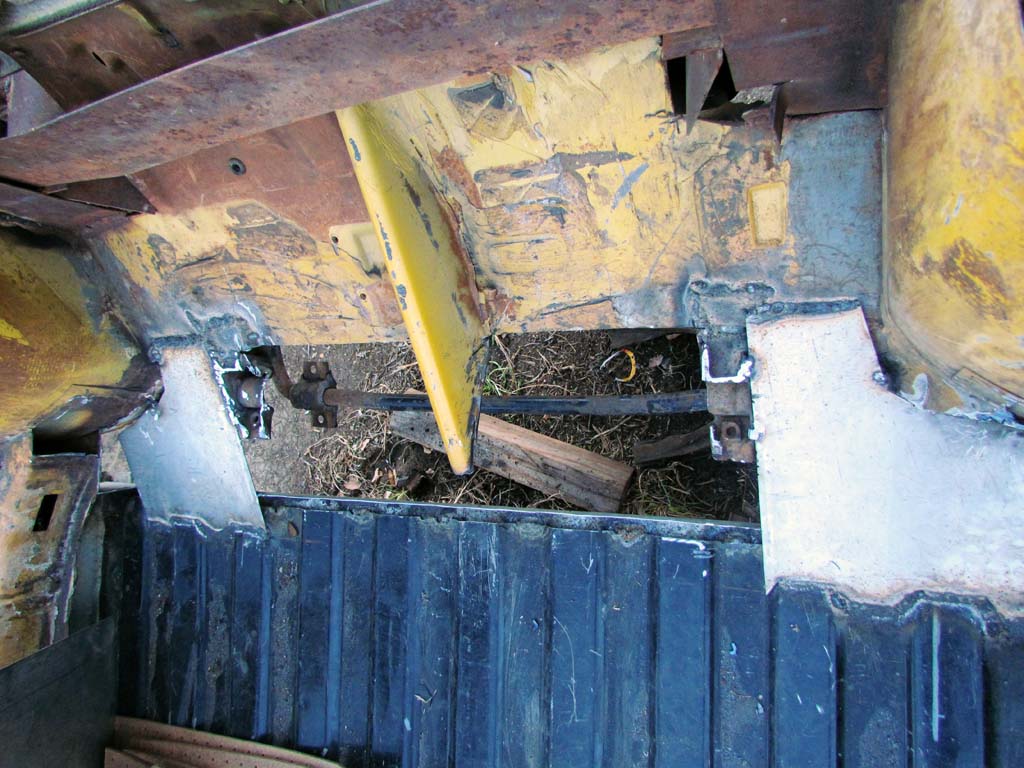
2nd ROW
(L) Footwell with center plate down
(R) Completed footwell
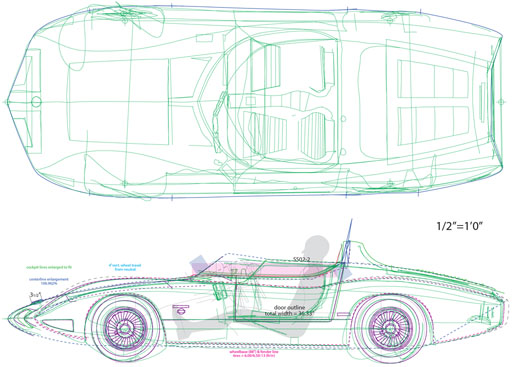
1st ROW
(L,C) The go-kart top and side from across the yard (near orthographic)
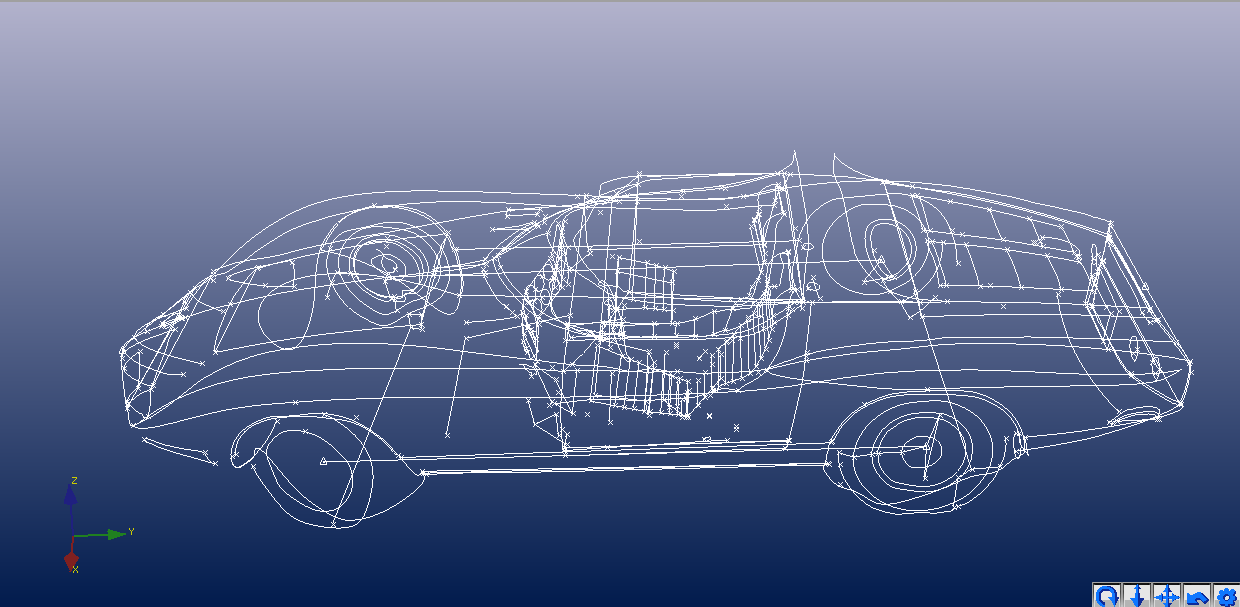
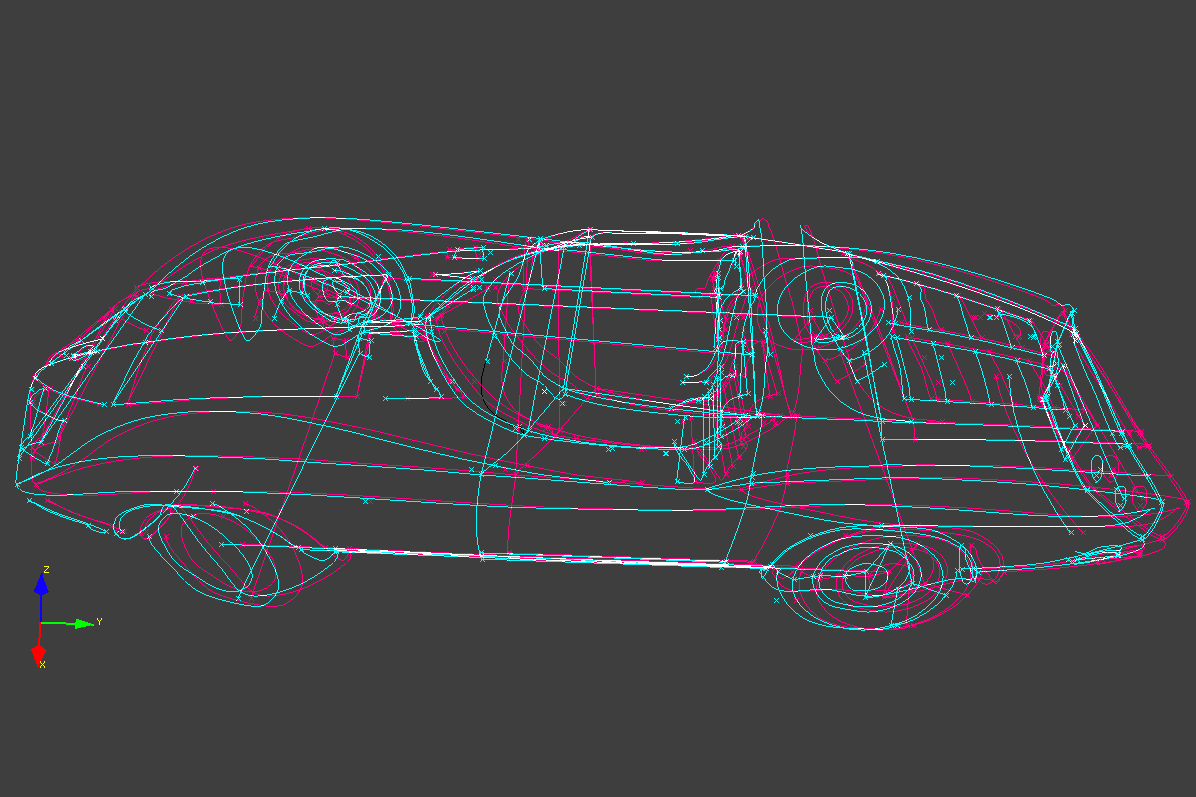
(R) Comparing Photomodeler lines (green) with earlier traces off photos (black)
The dark blue line outlining the top view is the actual trace of the go-kart.
2nd ROW
(L) Perspective view of 3D file. And it dimensions well!
(C) Orthographic side view
(R) Perspective view in 3D using red/blue glasses
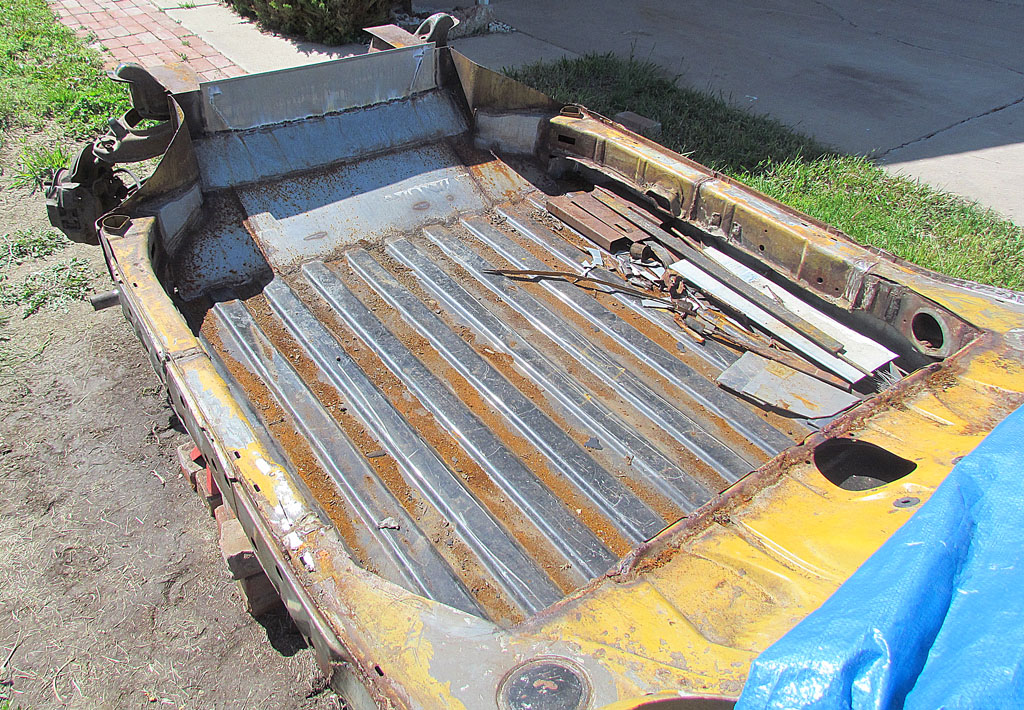
1st ROW
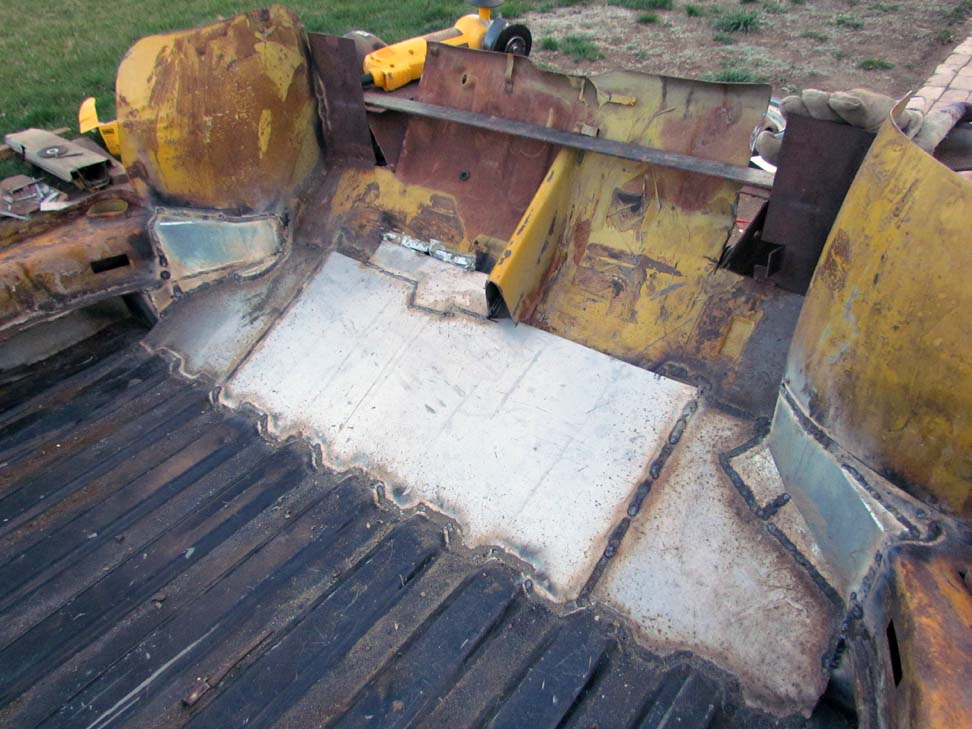
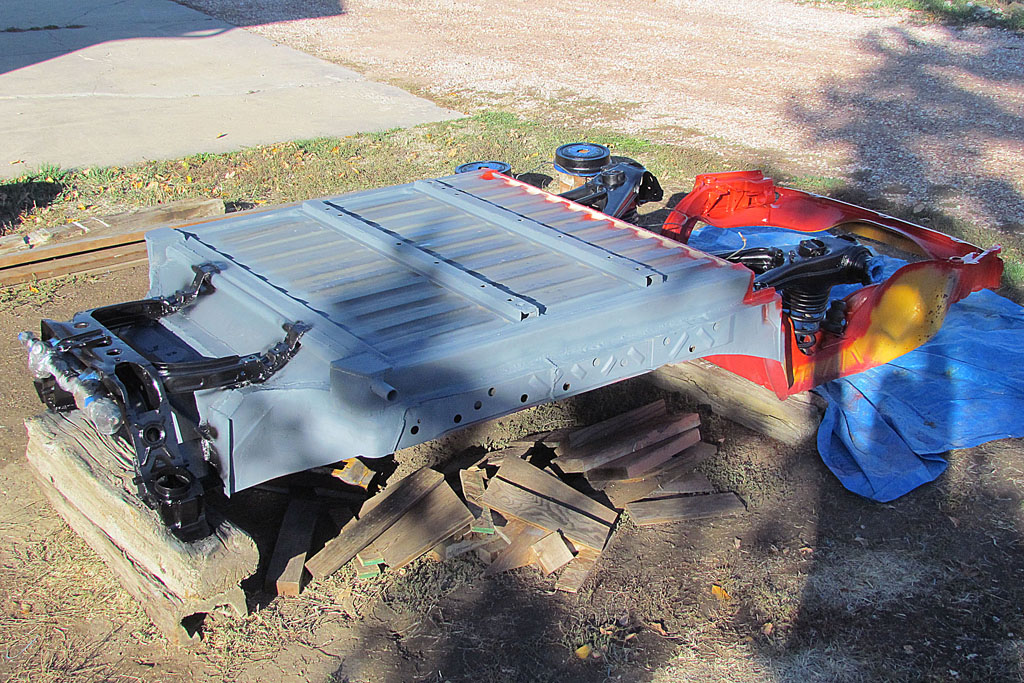
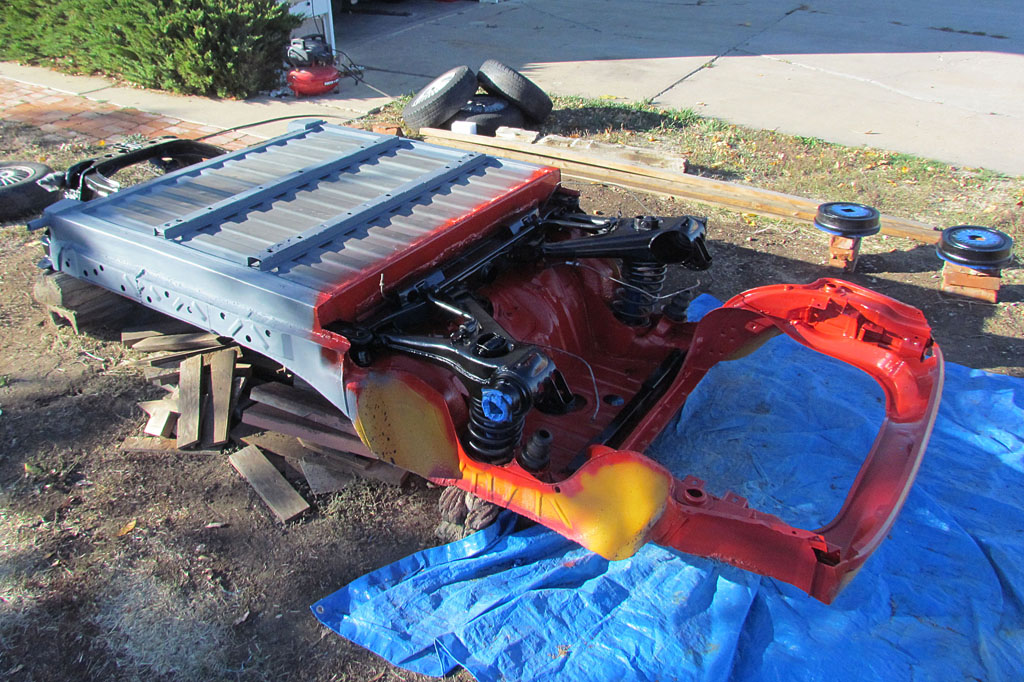
(L) The chassis with new footwell, painted for rust protection
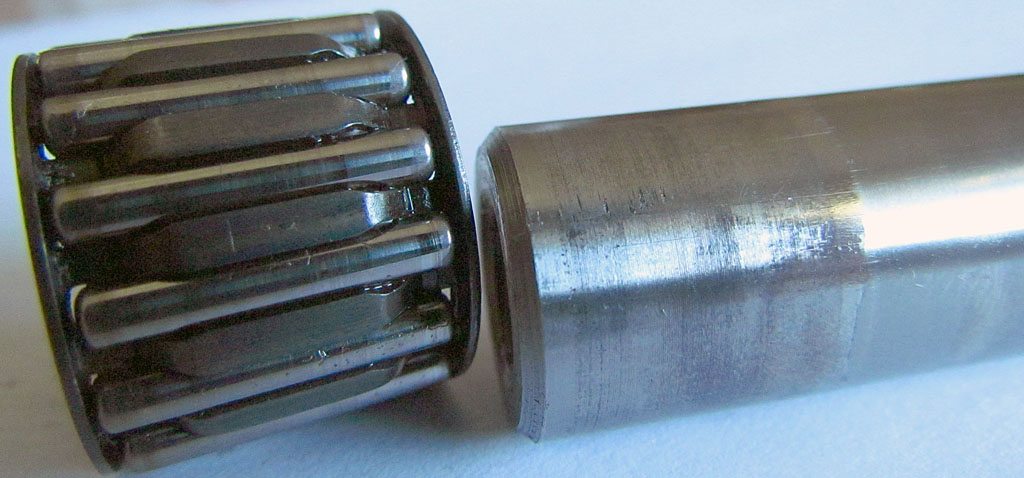
(R) The countershaft and one needle bearing. Note the striations on the shaft.
2nd ROW
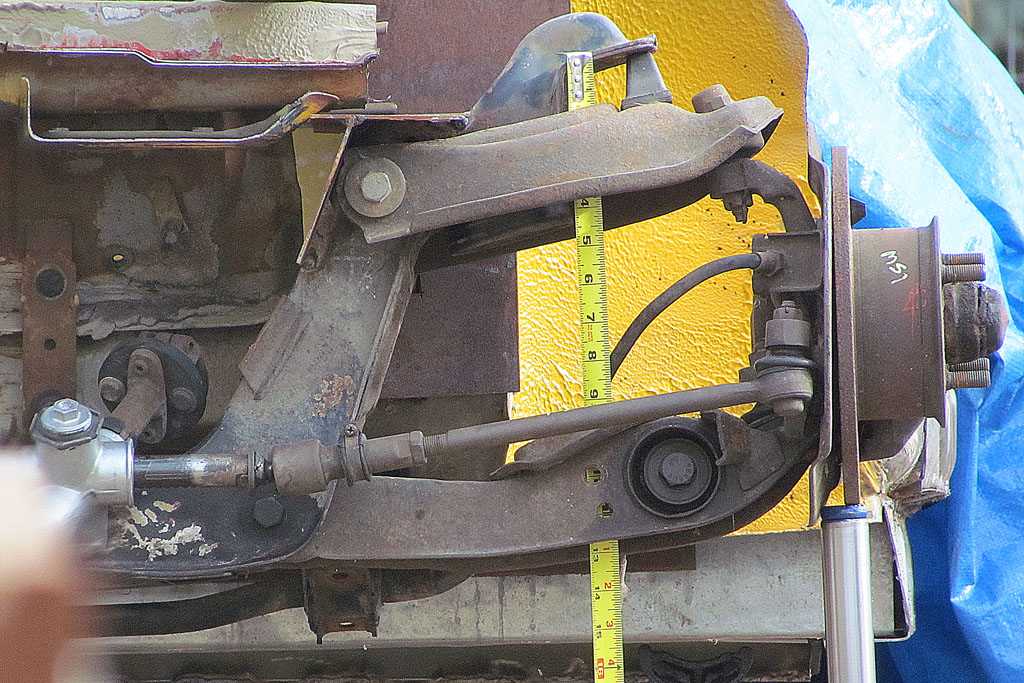
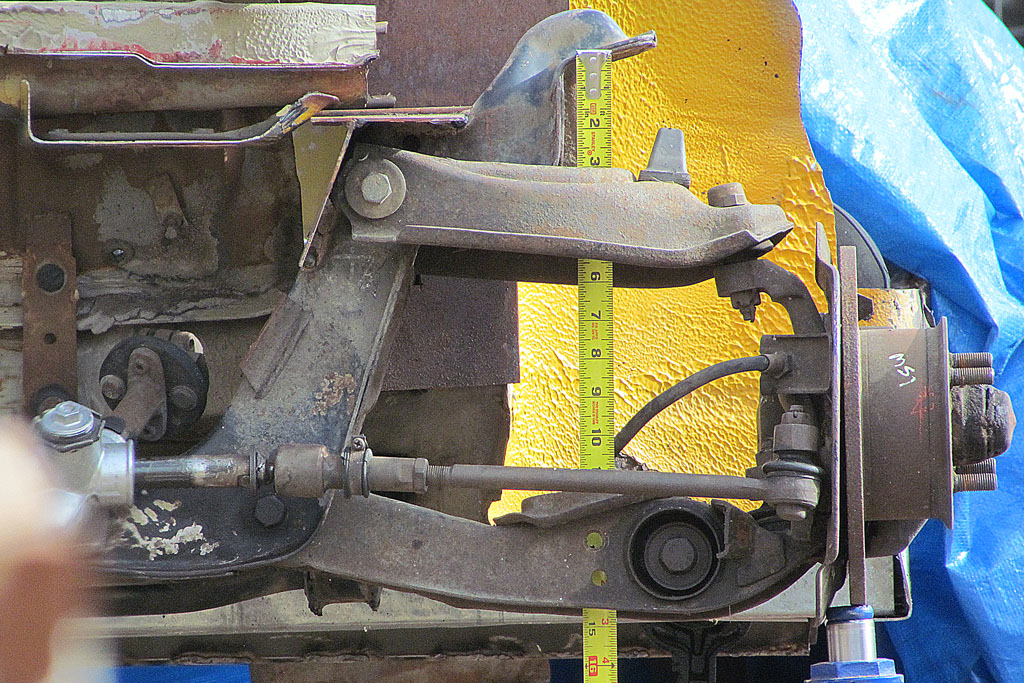
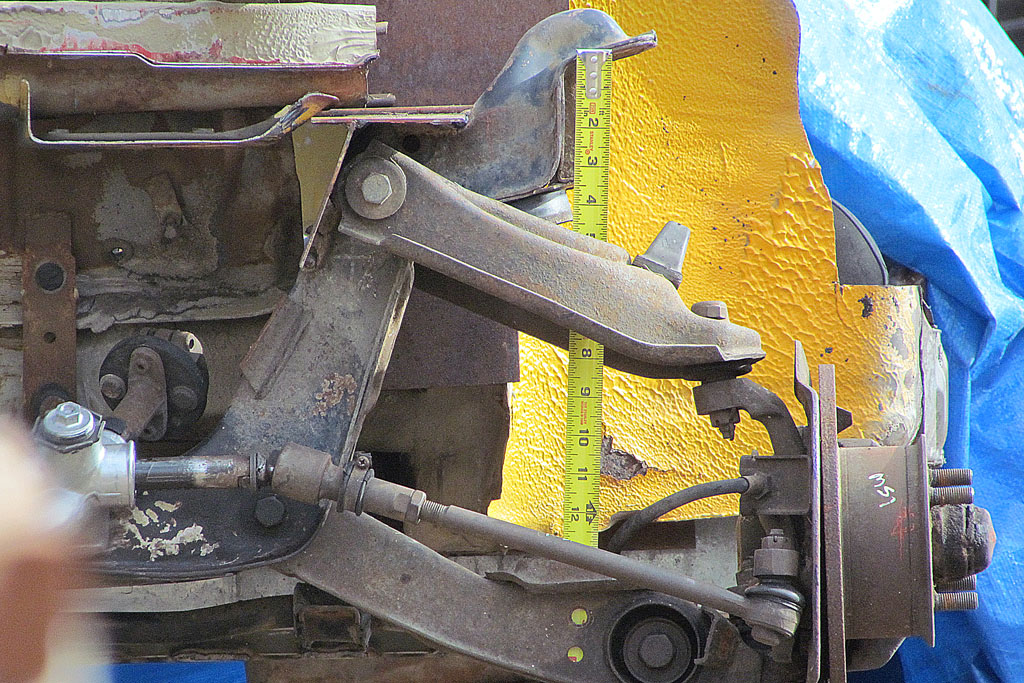
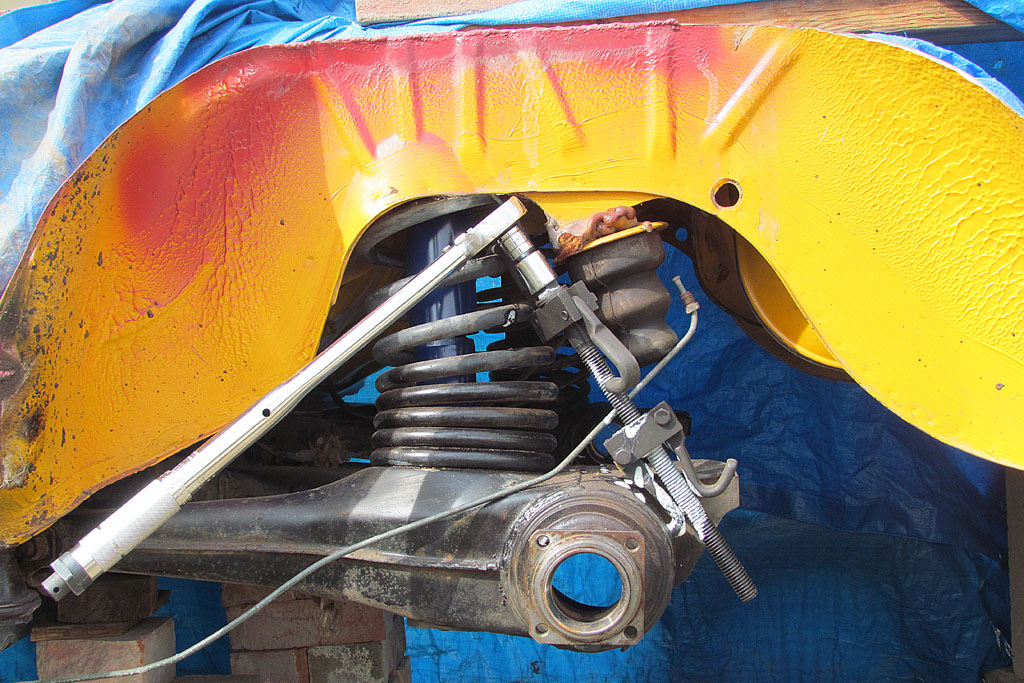
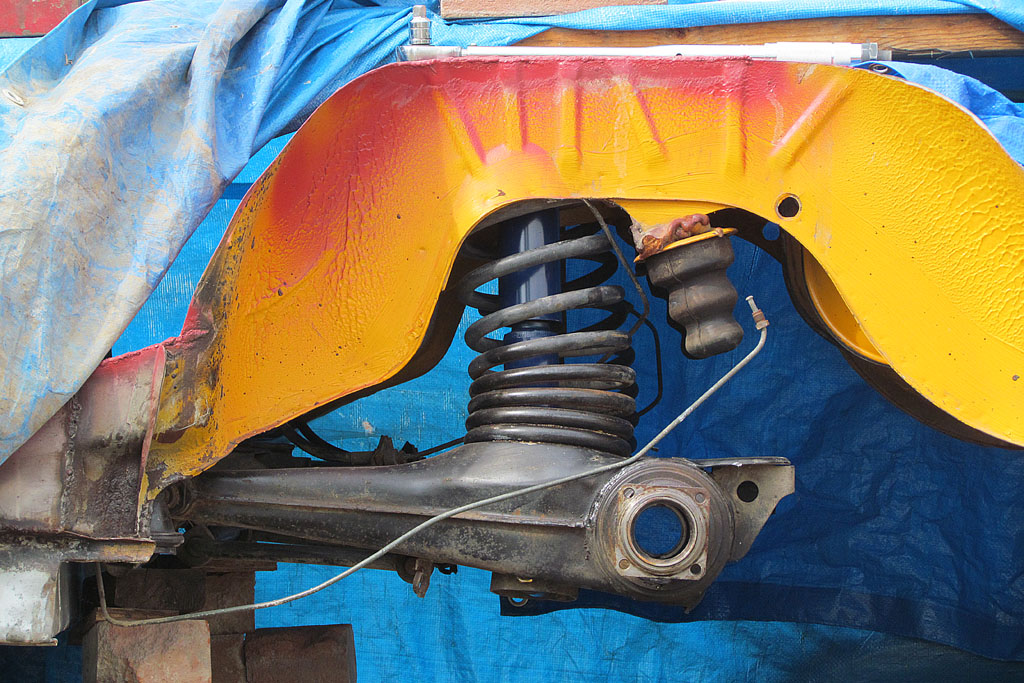
(L) front suspension all the way up
(C) front suspension at expected neutral point
(R) front suspension all the way down
3rd ROW
(L) rear suspension compressed to mount shock
(C) rear suspension and new shock fulley extended
(R) New lines (blue) on side view with best-guess chassis position

1st ROW
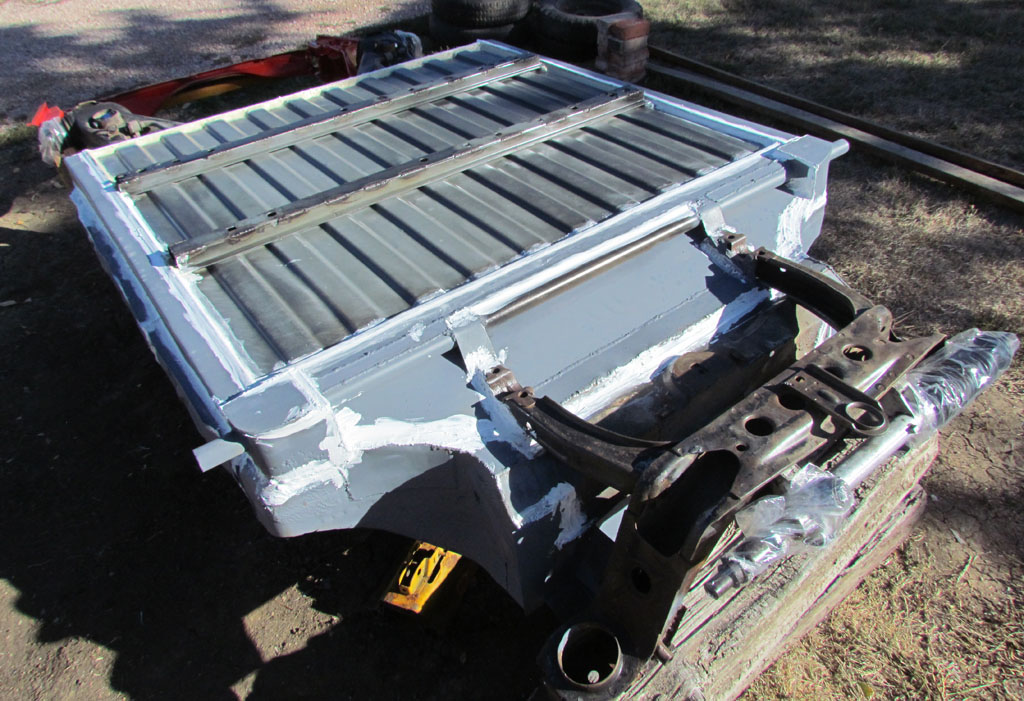
(L) Chassis underside showing priming and caulking
(R) Chassis front all derusted, primed and painted black. More welding needs to be done to add the cockpit bulkhead and dash and mechanicals, so the pan is only primrd for now.
2nd ROW
(R) Chassis rear view all derusted and primed and painted engine red and black
(L) Chassis rear view end-on.
Now it's all ready for the winter snows (under a new tarp, of course).