Contact: Rich Kurz Page content last updated Jan. 18, 2023
The Construction Diary
2022
JANUARY
The new year begins in the midst of gluing in the first filler foam surface panels.
Because of the cold, I can only work for an hour or so when it gets above freezing in the garage.
Happily, I can open the door which faces generally south.
I am also limited by how many clamps I have to hold the sheets in place when gluing them in.
So progress is only about an hour or two a day.
So a day typically involves gluing in a set of panels, then cutting and fitting another set.
While the glue sets, I take inside to a spare room the newly cut and fitted panels, and glue those together overnight if they will be more than one layer.
Note to self and others: make sure one puts down a plastic sheet before gluing!
I have been neat so far, but drips and accidents do happen.
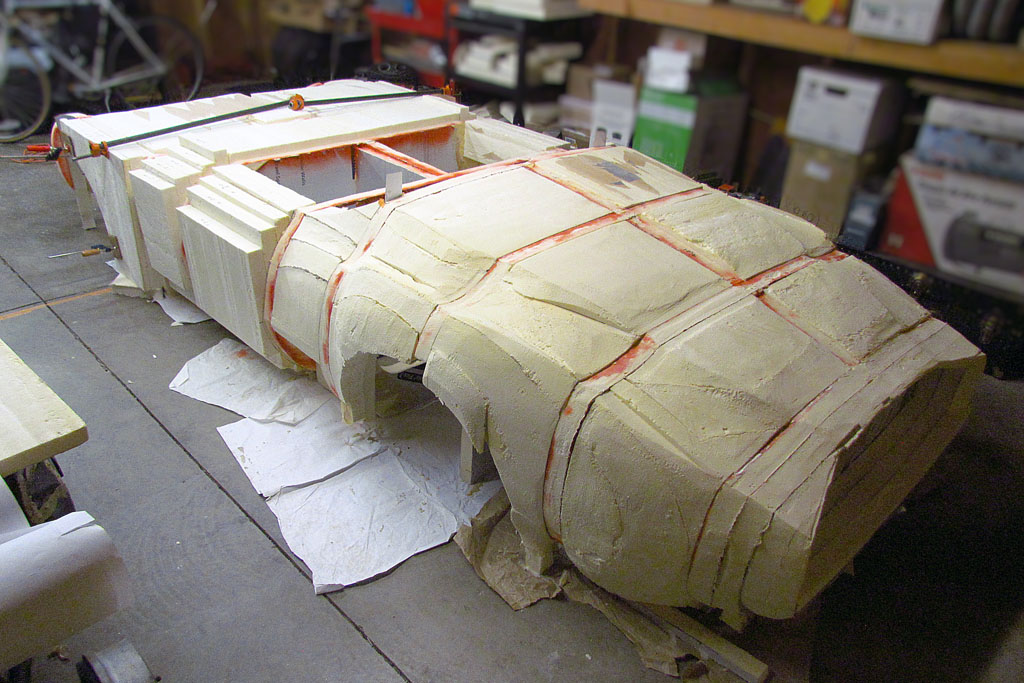
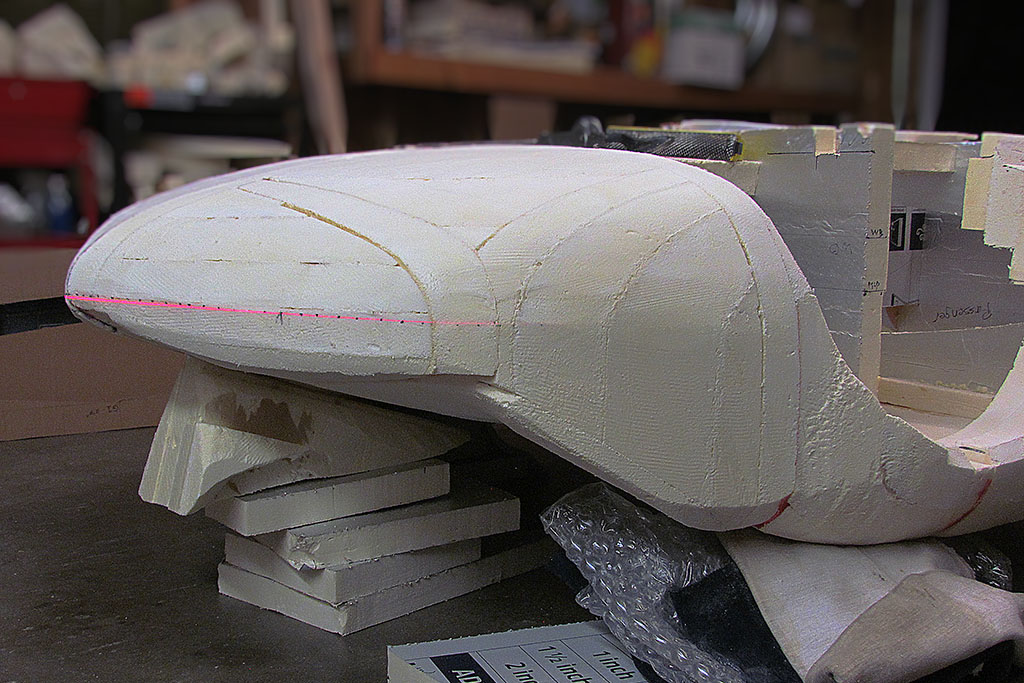
By the end of the first week, I am ready to glue on the Kamm cove section at the very tail of the body.
Then I will begin carving the entire rear section!
JANUARY 12
The weather is in the 40s. I pull off the clamps and begin to check my measurements to know which side of the width contours are the accurate outlines, front or back.
I next layout out how I will trim out the outline of the Kamm cove.
The sides protrude rearward more than the center engine lid rear edge.
Now I can plan how I will cut and sand them to shape.
I have left extra material to do just that.
But I also confirm my fear that I left off such material on the top and bottom surfaces.
I will need to glue on some panel pieces.
JANUARY 17
Put about 5-1/2 hours into the rough shaping, experimenting with different tools.
I tried an orbital sander with a hose attached to the shopvac to remove the dust.
The hose created a piercing high-pitch howl, and the sander generated a low-pitch roar on the buck because it is hollow underneath, like a sound box.
And it worked but needed care or the edge of the sandpaper would slice into the foam if I tilted it too much.
A sanding block works, but much too slowly and too much effort.
The rasps turned out to be the best tool.
They take off material quickly, yet can be used with light effort to make a smooth surface.
The long yellow rasp was great for taking off lots of material relatively quickly.
The small rasp worked better to get into the curves and was overall the best finishing tool.
The intermediate rasp with a flat bottom did great at blending two surfaces into each other, such as the contours on the central keel.
But I discovered that some of the panels started popping loose.
I will have to find a glue that sets in this cold.
It turned out that the Elmers Glue All would not dry out, even after a week when the temps got below freezing!
JANUARY 25
Slow progress with other tasks intervening.
Before I can shape the foam anymore, I need to create some patterns for the ridge lines on the rear hood and fenders, as well as the front and rear deck edge left-to-right.
In the meantime, I ran across images from my visit to the GM Heritage Center that could be made into stereo views.
So I made them so. The benefit is to study the shape as it curves at different parts of the body, as a check while carving.
Enjoy the views! As typical for me, they use the parallel viewing method, like with old-time stereoviewers.
One caveat - my eyes are getting old and tired and so I see I need to shift one of the images up to help alignment.
Perhaps that is MY problem. . . let me know if you have problems.
FEBRUARY
Not much to describe. I continue gluing foam together using Elmers general purpose white glue.
Only now, I make sure I spread it out evenly and not too thick using a piece of cardboard.
I now do the same thing when gluing the panels to the frame.
I squeeze the Gorilla Glue onto a piece of cardboard and then apply it and spread it out evenly.
When the entire surface is coated, I spray it with a mist of water to help it cure quickly, and, also quickly, place the panels and clamp them tight.
We have had three snows in the last month and high temps have only been in the 30s and 40s.
I can only work in the unheated garage for an hour or hour and a half a day, but I have been pretty consistently doing that and made progress.
White glue drying times are long. I brought the pieces into the house after discovering it never dries below 40.
Still, it takes from two days to a week for them to dry enough.
I simply work ahead preparing the buck for new pieces and cutting the next set of parts.
One thing I began doing on the front was adding ledges for the panels to rest on when in place.
That helped make this a one-man job and also added more strength to keep the panel in place.
When I finish the nose, I still need to do the rocker panels and rear pan, and so will need to turn the buck on its side.
We will see what pops loose then.
FEBRUARY 27
Temps were up to 50, so it was time to get back in the garage.
I glued in place the foam parts for the section in front of the front axle the day before.
Now, I decided to add bracing to each section to help resist the stress of clamping when gluing in new foam pieces.
It also will help when it comes time to rotate the entire body on its side so I can work on the rocker panels and front and rear underpans.
I think of the frame structure as a skeleton with the front-rear center part the backbone and the left-right contours as ribs.
Anyway. . . while adding the brace to one of the front sections, the rib contour bent forward and broke at the connection to the central frame - all while the glue was setting on the brace part.
I was not happy and rushed to glue it and clamp it tightly in place with the brace part.
That's the first time that happened.
MARCH
Progress continues on to the last two sections.
I have to work around another cold spell with this week's snow storm. They have been regular in February.
This section needs the underpan as well as the top surface, so that makes for sections to glue in place.
Just more work and more time, taking this section at least a week to get done.
Well. . . more -
My glue did not dry for the top driver-side pieces, so back it went to the back room while I glue in place the passenger side.
I begin measuring the last nose section and discover it will need six layers.
I also experienced my first broken contour "rib".
And, of course, it occurred right when I had just applied the glue to the foam piece to be placed in that section.
I had to do some real quick repairing and clamping to hold it in place while at the same time clamping-in the new foam section.
And all the while the glue is beginning to set! Got it done, though.
MARCH 18
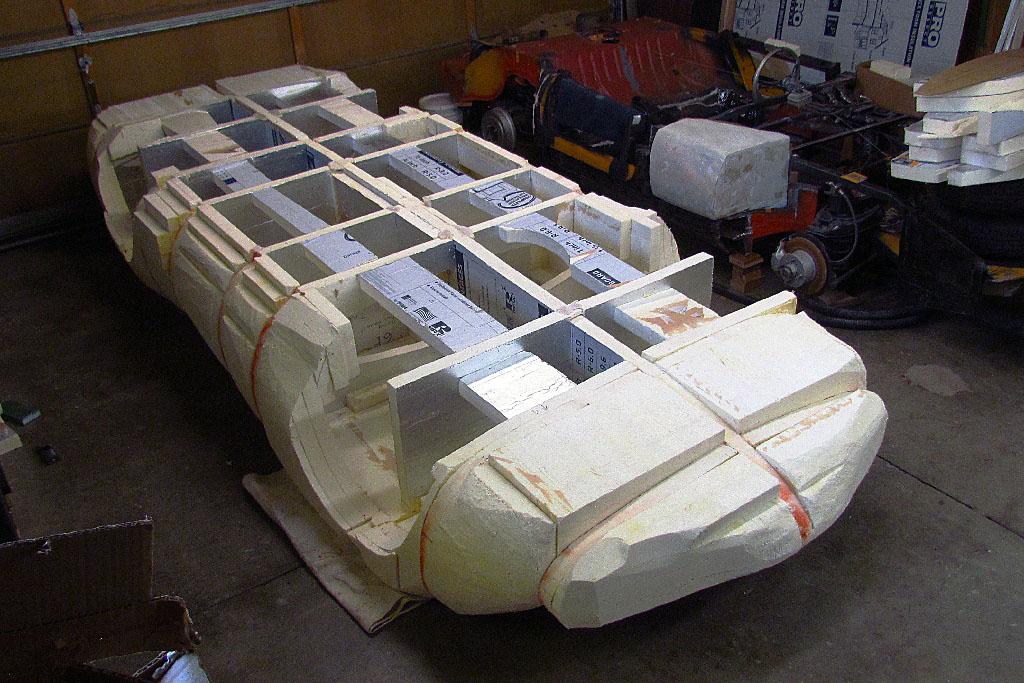
Big Day! The clamps came off the last big foam chunks glued onto the last section!
The last section on the nose was solid foam built up from six 2" layers.
I glued on two triangular pices along the last contour and the central form to help with alignment.
It worked very well for that purpose.
Then a large clamp hanging off the bottom to squeeze the two halves toward the center and keep the halves against the bottom of the last contour,
and four clamps on top squeezing the top of the halves onto the top of the last contour.
Note how I had to clamp two clamps to each other to make them reach a ledge.
What's next?? I am not sure, but think I will tip the body on its side to complete the rocker panels and shape them as well as the front and rear underpans.
Then I will make a dolley aligned to the front and rear axle locations as well as the width of the passenger compartment.
I expect to move this summer and will need this to roll.
In addition, it is finally time to work at the windshield and top.
Will I rework the C4 convertible top or make a removable top like Mel Francis did?
To answer that, I will cut out the cockpit compartment foam contour cross framing and put in my seats.
And, while doing that, I will complete my templates to locate the fender, rear hood, and cockpit outlines.
I am expecting the body details to be worked out and the body ready to be fiberglassed by end of summer!
MARCH 19-20
Looking over the body sections, I noticed gaps on either side of the passenger door section.
I know it will be a door, but there should be no gaps there YET!
It also wiggles easily when jiggled.
So I need to cut the sectin out and reglue it into place.
Doing so leaves a piece behind that I finally can remove.
So now I am regluing the piece on and cleaning the contour surfaces.
The difficulty may be how to clamp that side of the body so that the gaps are eliminated.
We shall see how easy that is.
MARCH 24
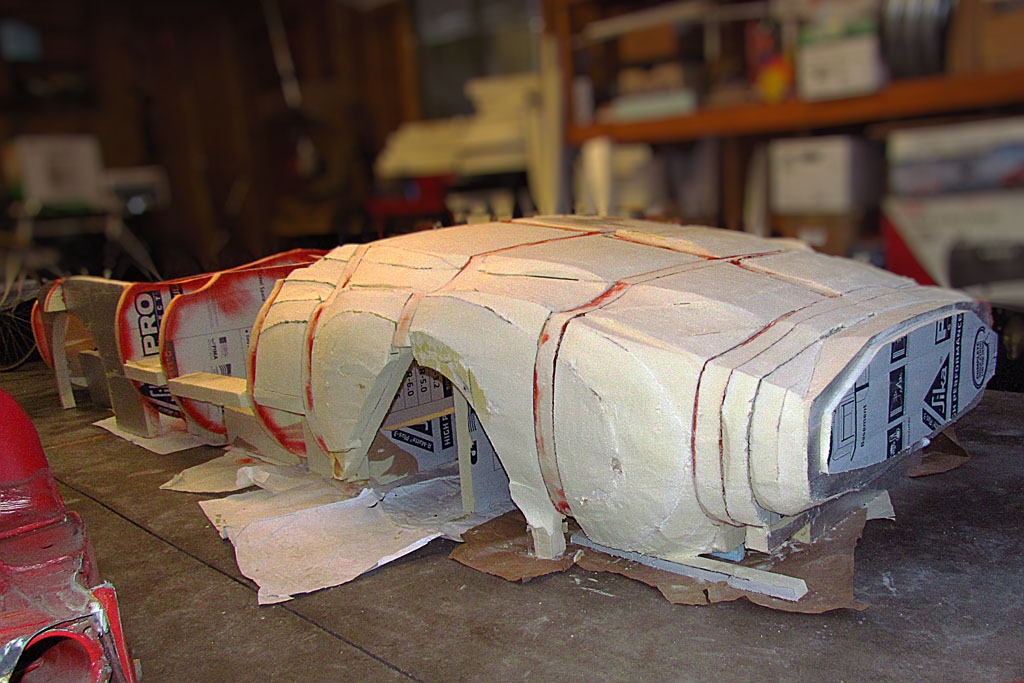
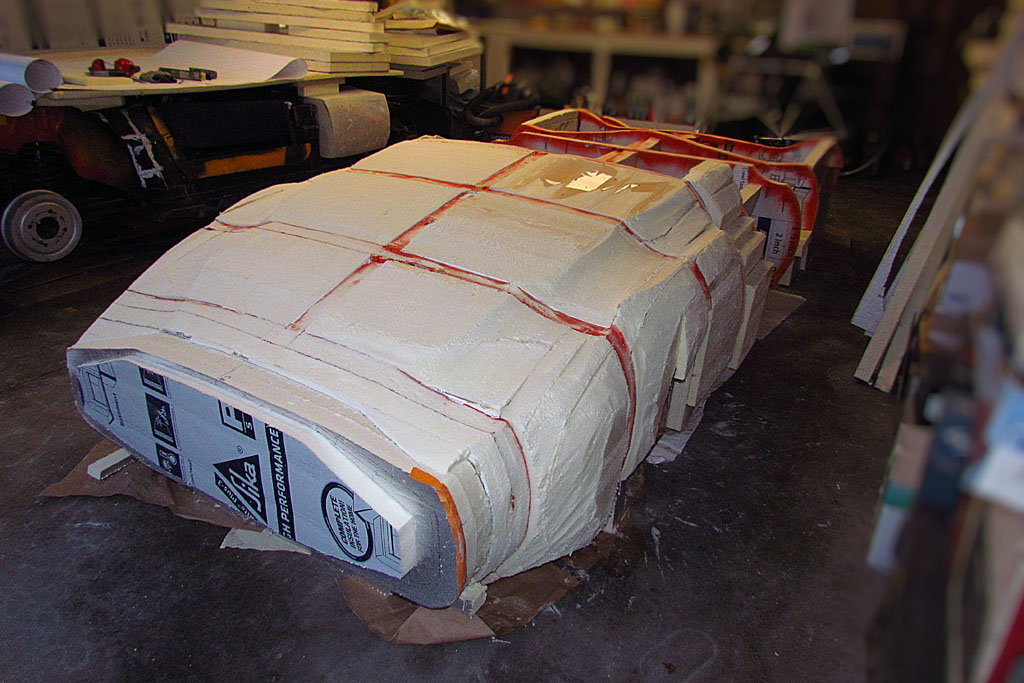
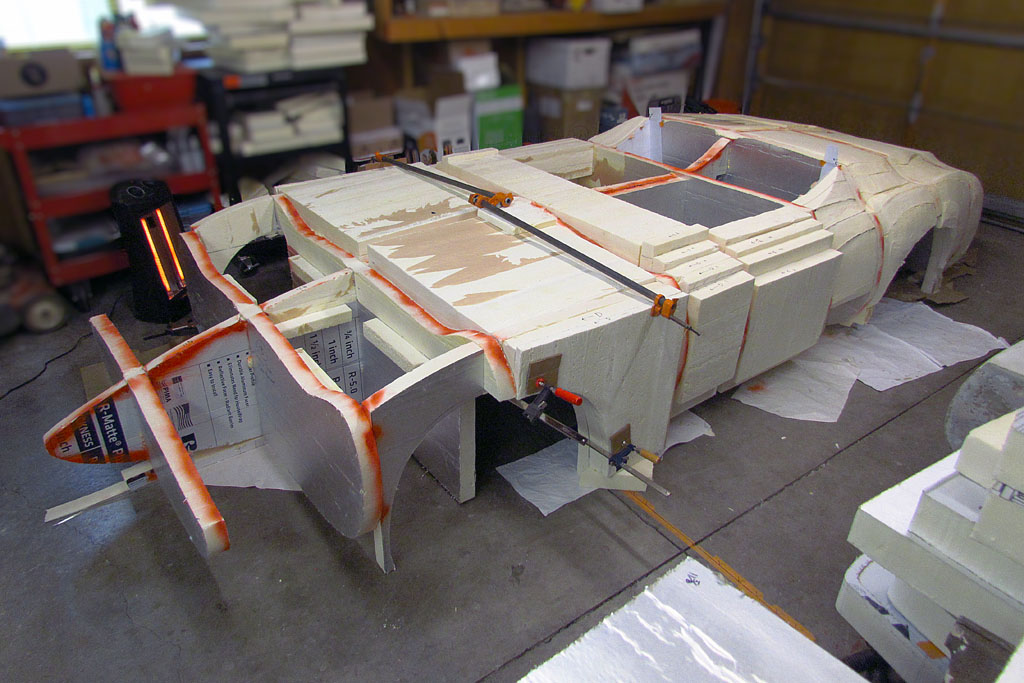
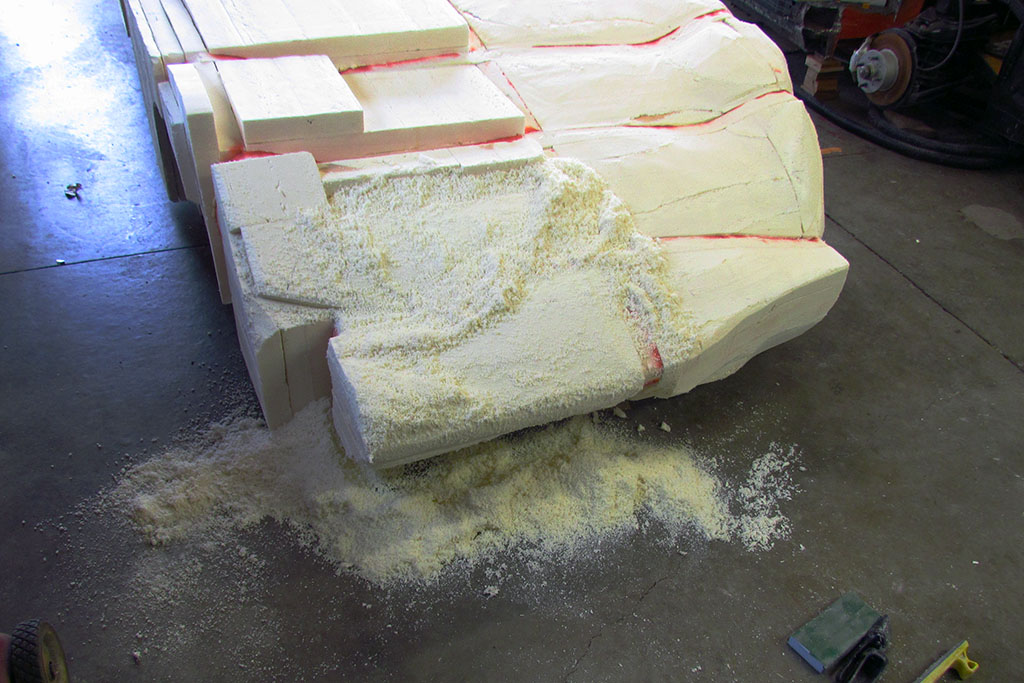
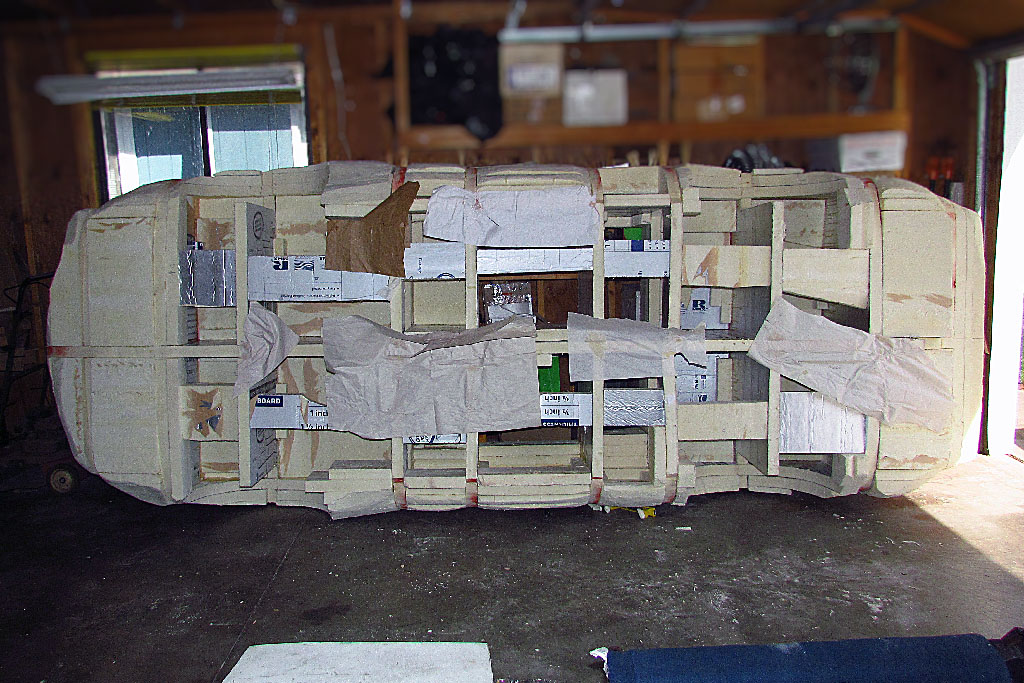
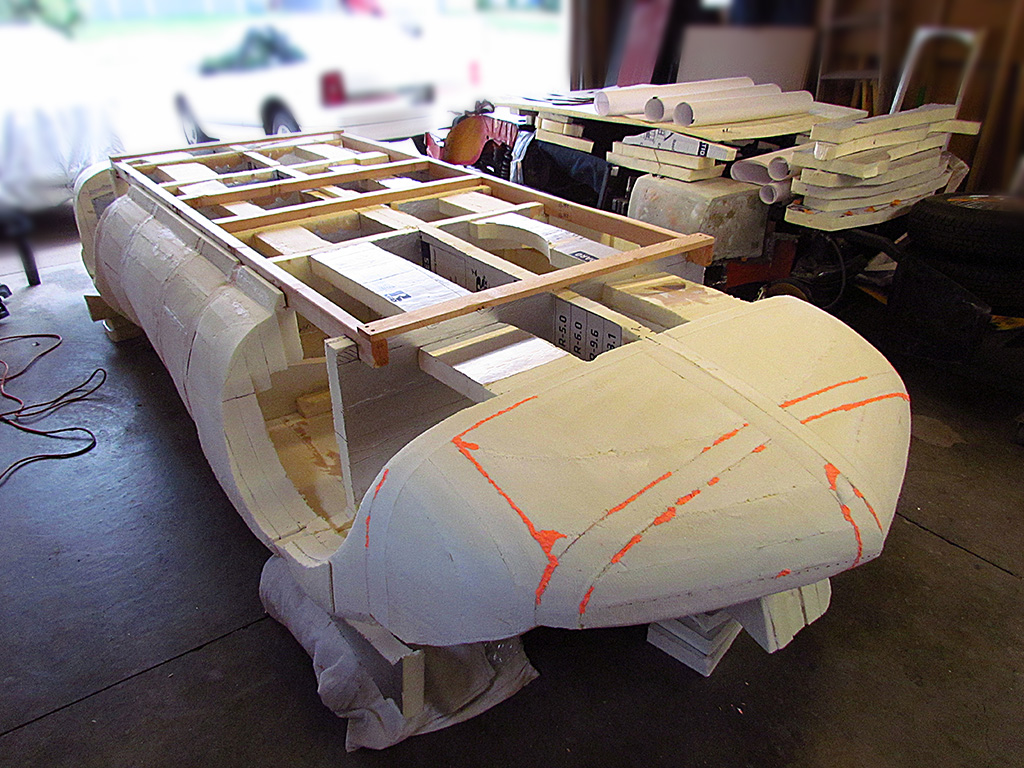
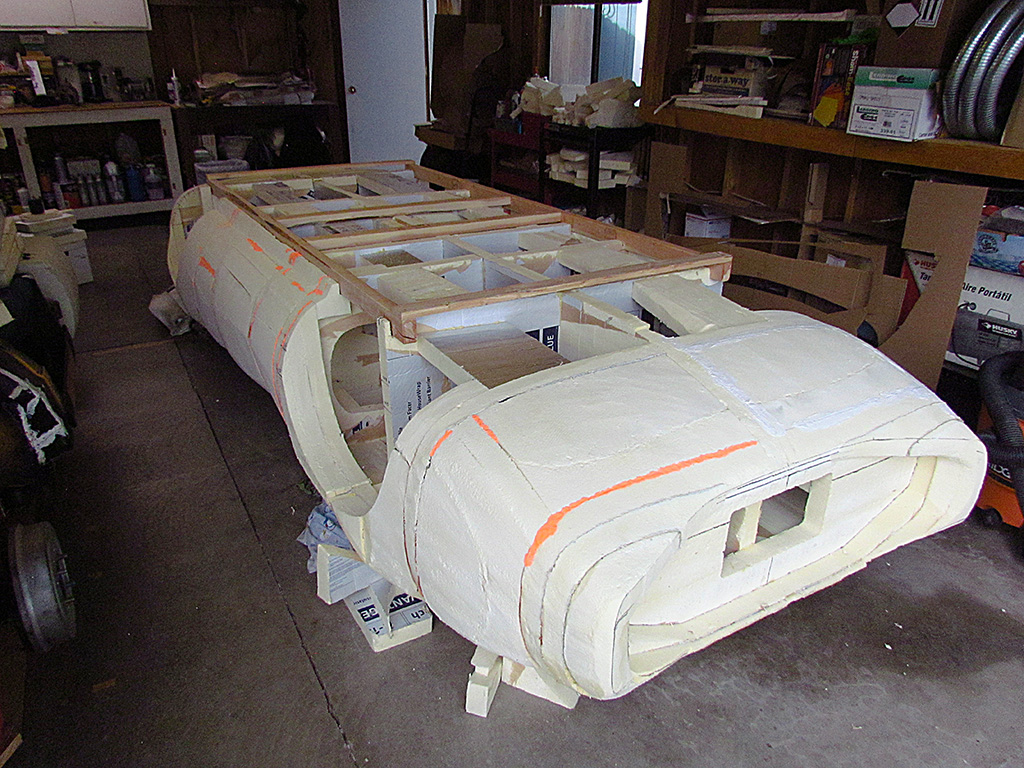
I decided to round off the square corners of the foam pieces, but got carried away and am roughing out the body.
Why? ? ? Because there's a car hidden in that foam! And I gotta see what it looks like!!
As I go along, I am adding bracing where things look fragile, and pieces for the rocker panel while it is still flat on the ground.
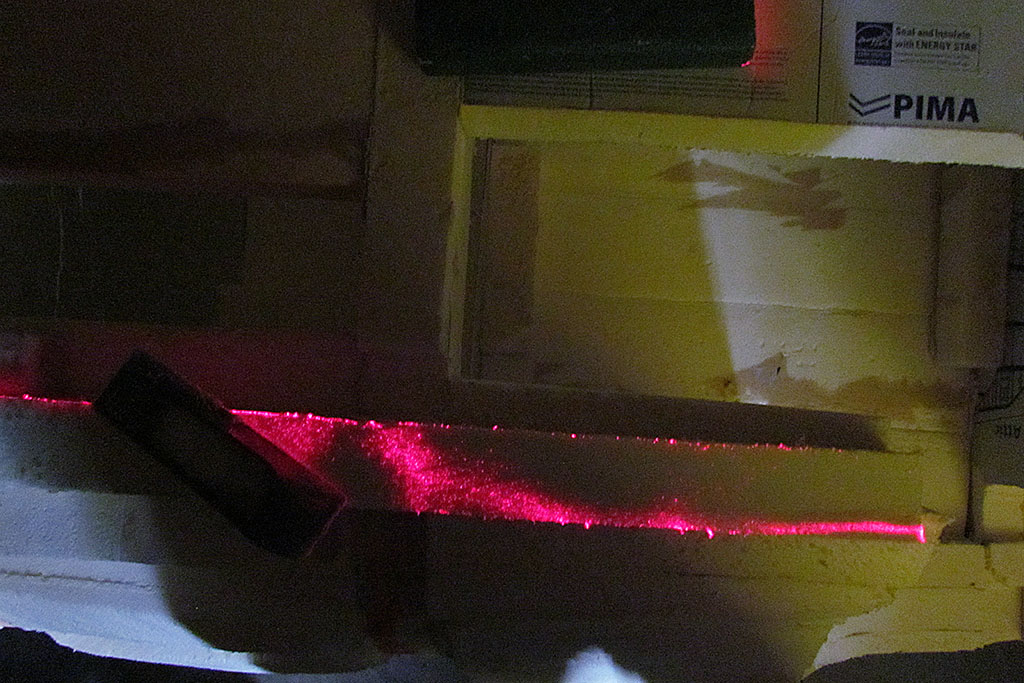
What one sees in the stereo image is 2-3/4 hours of rasping. And I haven't filled my shopvac yet with the foam dust.
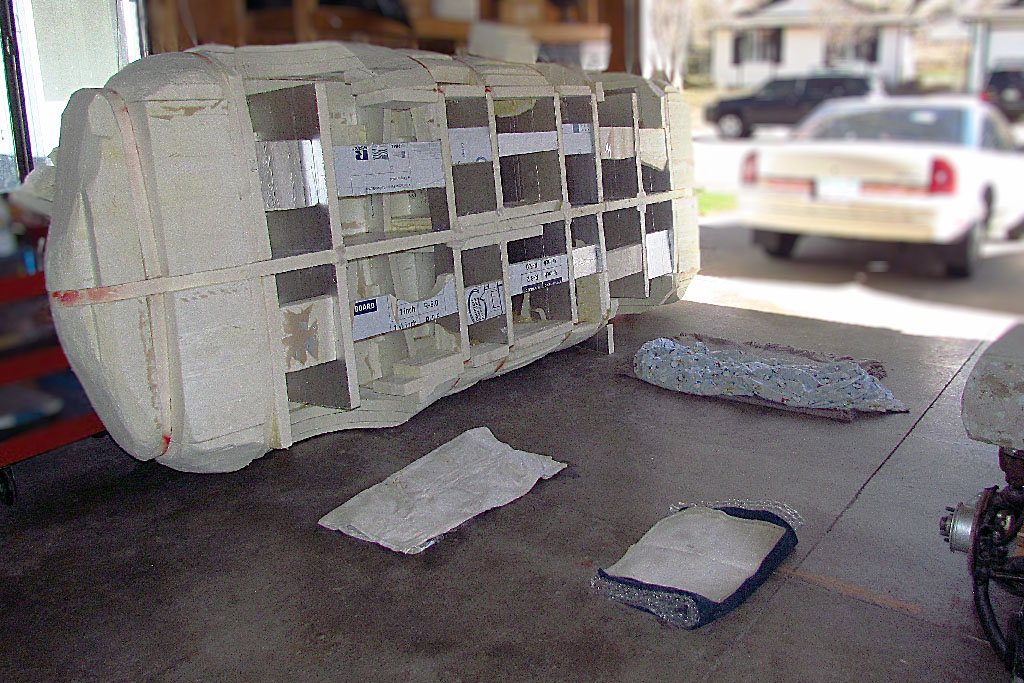
APRIL 2
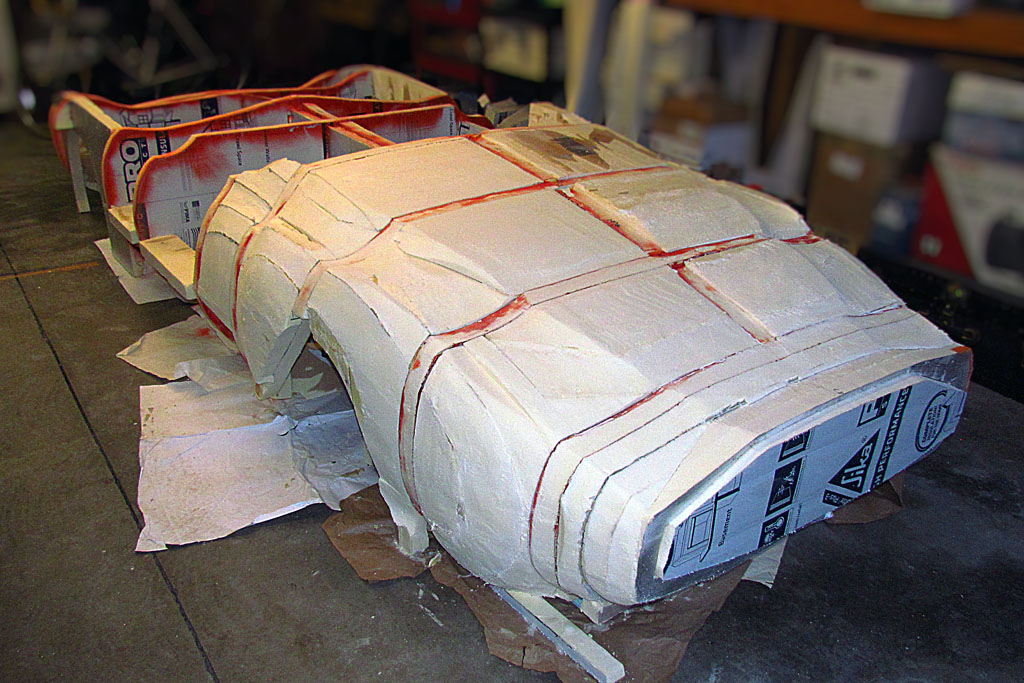
Put in four hours just roughing out the passenger side, and nearly got it all done.
I am getting the hang of handling the larger and small rasps to quickly work with them.
I also glued together a last, three-layer section panel that goes on the driver door below the waist line that I had left out.
Just about ready to tip it on its side to shape the rocker panels and front & rear pans.
APRIL 9
A busy week kept me out of the garage till Saturday.
I finished rasping off the square corners of the foam so the body would roll over without coming to rest on a square corner, thus applying under pressure and maybe popping loose a foam panel.
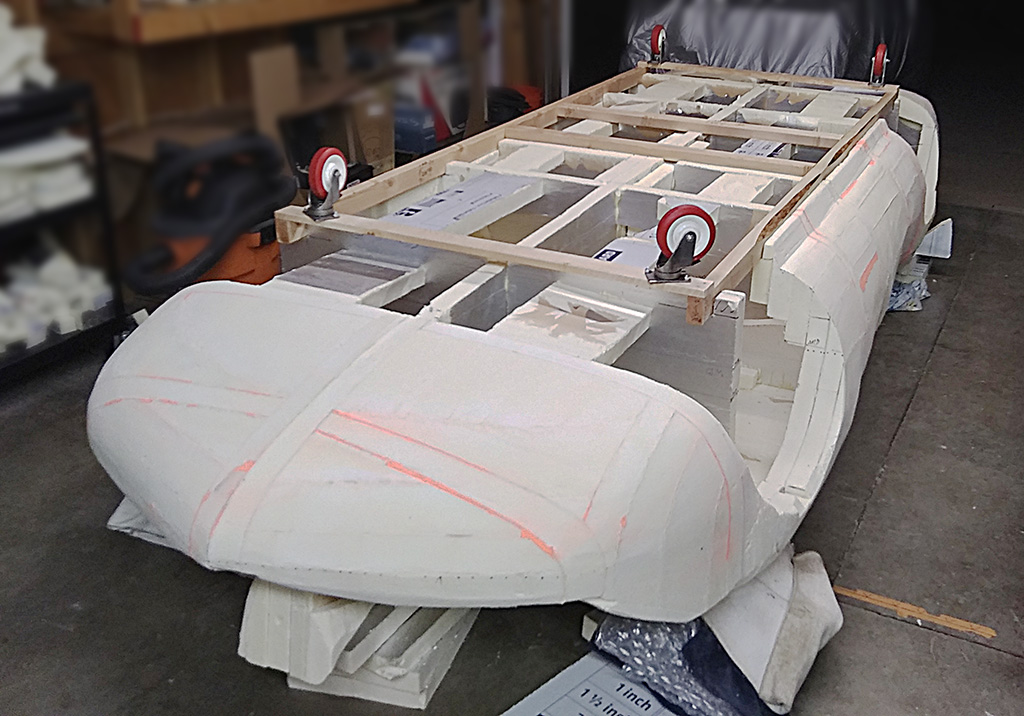
Although I was nursing a sore back, I was able to smoothly lift it up onto its side.
I cleaned off the paper and scraped the hardened glue drips off the floor.
Then I noticed the body was resting on my rasping tools.
I lifted the rear wheel contour with my knee and pulled them out.
I figure I will need four people to safely turn it and place it on its back on pads I have positioned for the rear deck and front fenders.
In the meantime, I add three pieces of foam to missing areas on the driver-side rocker panel, and call it a day.
APRIL 10
I called on two of my neighbors and in less than five minutes, we had turned the body over onto its back and ready for shaping.
The hardest part was figuring the way to manipulate it since there were no pieces to grab on to.
It simply had to be lifted or lie on the hands.
Total weight of the body is, I would guess, around 50 pounds.
MAY
From April thru June, we have a LOT of family events, in addition to the usual unplanned life events.
So not much work could be accomplished.
But I completed my first contour guide, for the nose, and put it to the test.
After alignment, it showed well where and how much needed to trimmed and shaped.
That done, it dropped into place. It worked!
During the process, I realized I needed to relevel the upsidedown body.
So I dug out the laser level and skimmed it across the bottom surfaces.
Yup, the rocker panel on the drivers side was too low, so a thickness of foam was glued onto it.
The laser did a great job while sanding showing when the surface j-u-s-t let the laser dance across it.
In addition to the laser, I fabbed a variable contour guide.
My designer friend shared that they used a more professional model in-house.
I moved on to shaping the wheel wells, front and rear contour of each well.
I next moved on to the rocker panels, and finally started on the Kamm tail.
JUNE
The tail will need the most effort to correct. I carved and cut in too much.
I also needed to glue foam pieces inside the skin to hold the pieces together.
It was the first area I glued and was still learning what to do.
I also discovered a mistake - the back panel of the Kamm cove, with the license cutout, should have been placed 2 inches farther forward.
That will be tricky to rectify.
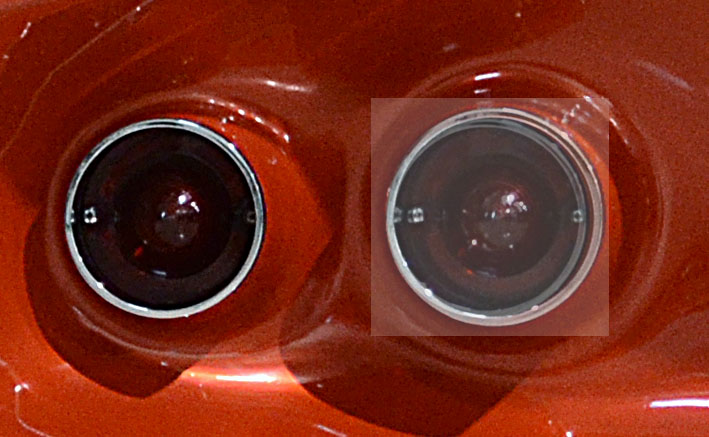
While preparing a final drawing of the Kamm tail based on my 2016 photos, I discovered that the taillights differ in diameter.
The outside lights are smaller than the inside.
Once I realized that, I could see it on the photos. The difference is only about 1/4 inch.
I am currently completing my next contour guide and preparing to test applying Bondo directly onto the isocyanurate foam.
JULY - PREPARING TO MOVE
My move date is set for the end of the month.
I determine I will need a dolley to move the body about, yet be able to lift it on and off the dolley when needed.
I want to finish shaping the nose underpan before turning over the foam body.
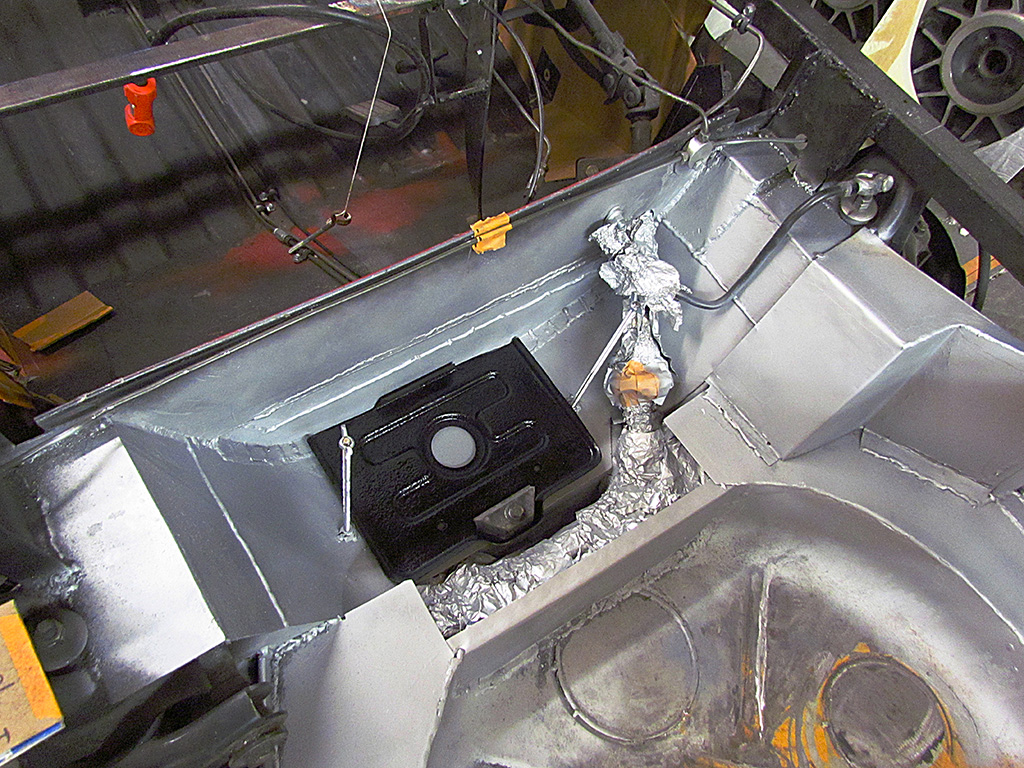
I need to get the engine started again, meaing, I need a new battery. Hopefully the gearshift will work as well.
And I have to complete the patterns I have been making in the house, too!
The rush begins.
I calculated the patterns tediously as x,y,z-plotted points and lay it out on a flat sheet of corrugated cardboard for the vertical plane, which will be curved to match the shape of the horizontal plane cardboard piece.
Then the vertical pieces and the horizontal pieces are white-glued together, repeatedly sometimes, and allowed to dry hard.
I design the dolley using 2x3 strips to fit under the foam body and just inside the rocker panels.
It extends from the front to rear wheelbase positions.
As will be seen after the move, I needed to extend the length of the 2x3s to better support the front and rear underpans.
But it does roll easily!
Batteries have certainly become expensive.
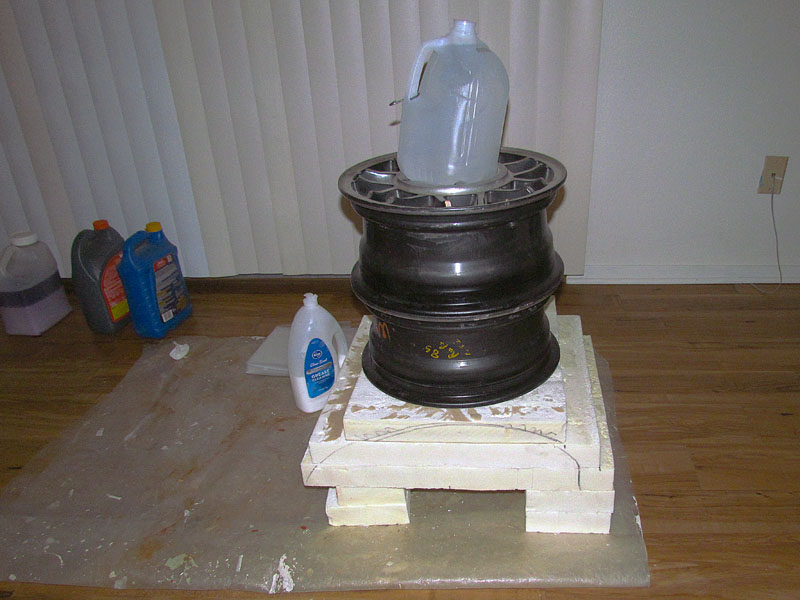
I clean up the acid spill in the battery well, grind it some and prime it and paint the front well engine-silver.
I think I will do the entire chassis interior in silver.
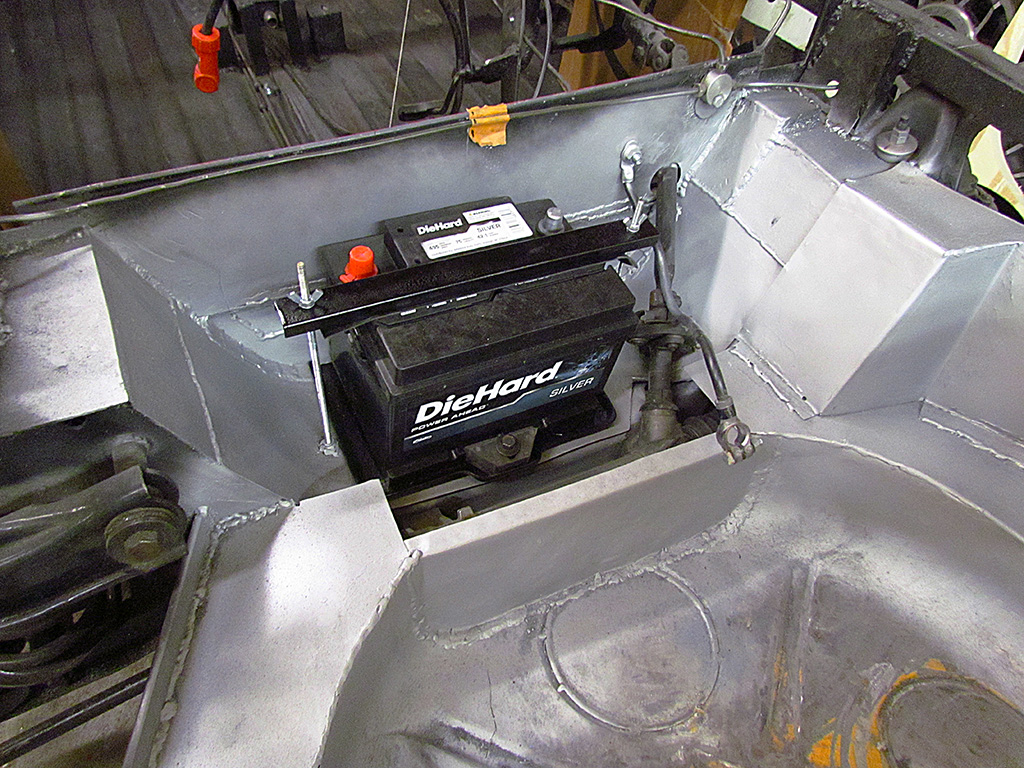
Oh - before painting, two screw rods are welded to either side of the battery to screw a retainer bar to for a hold-down.
Check that one off!
Then it's time to start the engine again.
I wire it up to a new ignition switch, and it starts!.
I play with the shifter and get it into 2nd and reverse, except that reverse in where 4th gear should be!?!?
Oh well, at least I can move the chassis forward and backward.
I will deal with that later in the new home.
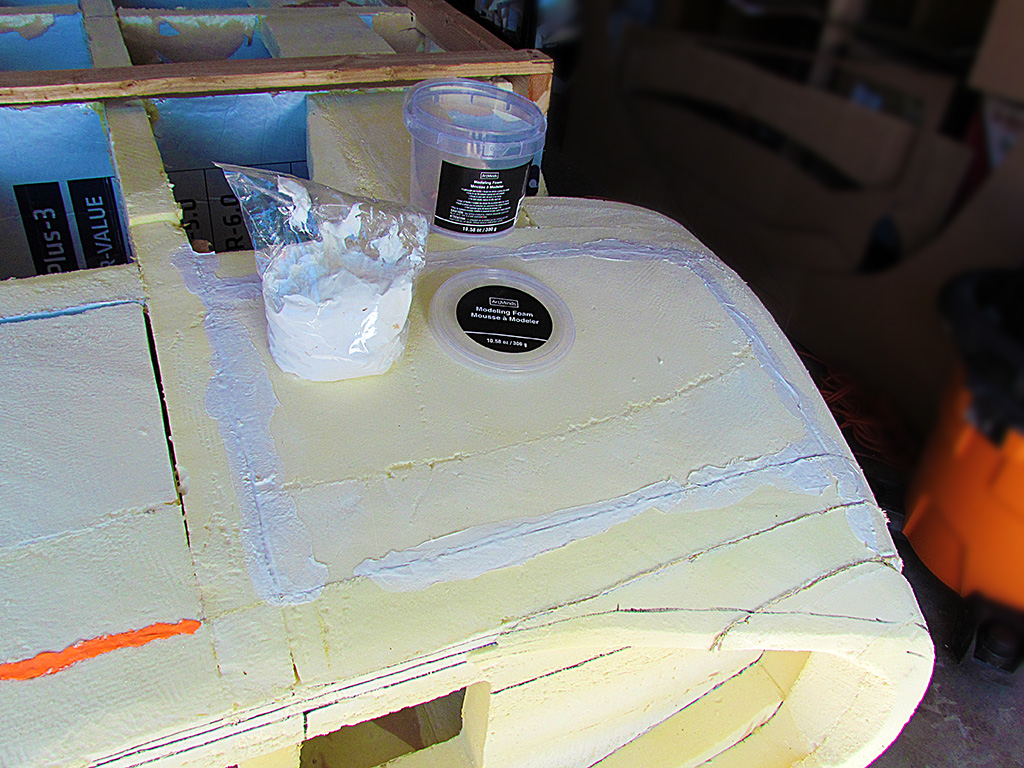
Finally, I found these children's play putty material and artist material to try using as foam-gap sealers.
The artist material is rather like a plastified paper mache.
It does not feather out well and the feathered material when dry peels up.
The plastic-like, playdough-like material behaves much better and sands smooth very easily.
I will get more of that!
Then I do my first experience with Bondo.
I have two types - one from Home Depot and one from an auto store.
I mix up enough to do a section of the front underpan half.
It becomes unworkable in five minutes using the mixing proportions of the instructions.
It takes me four mixings to do one half of the underpan.
I do the other half in the auto store Bondo.
Using the mixing instruction, I get the same performance - 5-minute working time, and only a enough for a quarter section.
But it does NOT work as well as the Home Depot product!
Glad to find that out before buying a gallon of the stuff!!
Finally the day comes.
The trailer arrives.
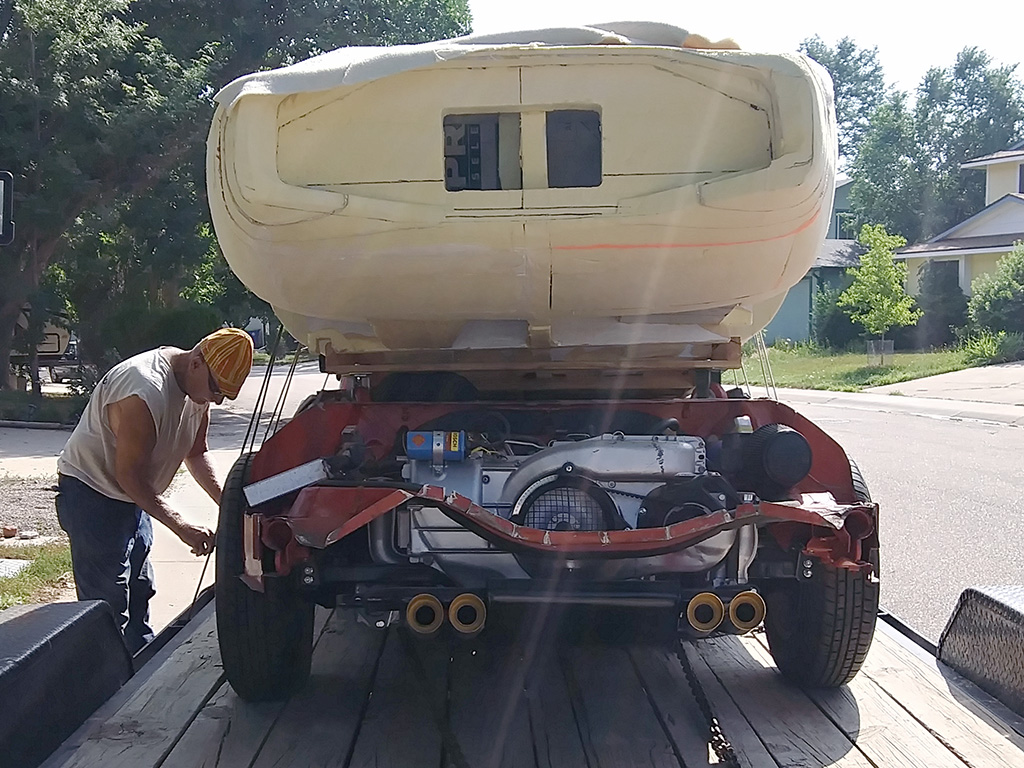
I start the engine, put it into reverse, and ease out the clutch... AND IT MOVES!
I back down the driveway, onto the street, back it up enough for a run at the steep trailer ramp, and drive forward heading for the ramp.
But I only get it halfway onto the trailer.
It high-centers and can go no farther.
We end up levering it the rest of the way onto the trailer - a good 15 to 20 minute process.
We then carry the body onto the trailer and positon it so it seems stable, and begin tying it down.
The tarp protects the foam from being cut by the ropes.
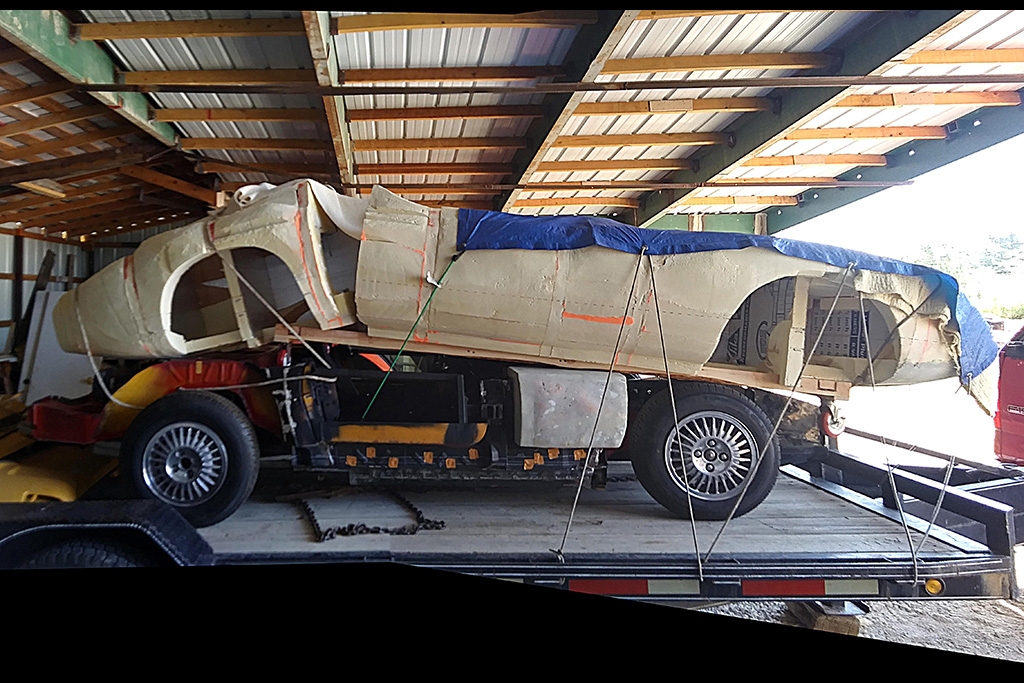
Then off we go.
Keeping an eye on things as we go, all seems well.
Yes, it bounces some.
But on parking the trailer, only then do I discover the body broke in two.
But both pieces stayed put.
And so it will stay for two months until it can be taken to its new home.
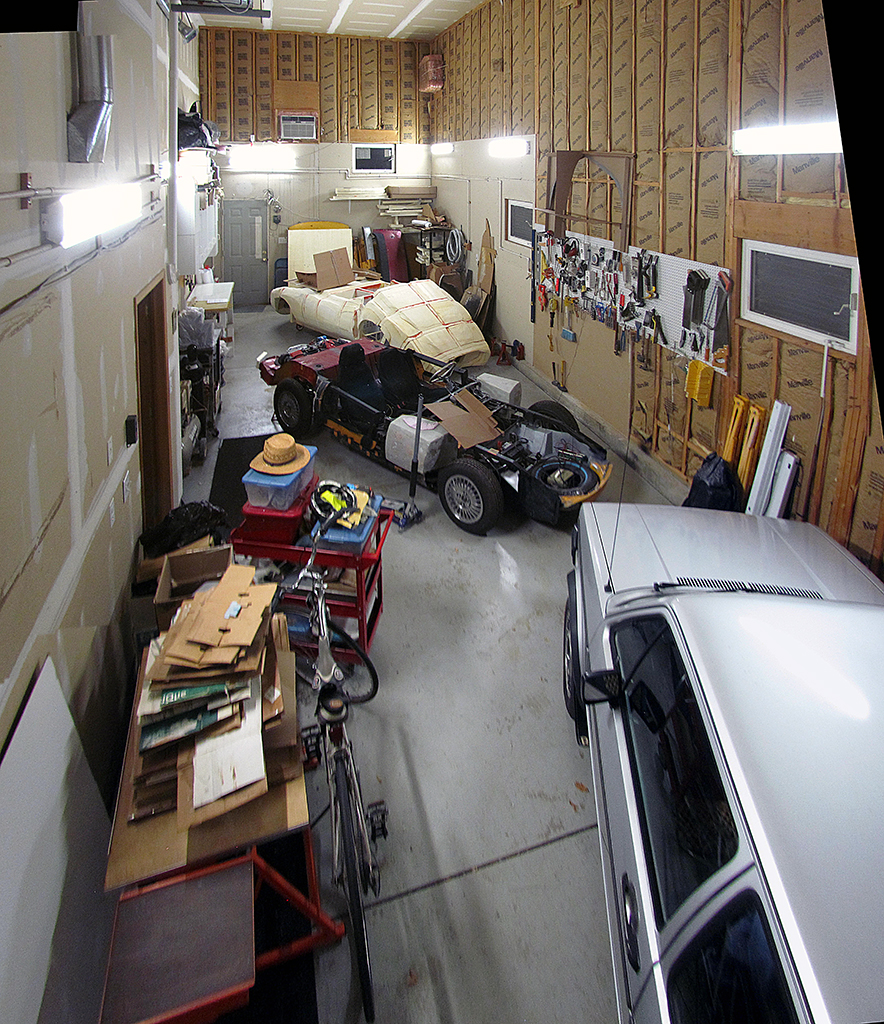
A NEW HOME
We bought a new (old) home, trading less land for more building.
The 3rd garage is big enough to house an RV, and has heat!!!
It will take awhile to settle in, but no more excuses!
Once the boxes are out of the way and the chassis and body are arranged, I glue the broken halves together.
It only takes 35 minutes to align and glue, but 3 days for the glue to fully set.
One can tell it's set when the ascetic acid smell dissipates.
So, by the Christmas holiday, everything is in place to get going again.
Check out 2023 for more progress!
The Build--2022
January

1st ROW
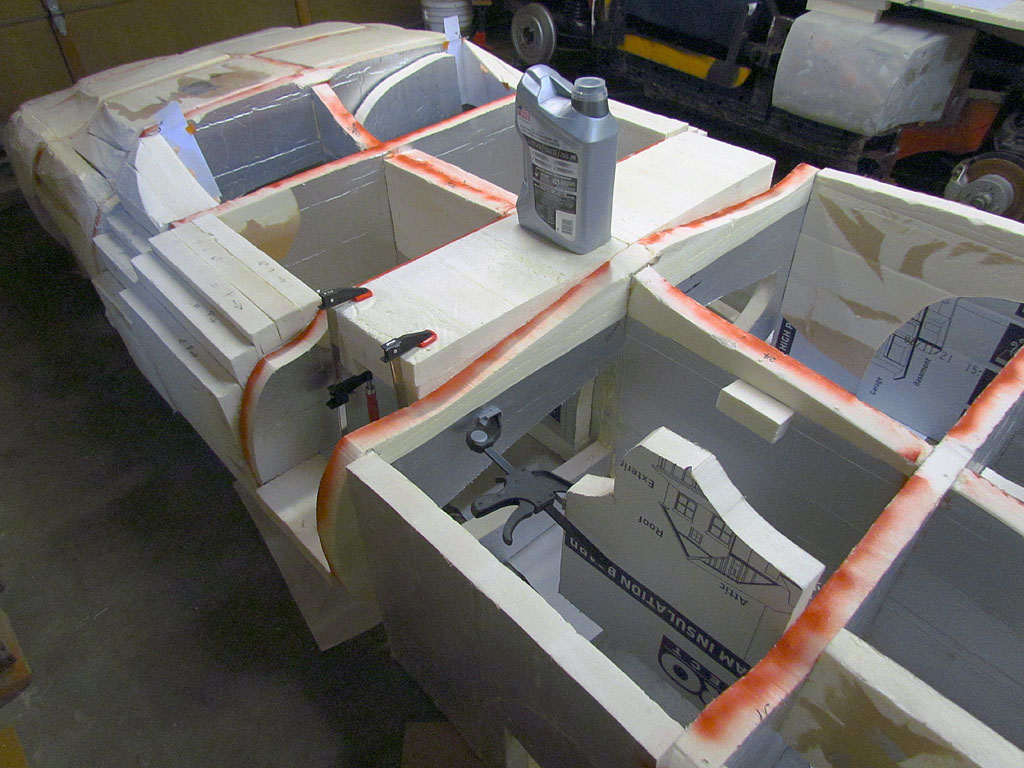
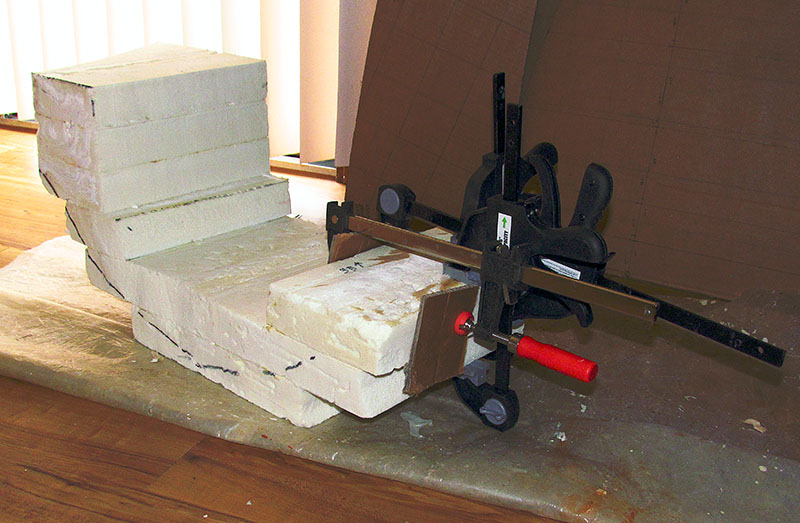
(L) It's not enough to just plop the foam filler panel into place. It has to be supported in some cases, but especially pressed together while drying. That takes some seat-of-the-pants noodling... all before the glue actually starts solidifying!
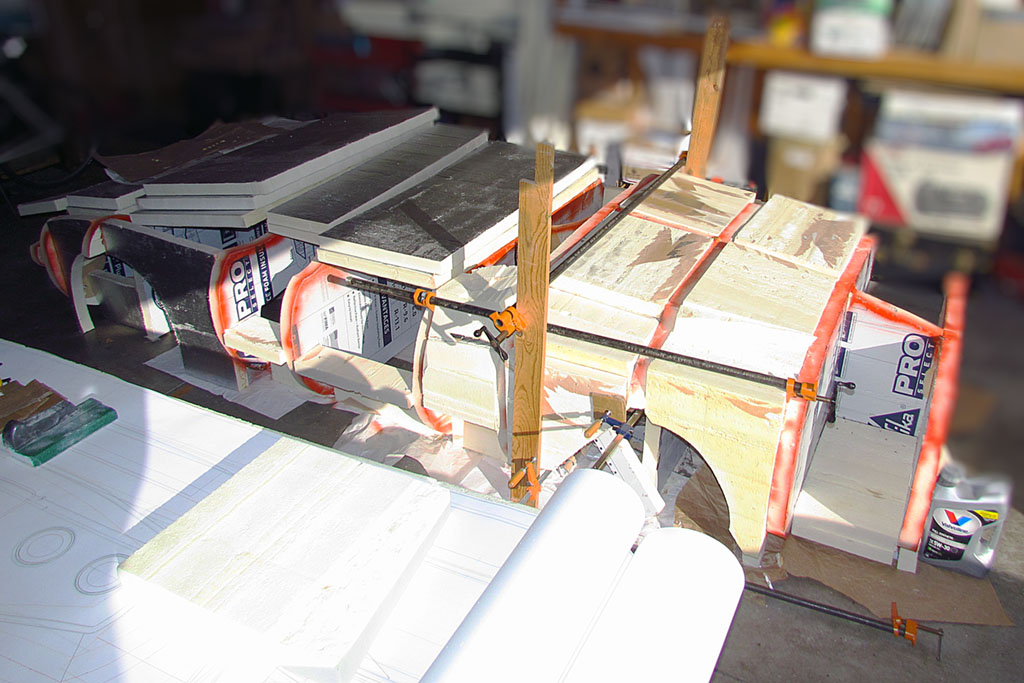
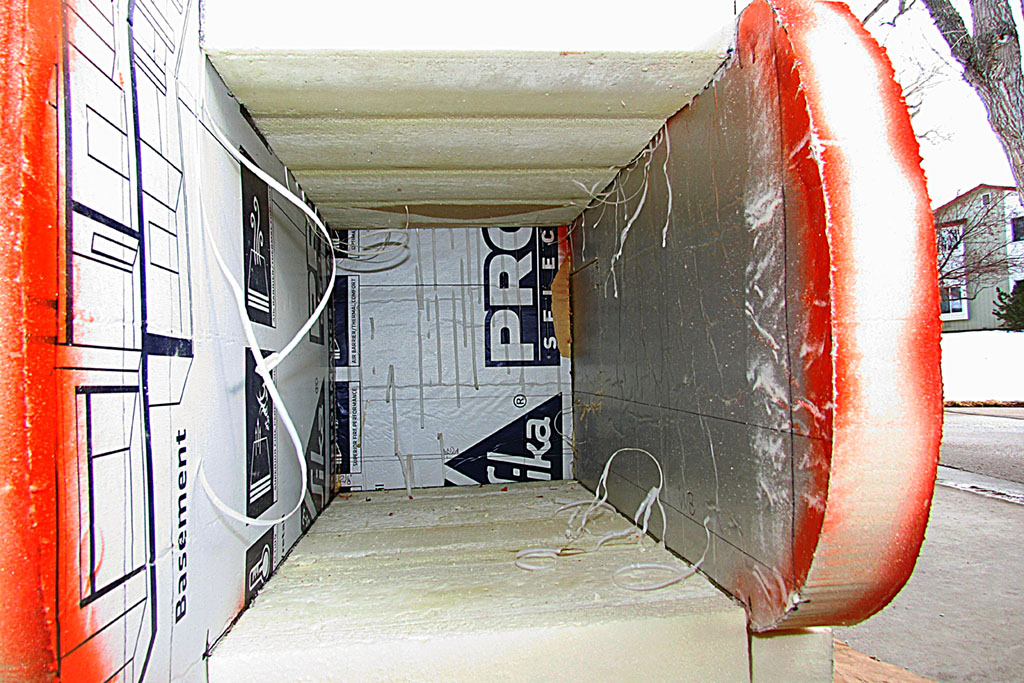
(C) A stereo view (parallel viewing method) of one arrangement holding two panels in place - on the driver side rear cell outer foam blocks, and the passenger side forward cell of the rear wheel well final foam piece to build up the thickness.
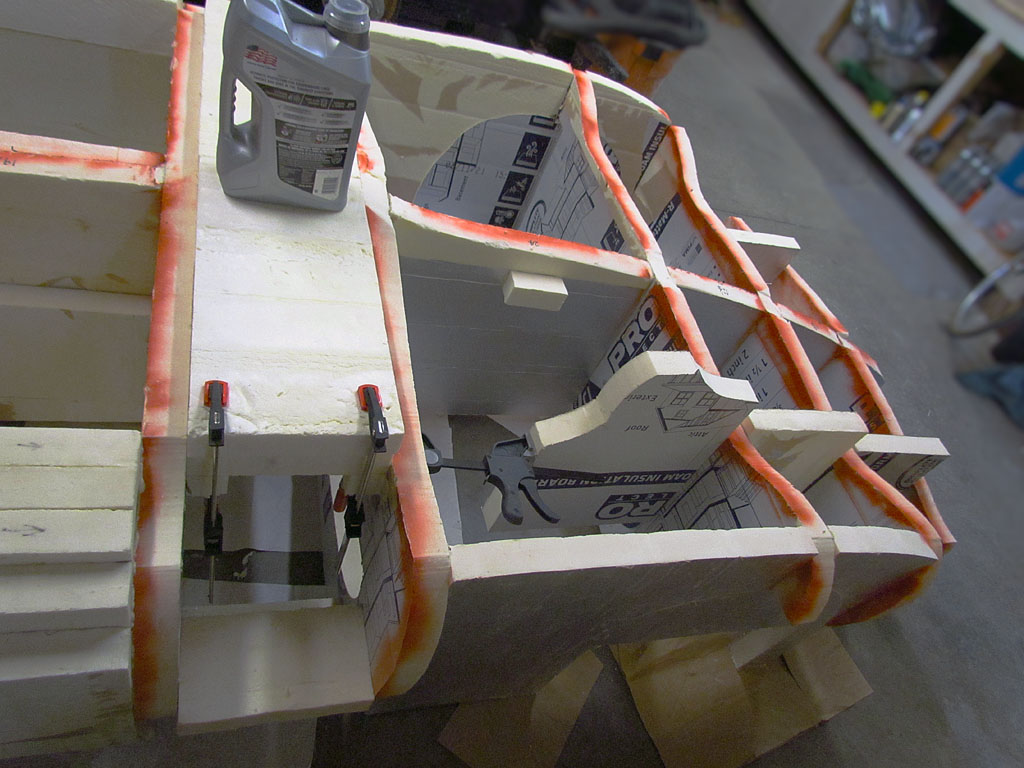
(R) Another view of the driver side rear cell arrangement. I inherited these large woodworking clamps, and, boy, are they coming in handy!
2nd ROW
(L) I was taken by surprise to see these "shavings" hanging onto the panels. I guess this happened because of the freezing temps while the glue dried overnight.
(C) Here is a stereo view (parallel viewing method) of the driver side rear cell.


1st ROW
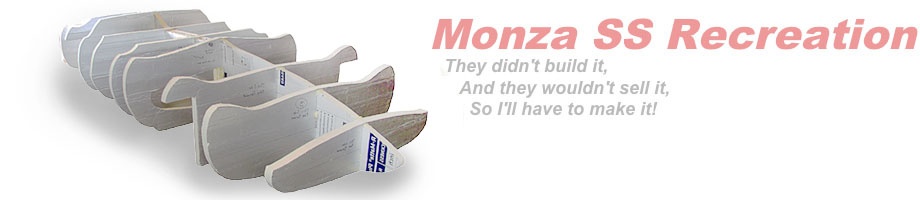
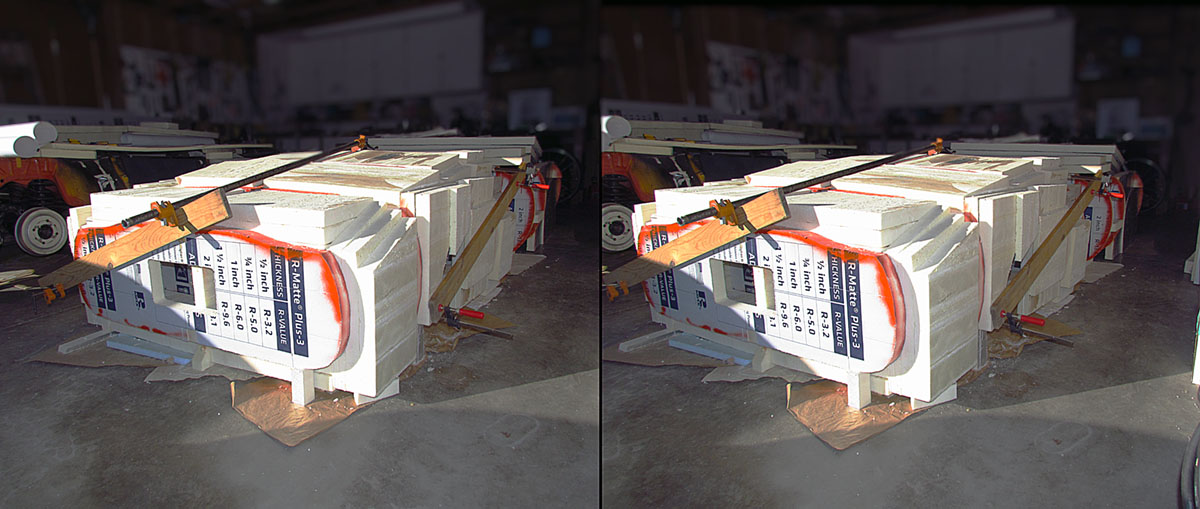
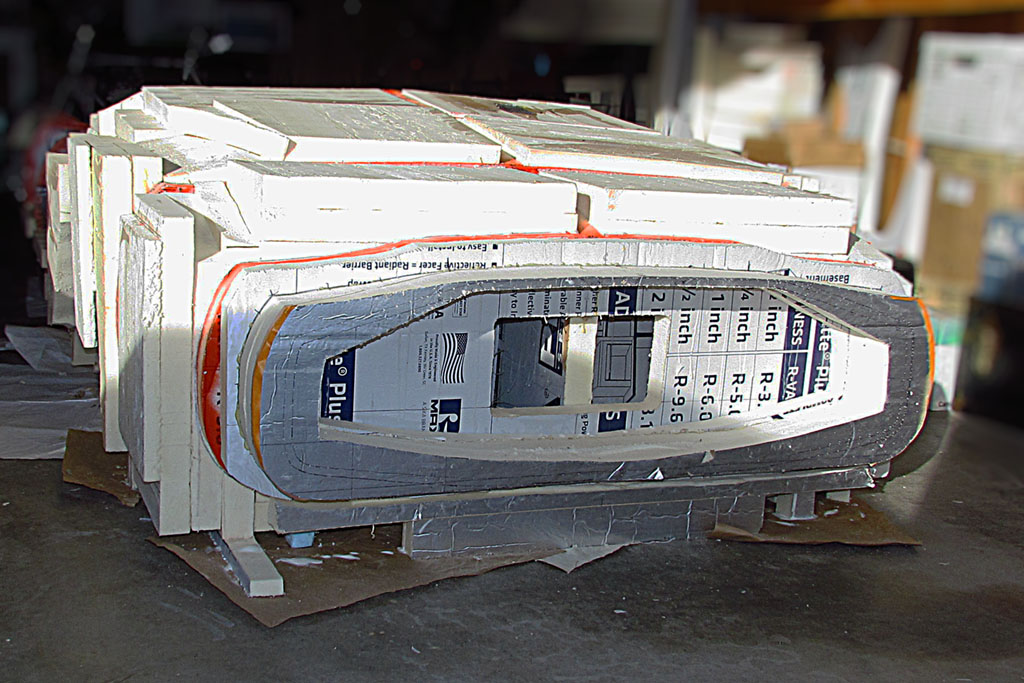
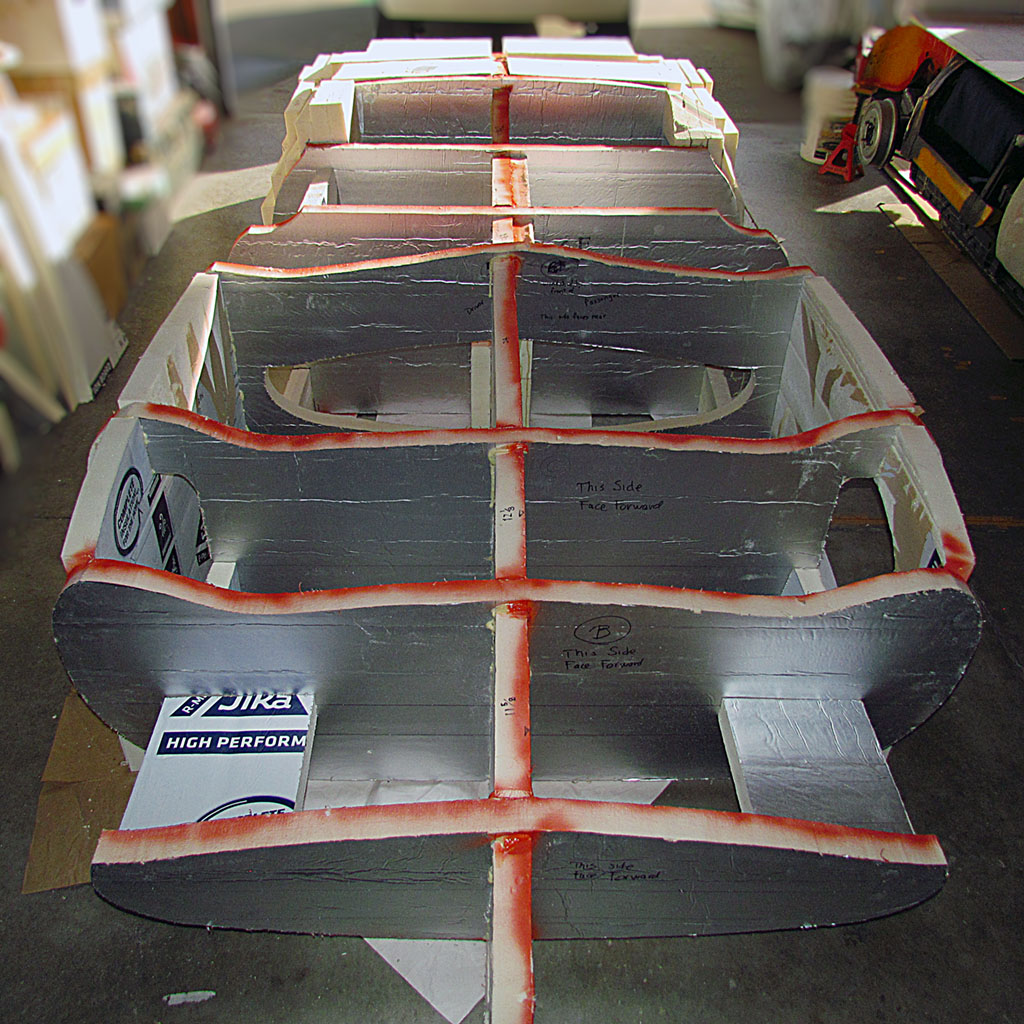
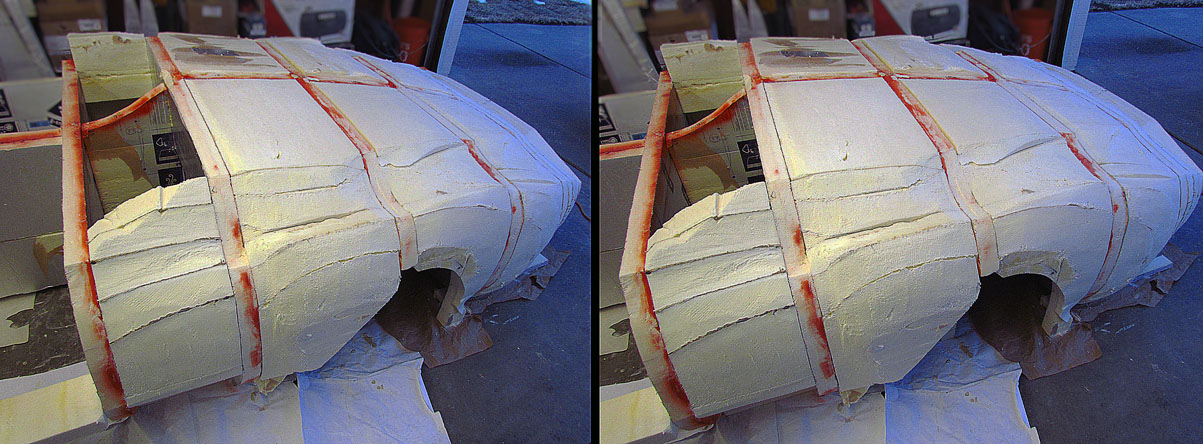
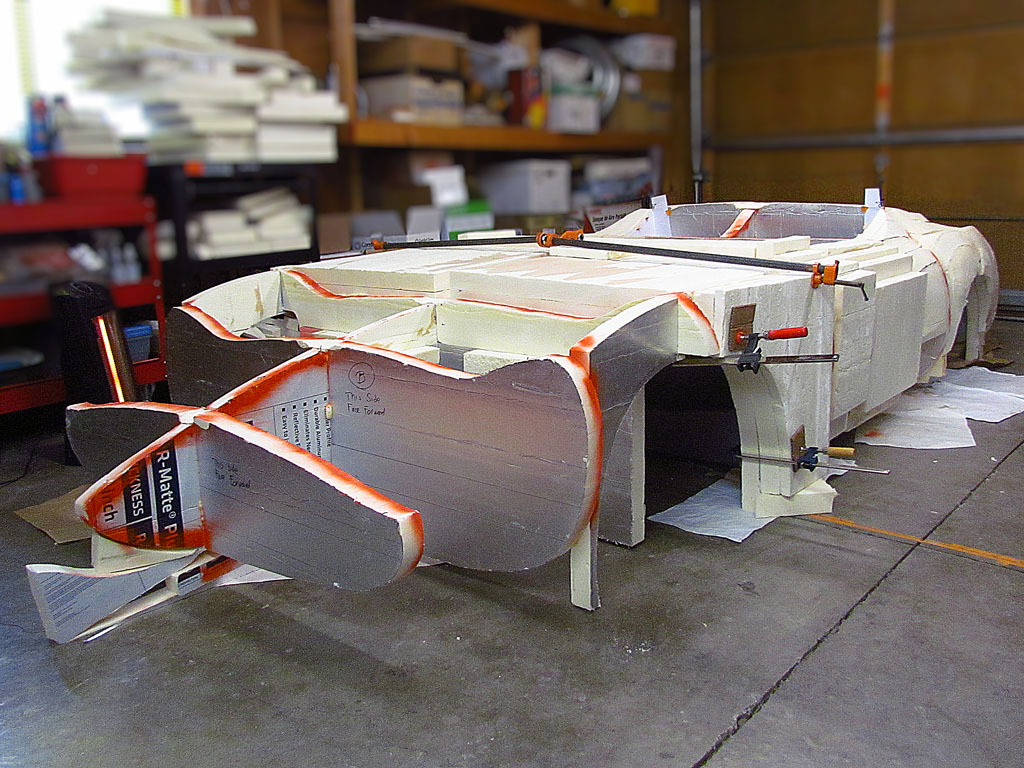
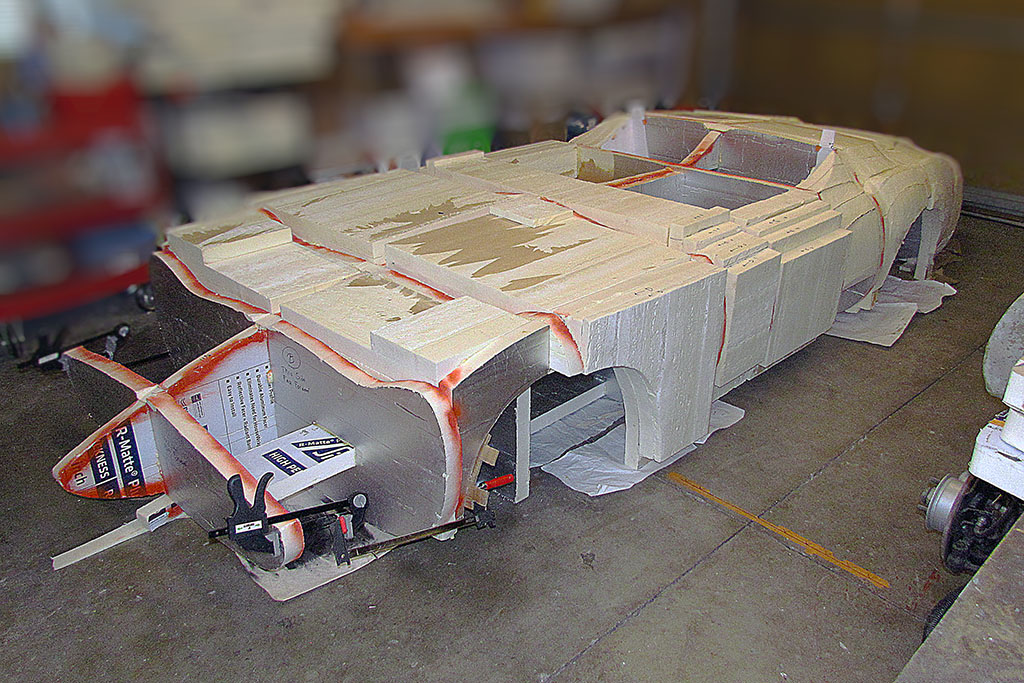
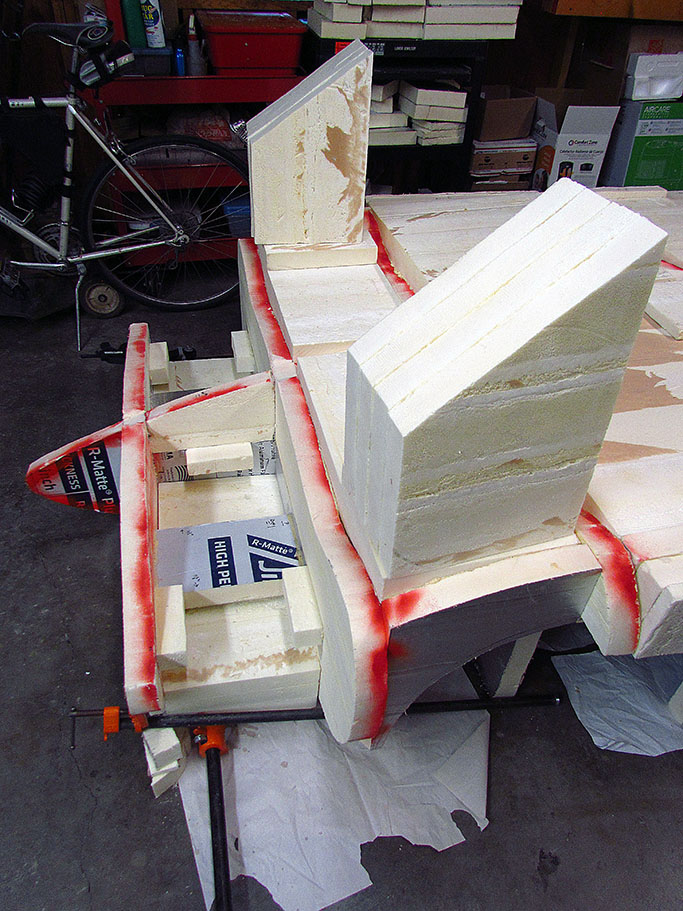
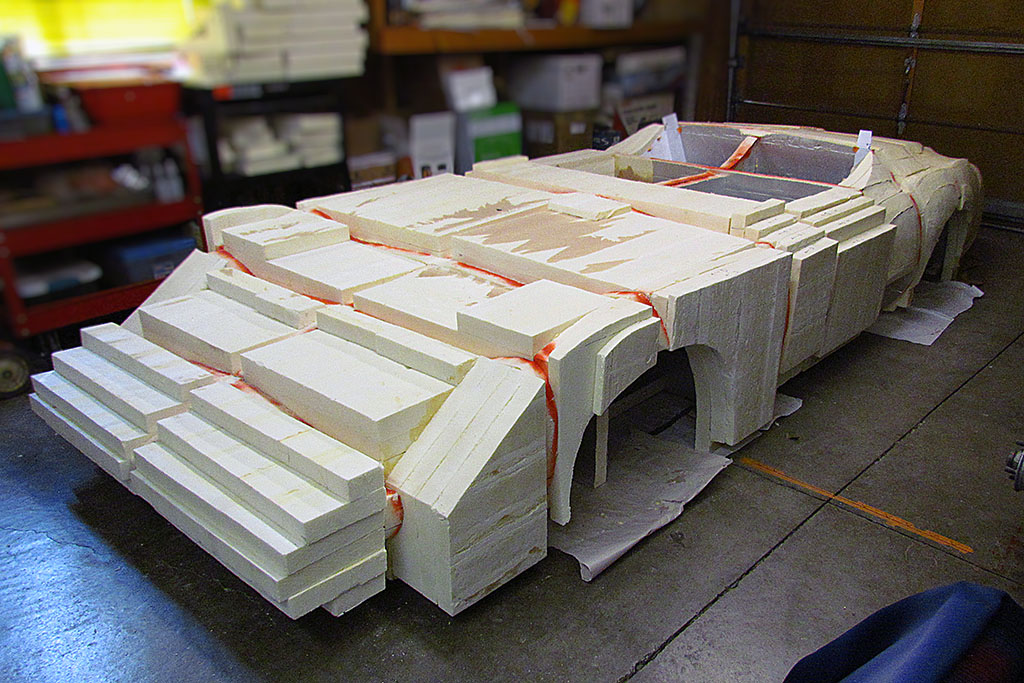
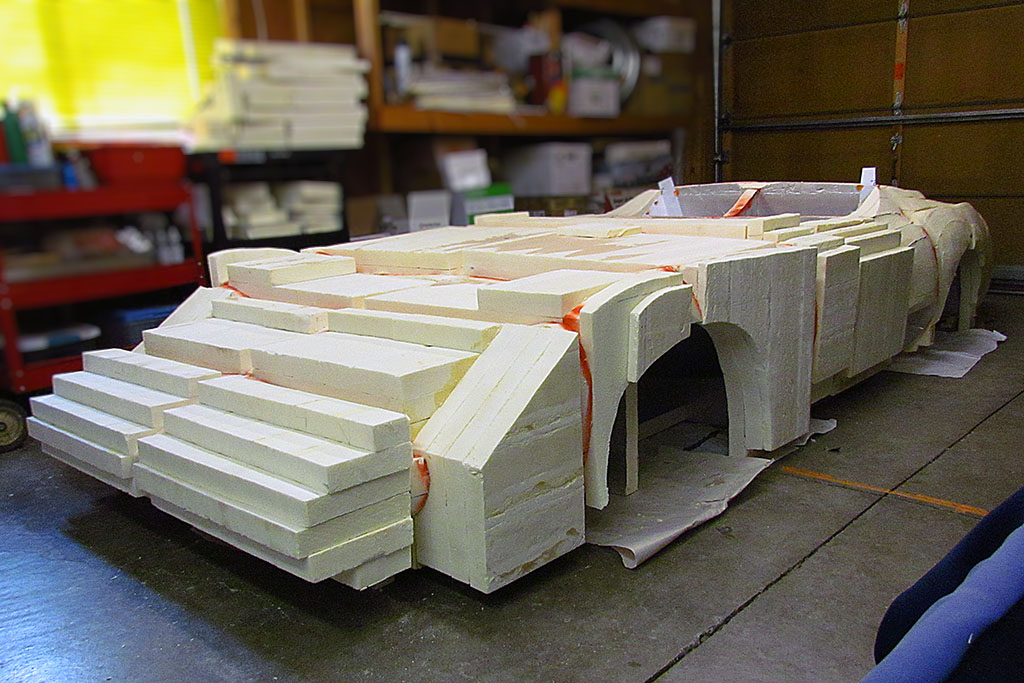
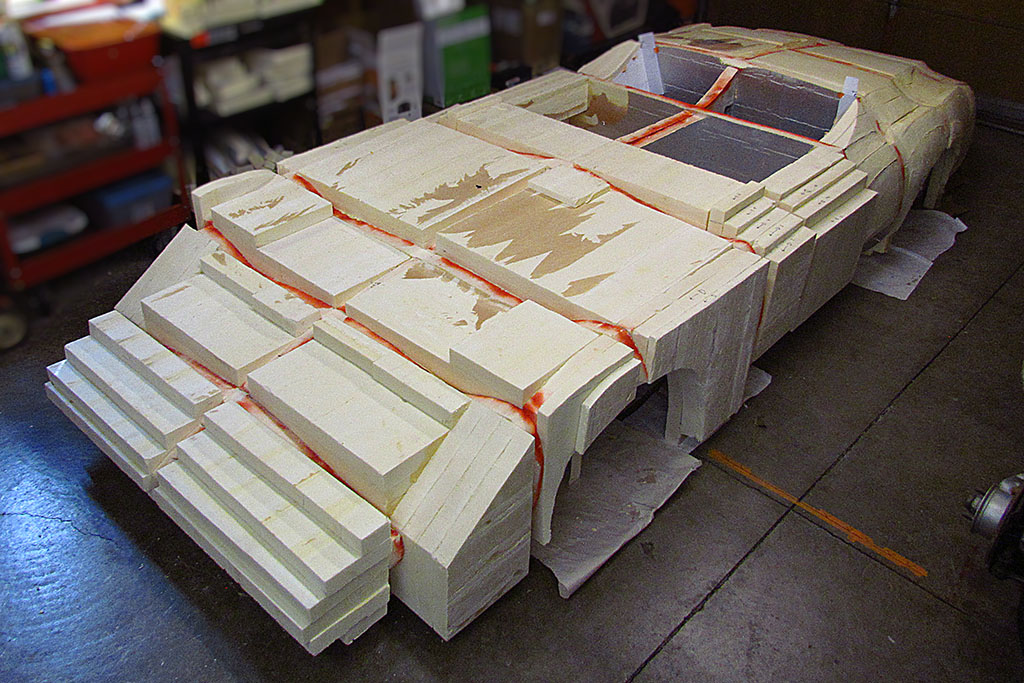
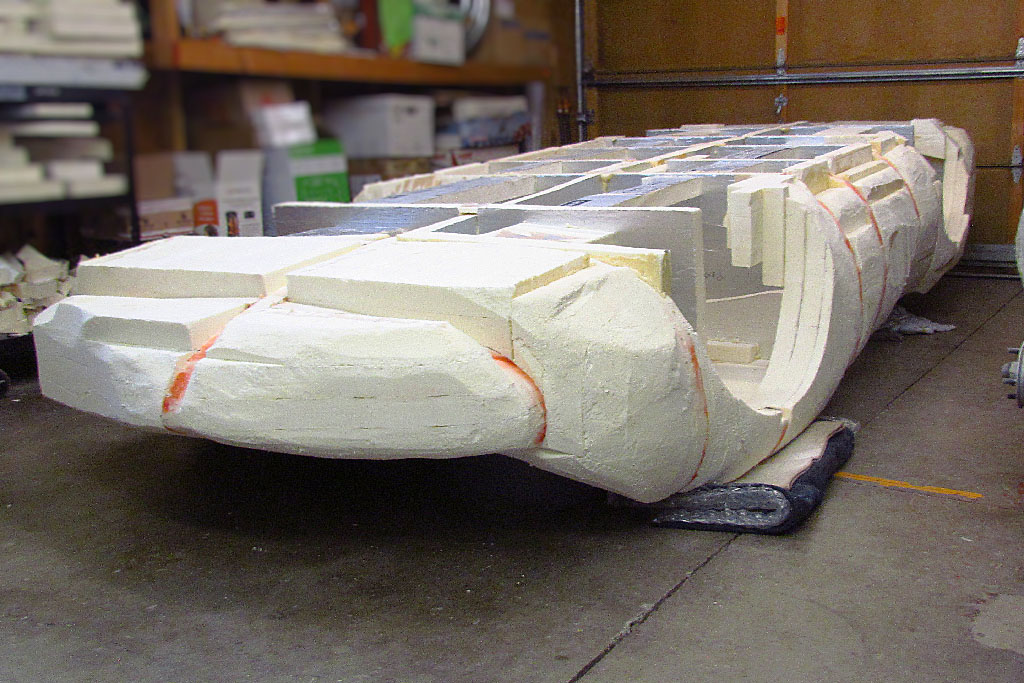
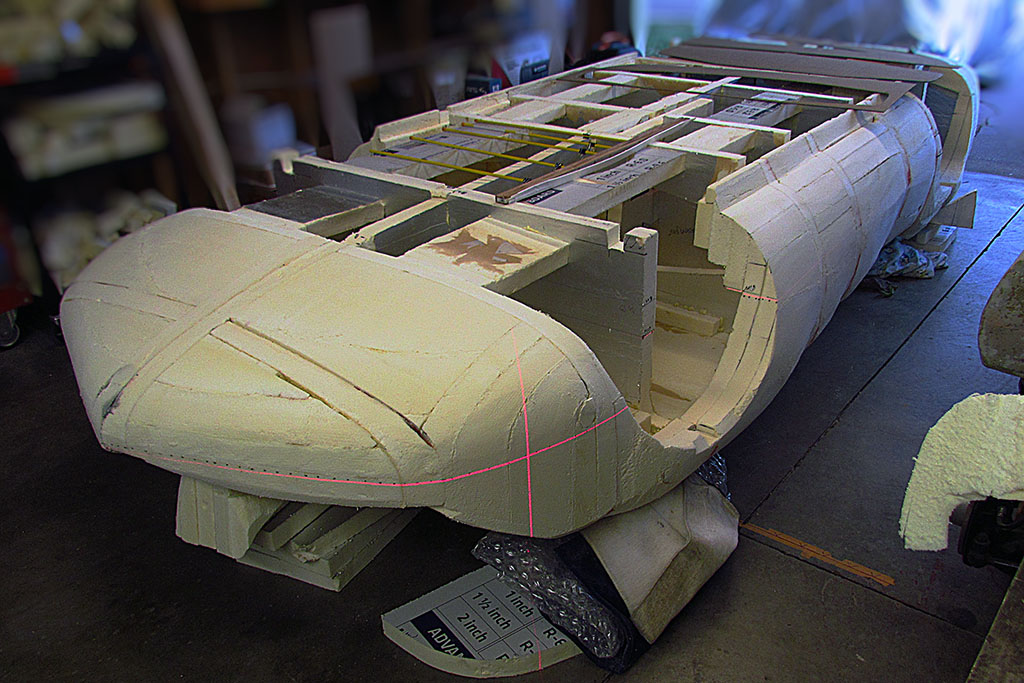
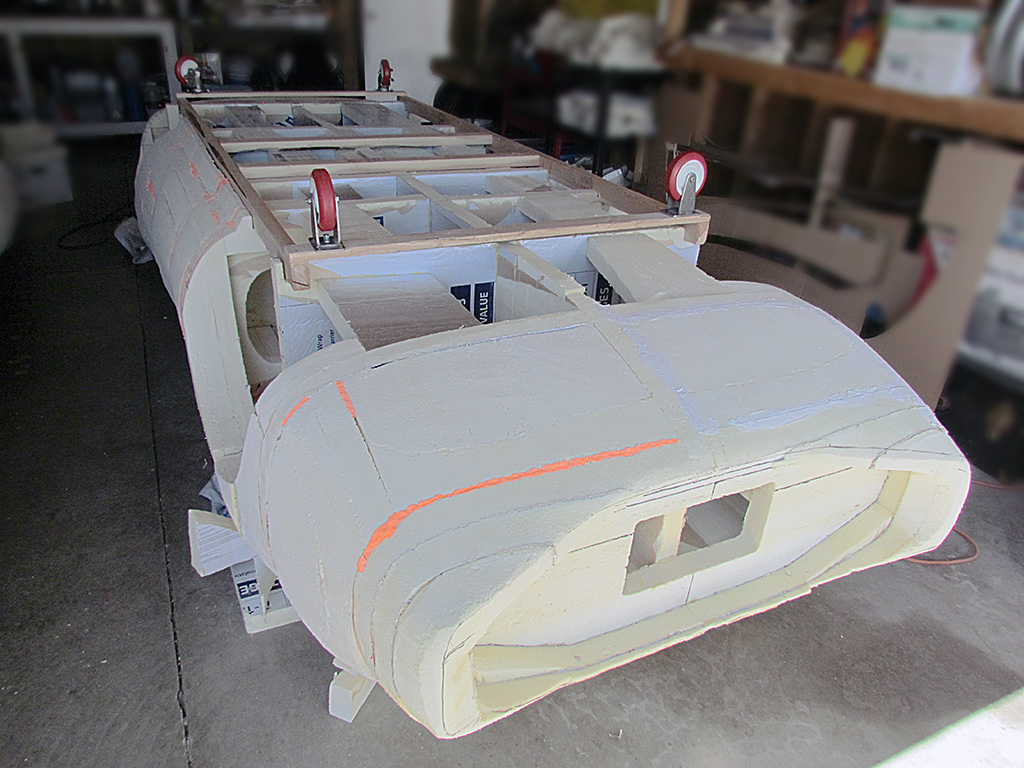
(L) The Kamm cove roughout is attached.
(C) It's blocky, but here is the body buck next to the chassis, which is currently serving as my drafting table for my full-size drawings.
(R) Another angle
2nd ROW
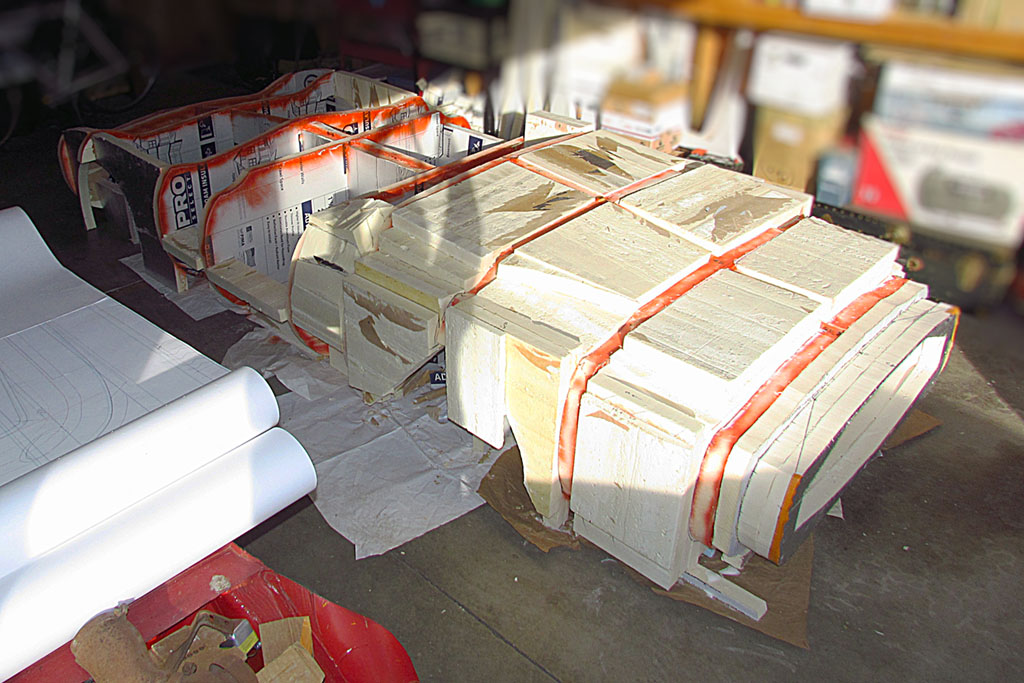
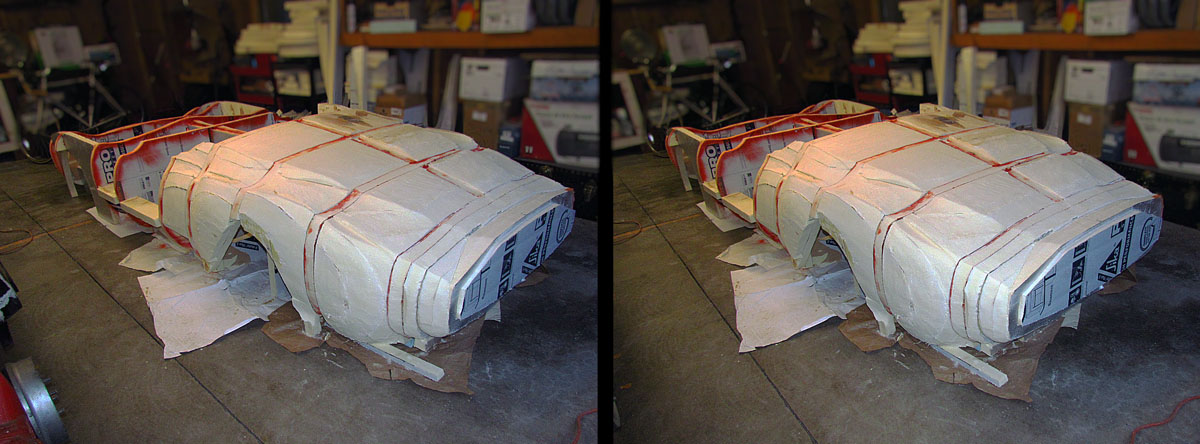
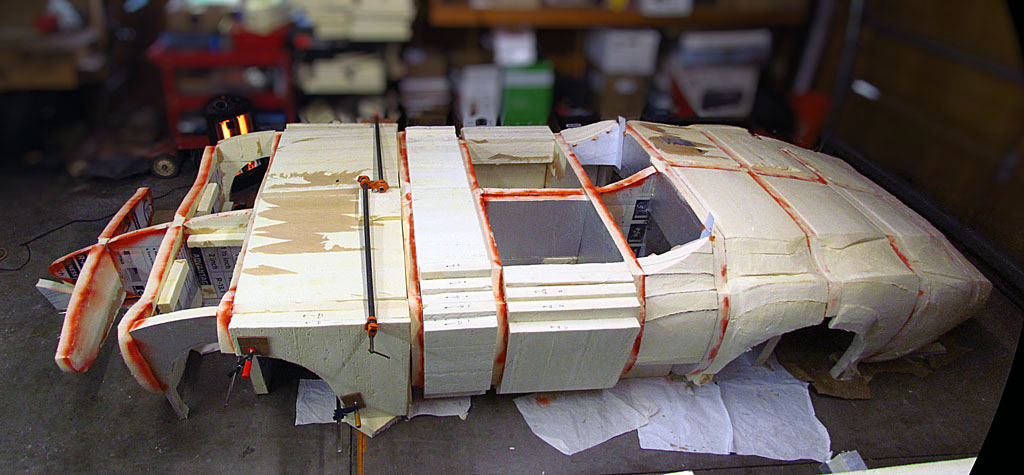
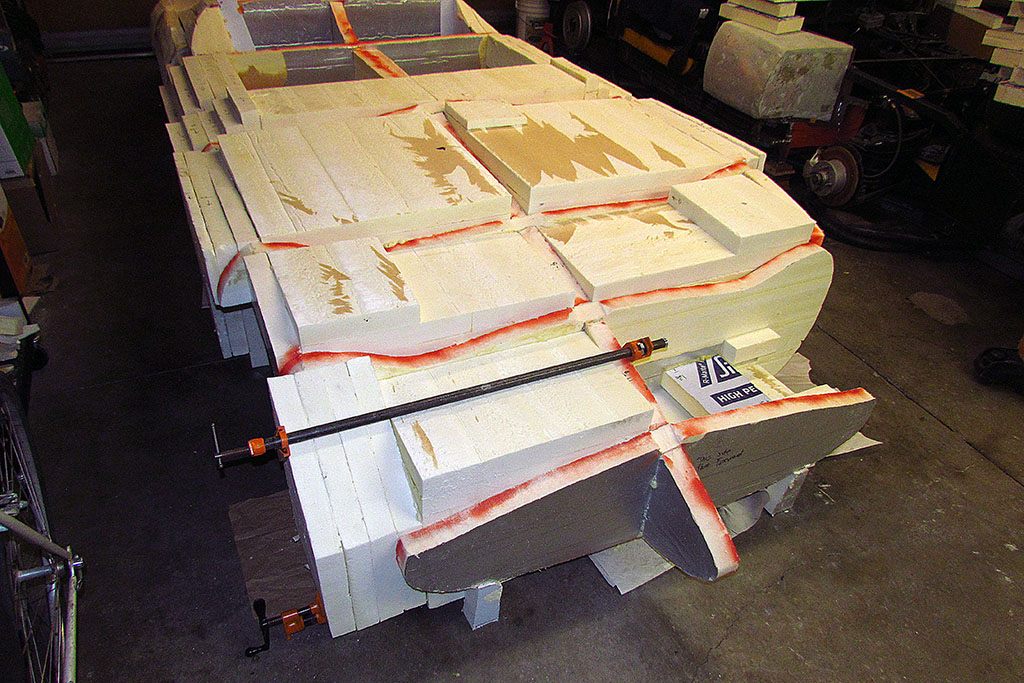
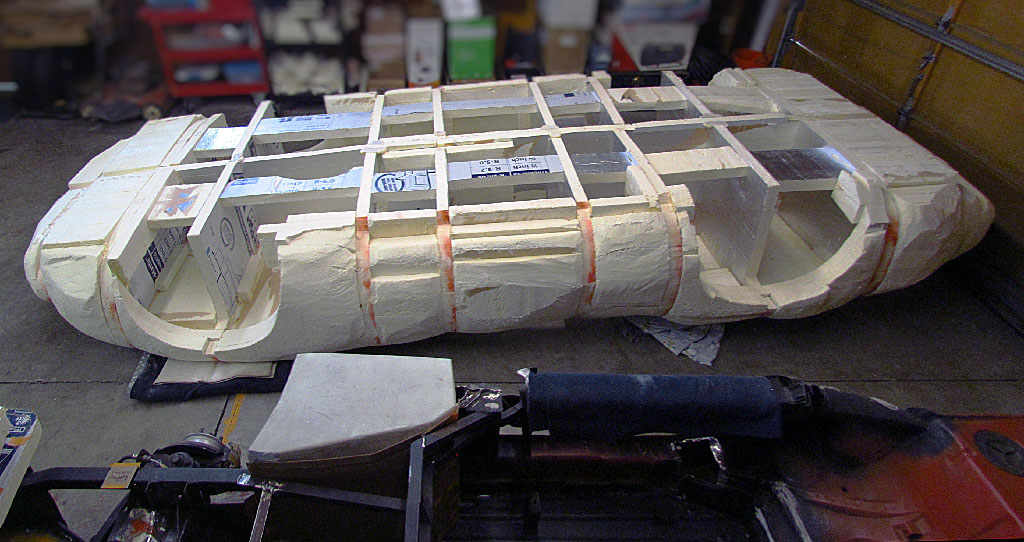
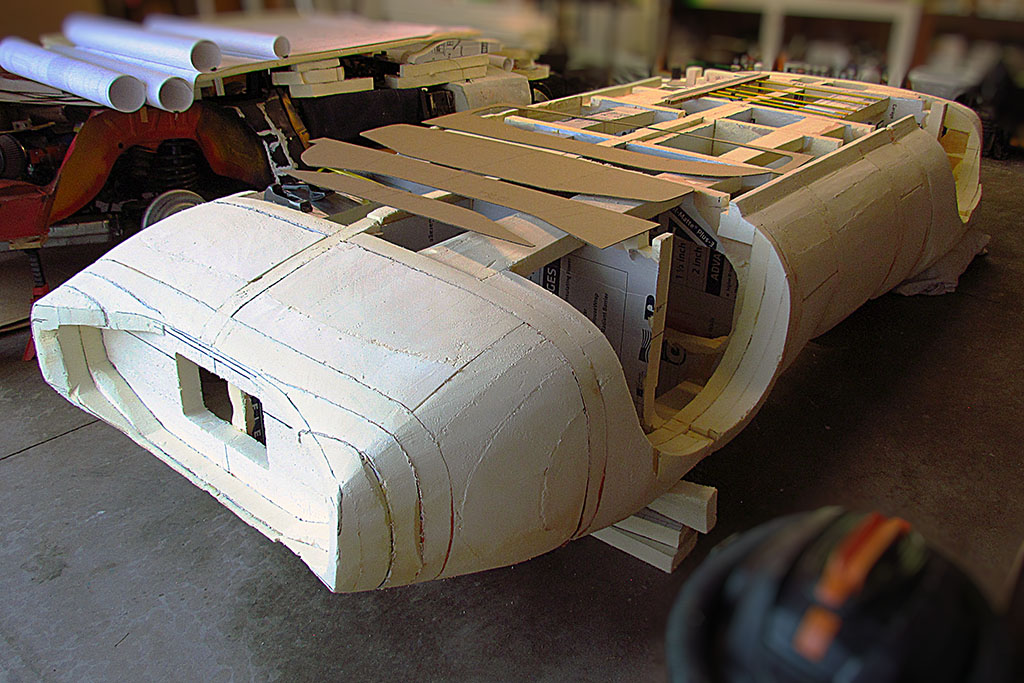
(L) As seen from the front.
(C) I can almost imagine it!
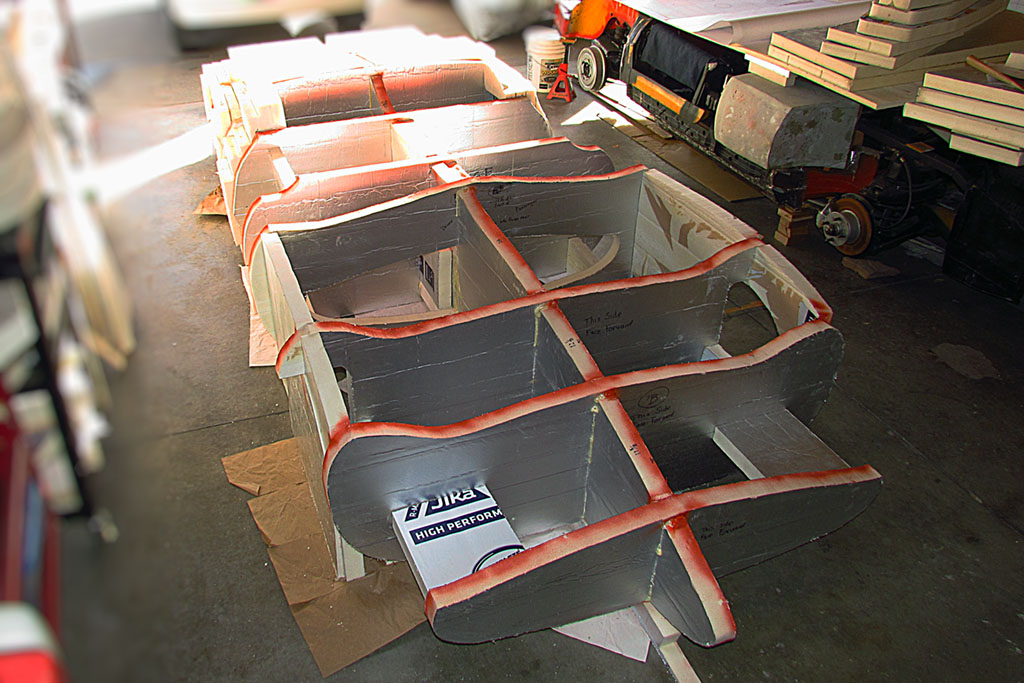
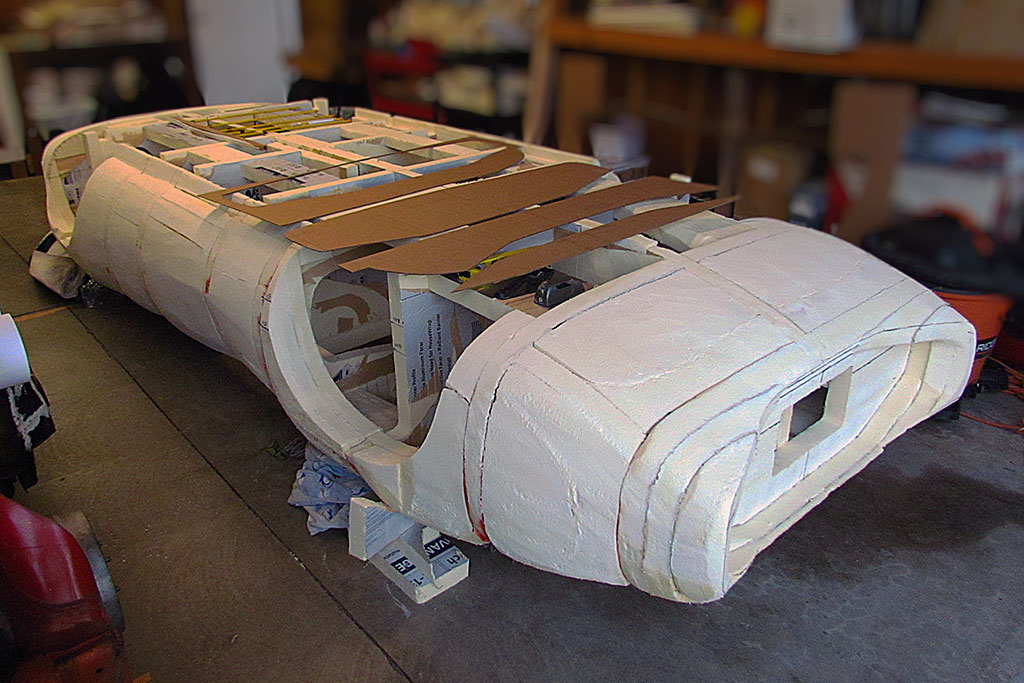
(R) An overall 3/4 front view.

1st ROW
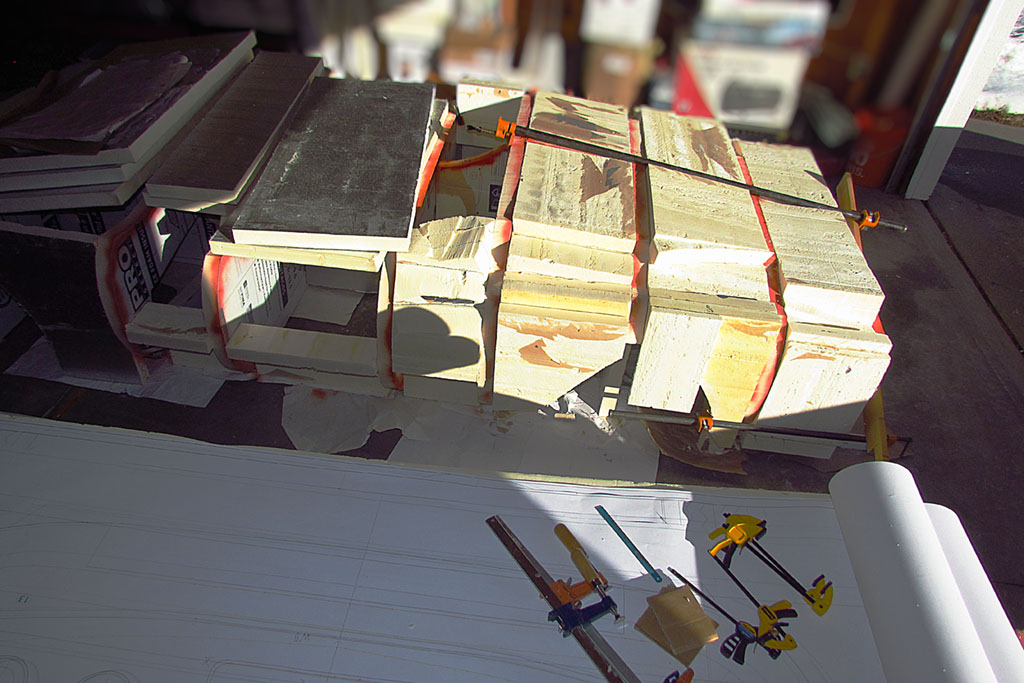
(L) The Kamm cove roughout is attached.
(CL) It's blocky, but here is the body buck next to the chassis, which is currently serving as my drafting table for my full-size drawings.
(CR) It's blocky, but here is the body buck next to the chassis, which is currently serving as my drafting table for my full-size drawings.
(R) Another angle
2nd ROW
(L) As seen from the front.
(C) I can almost imagine it!
(R) An overall 3/4 front view.
February
1st ROW
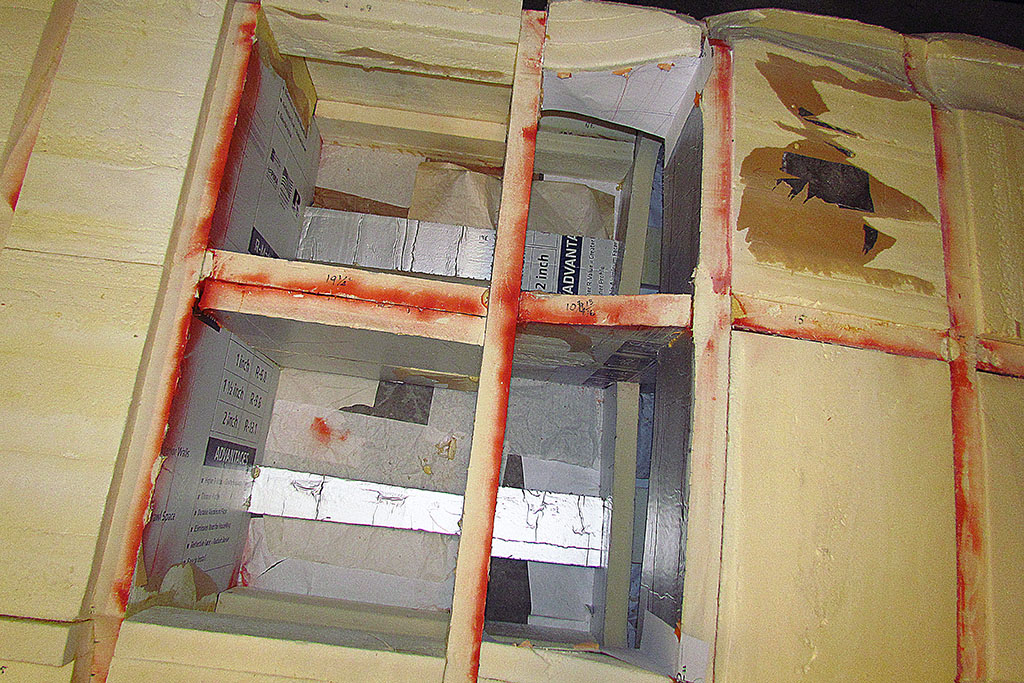
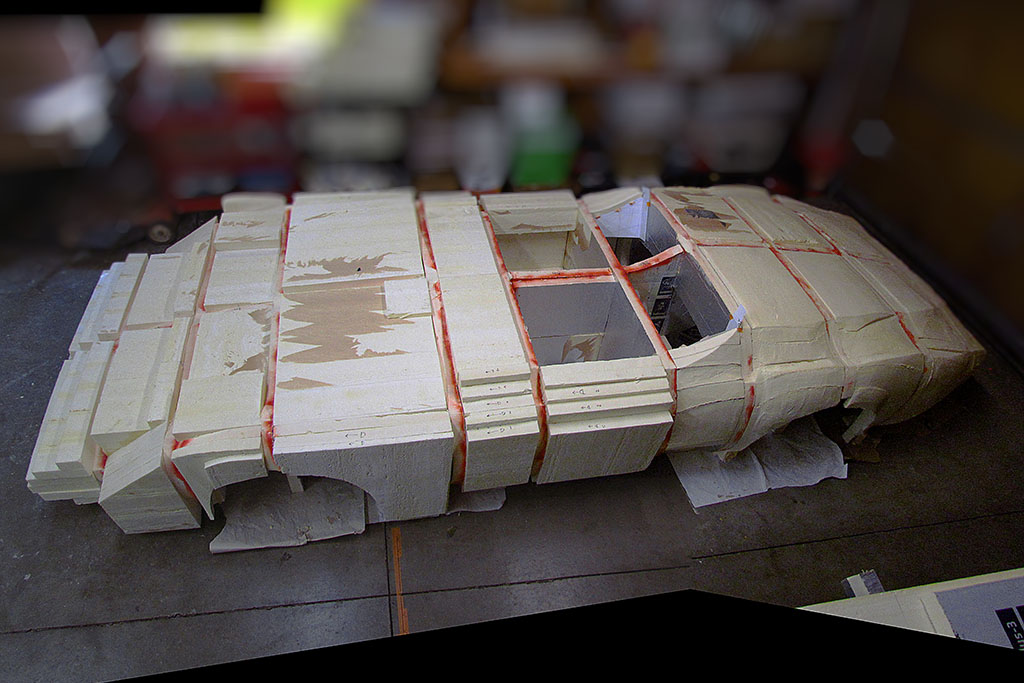
(L) Foam panels being glued and drying in the house. Note my custom weights to press the panels together. The white paper sticking up in the rear of the cockpit are templates for the side windscreen upcurves.
(C) These panels will make the dashboard. The front-center of them will be the forward-most point of the windscreen, which curves around as a V-shape. Check out photos of the car in 2016 or the home page.
(R) It's a little precarious, but I used a clamp to apply pressure from the front. Note the vertical foam pieces in line to add the advantage of each bulkhead.
2nd ROW
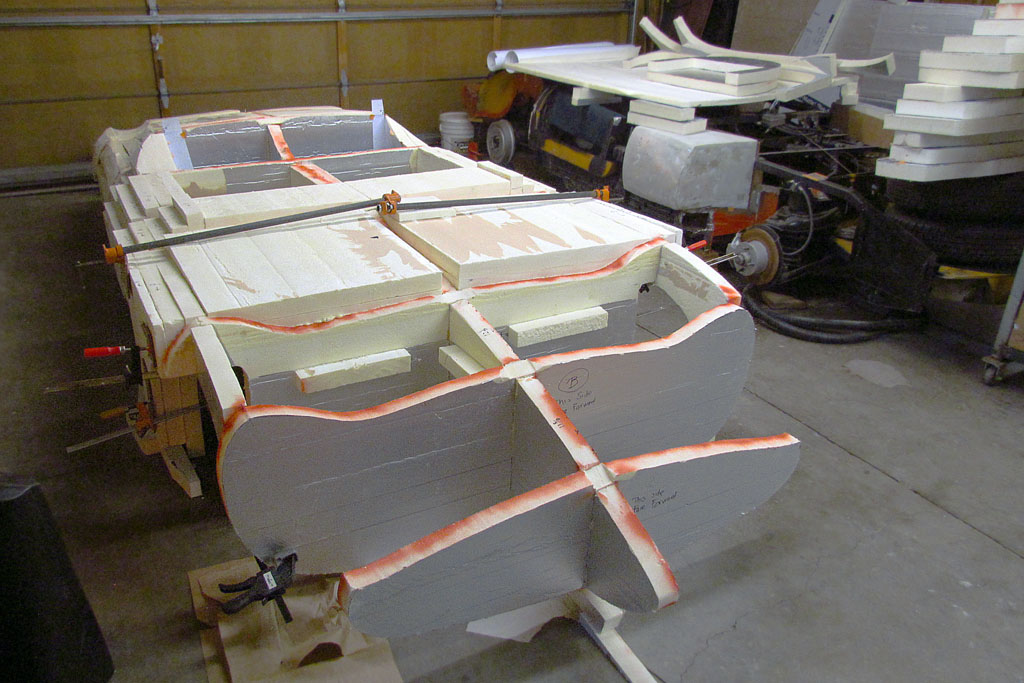
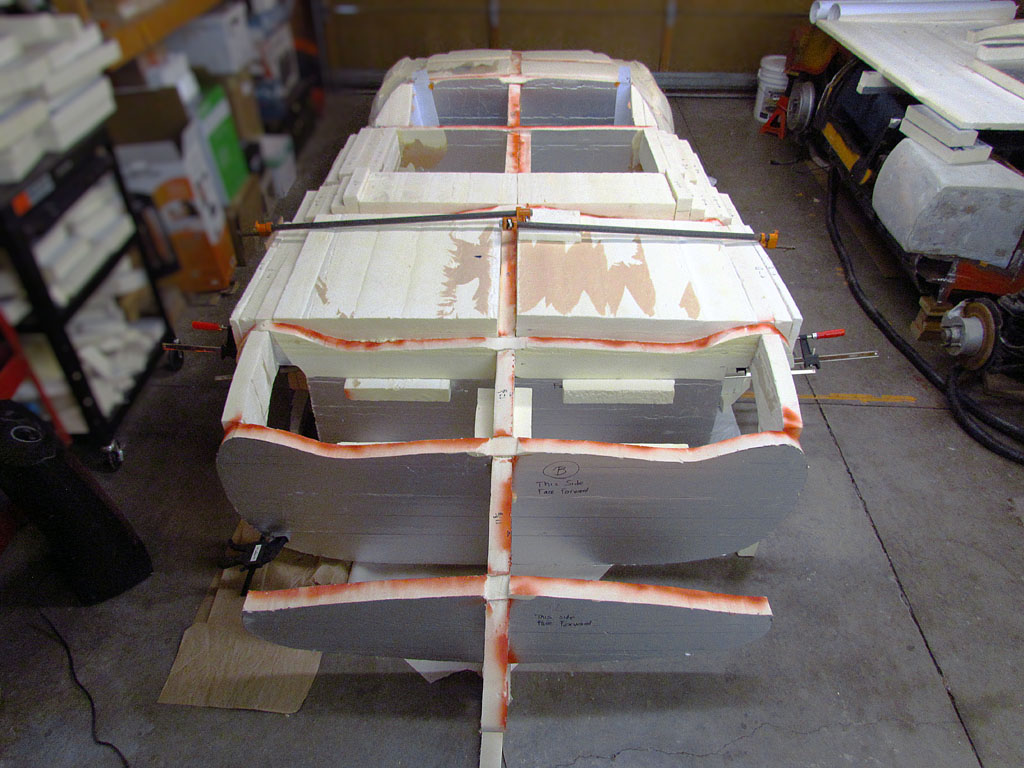
(L) Foam panels are now in place up to the front axle
(C) I call it "the LEGO car", but even with blockey panels, I can easily see the shape happening.
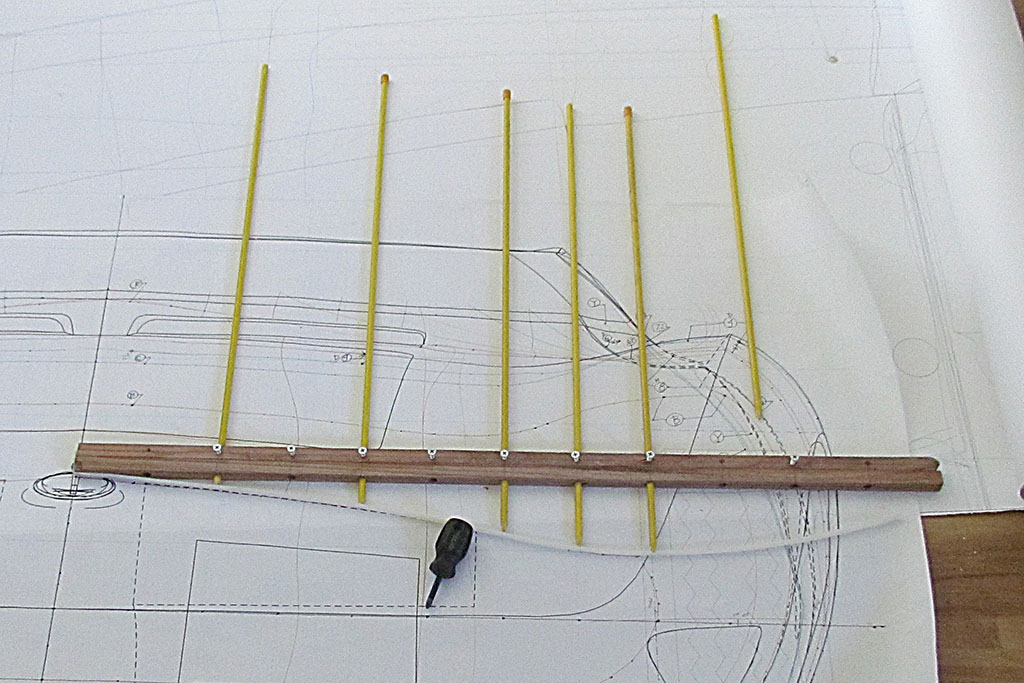
(R) Before I do more shaping on the rear, I am making a 3D template to locate the hood and fender ridge lines.
3rd ROW
(L) The clamps are holding in place the side fender panels while drying.
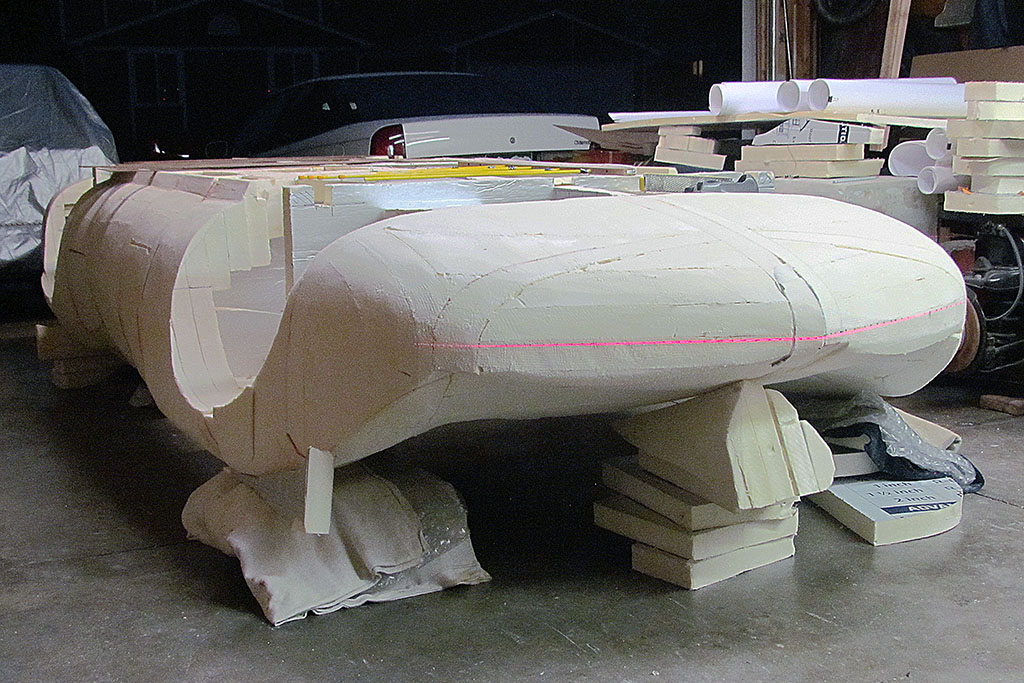
(C) The nose looks reee-ally long.
(R) But it is only a 20 degree angle at the very front. And the very tip is 39 inches from the front wheel centerline.
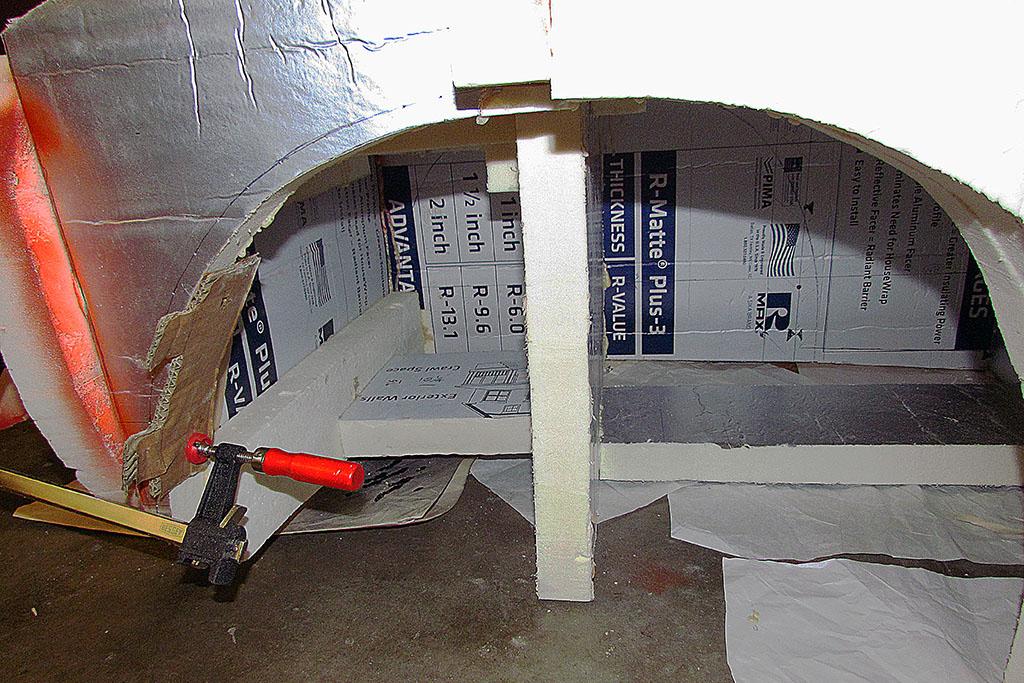

(L) The front wheels are nearly all blocked in. Only two more sections to go! Note the clamps in front. The rib contour broke and I have it clamped for gluing.
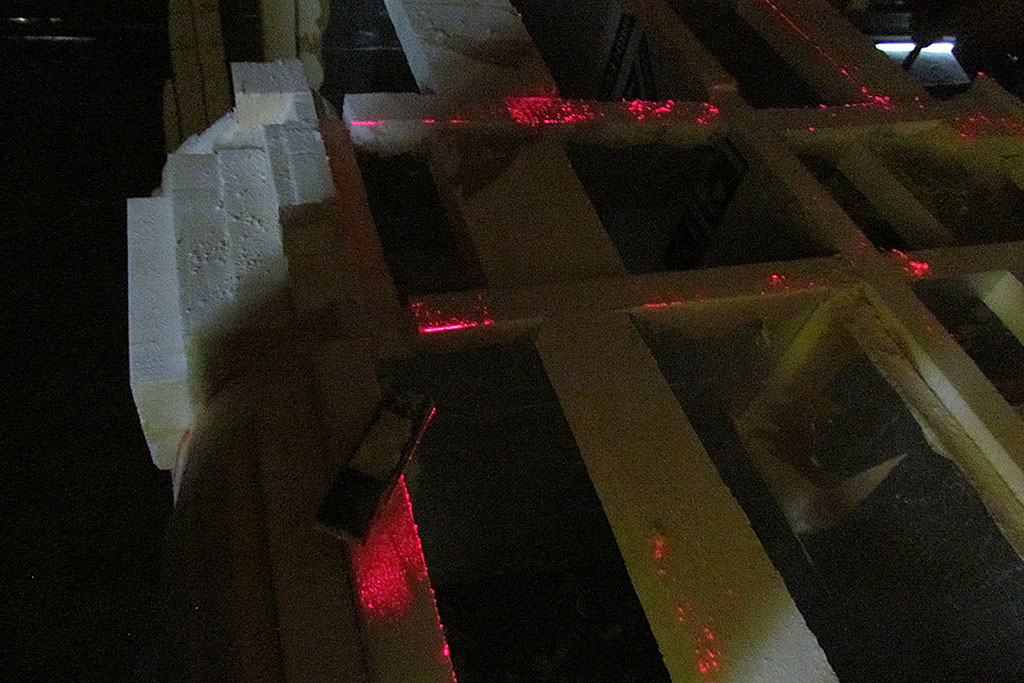
(CL) Added braces to all sections to aid in clamping and to sturdify the structure for when it comes time to turn it on its side to work on. You can see the braces in the front wheel well.
(CR) The bracing in the cockpit. I am anticipating a seat going over this brace later when I work with the windshield and top.
(R) And the bracing in the tail end section. I had to slip them in thru the license cutout.
March


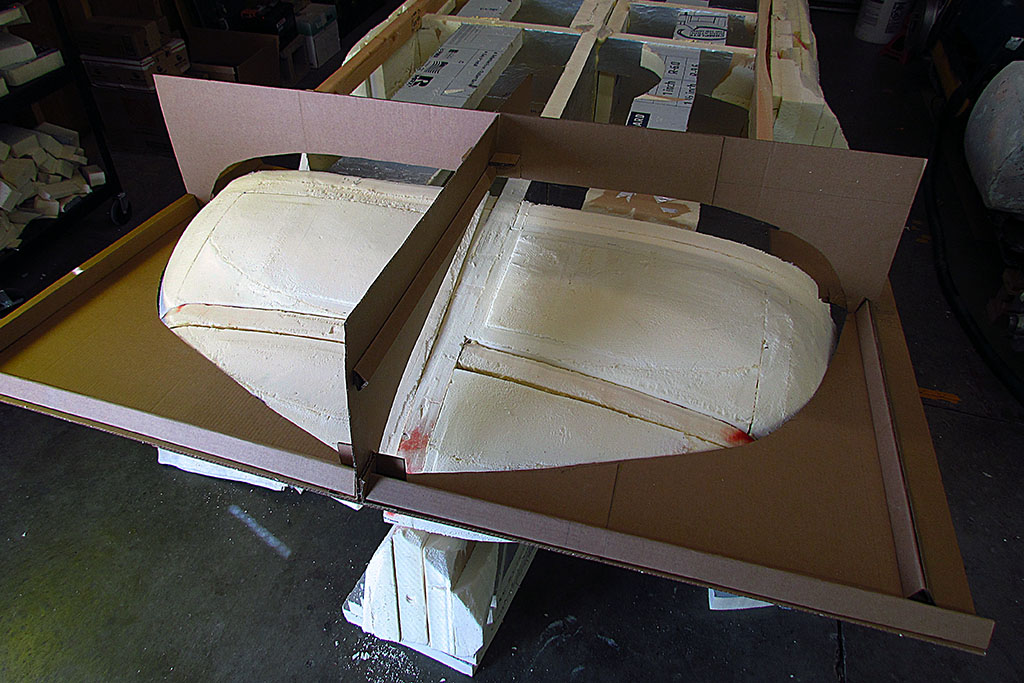
1st ROW
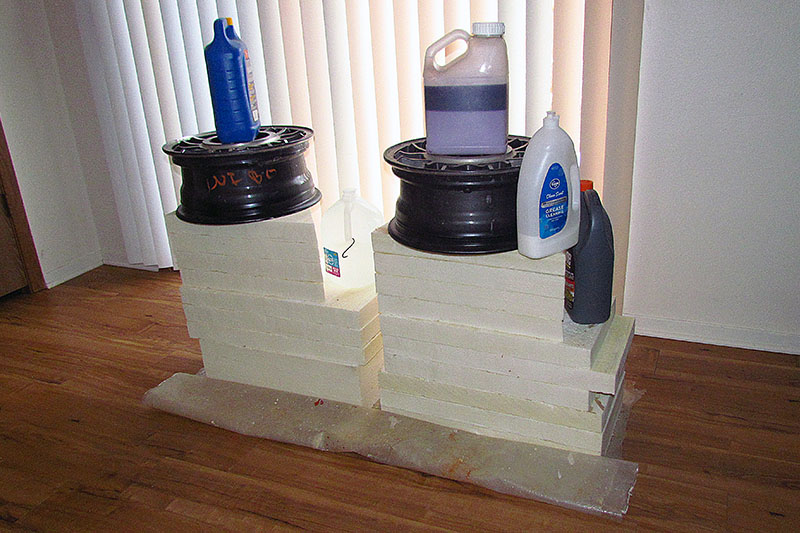
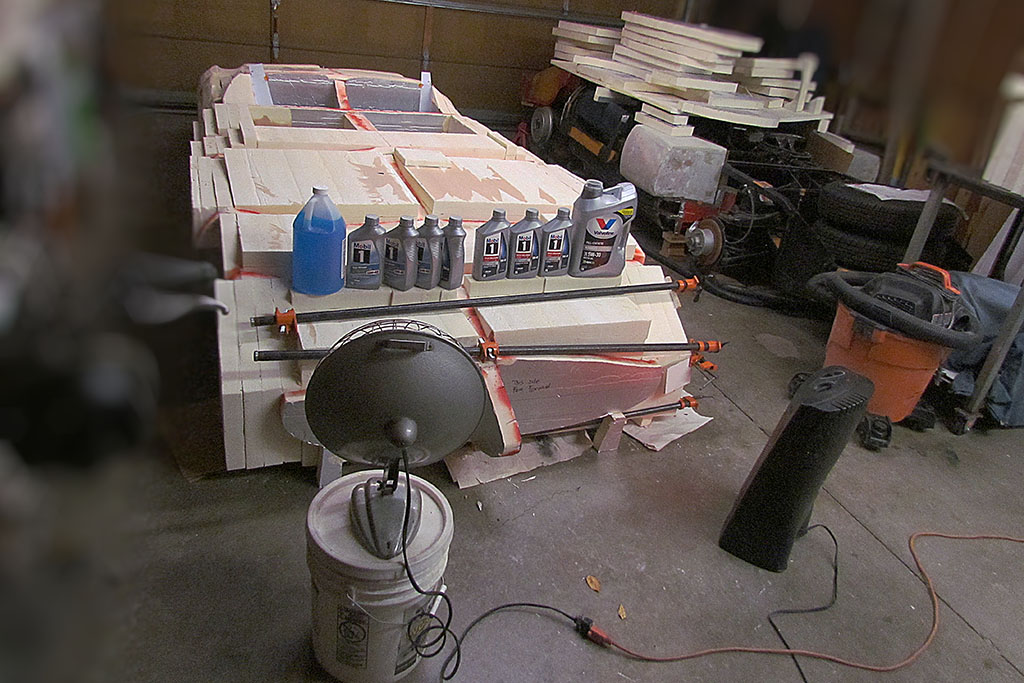
(L) More gluing in the back room. I only have enough weights to do two towers.
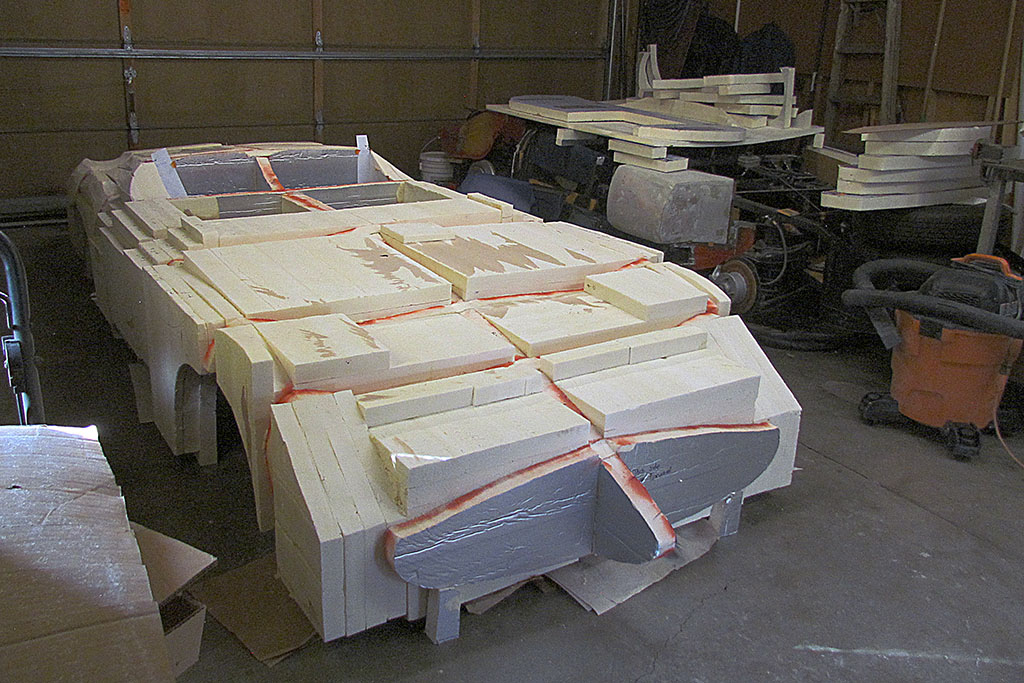
(CL) Beginning the next to last section. I need to add foam for the undernose pan as well as the top surface. Twice as much foam, gluing, work, and time!
(CR) The driver side top pieces did not set and had to be glued again, so I could only do the passenger side.
(R) Clamps used top and bottom on this one.
2nd ROW
(L) With overnight temps in the teens, I plowed ahead with glueing. The clamps hold pieces attached with Gorilla glue. They set in the cold if they get a good start. The bottles hold down pieces glued with general purpose white glue. They won't even set under 40 degrees! I am hoping a couple of hours of heat from the electric heaters will get them to set. I gave them three days and IT WORKED!
(C) Clamps removed and foam added to the outside front half of the wheel cutout.
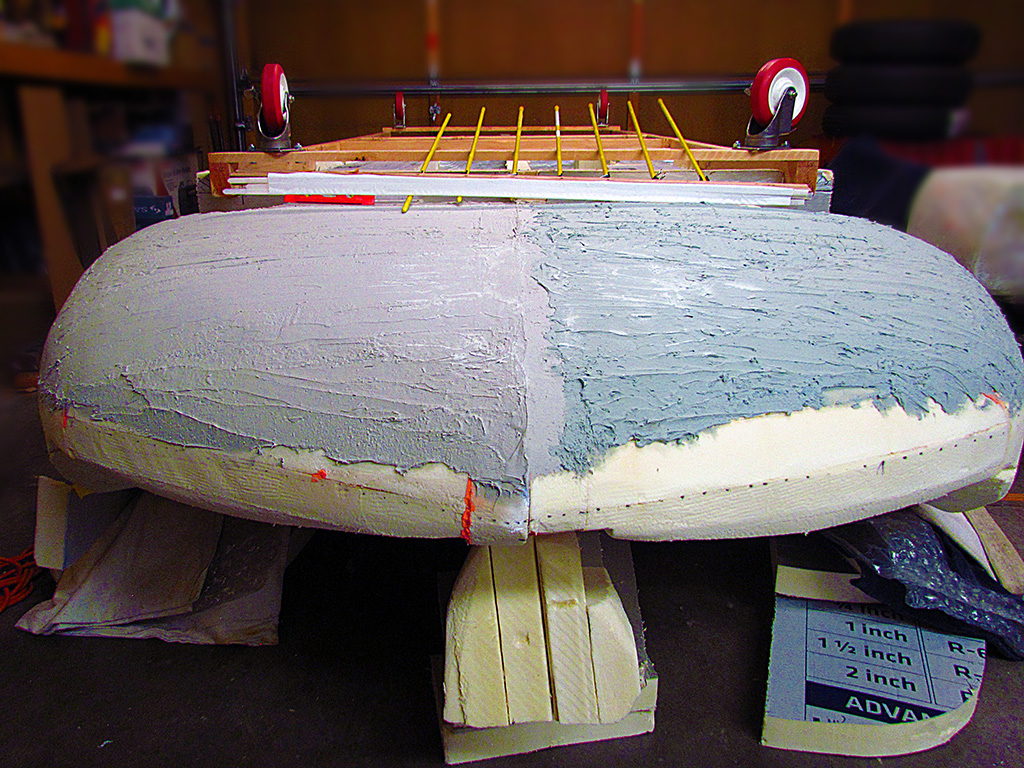
(R) It still needs another 1" layer added. This is the widest point of the body.
March 18


1st & 2nd ROWS
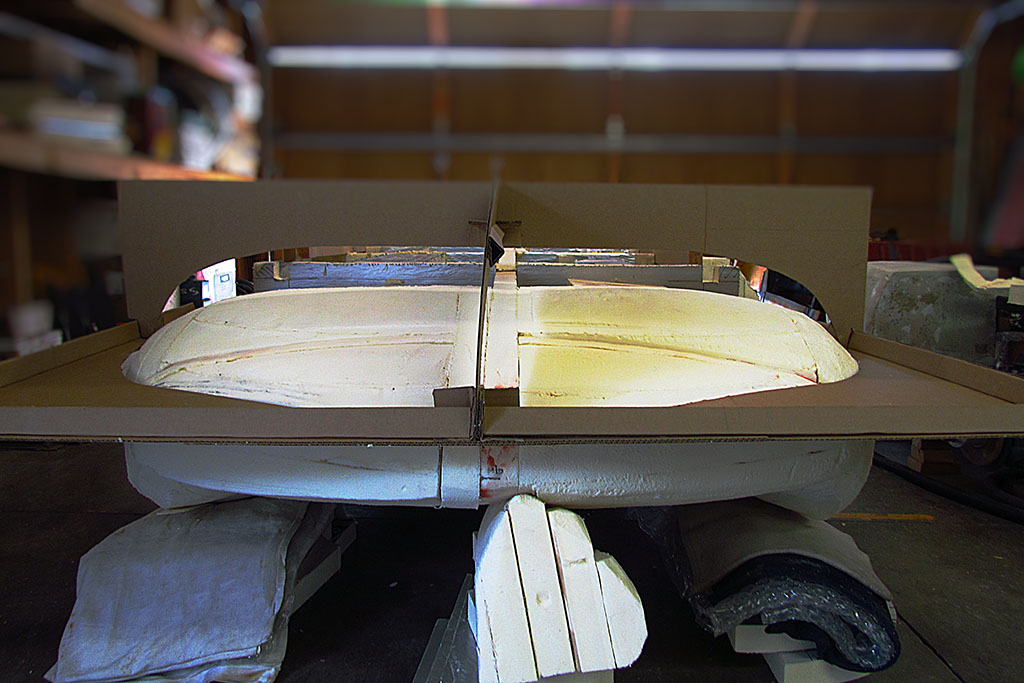
(L) The last section clamped into place!
(CL) A walk-around of the body, starting with the 3/4 passenger-side front view...
(CR) Straight-on view...
(R) ...welllll - I am sure you can figure it out.
March 19-26


1st ROW
(L) Repairing the section that was removed. Gluing it down well!
(CL) The section requiring repair, and the problem of clamping it tightly.
I have to pull the back half and front half of the car together.
(CR) Starting to rough out the driver's side (parallel-view stereo image)
(R) Beginning to rough out the passenger side
April 2-10


1st ROW - April 2
(L) Nearly done with the topside rough-out.
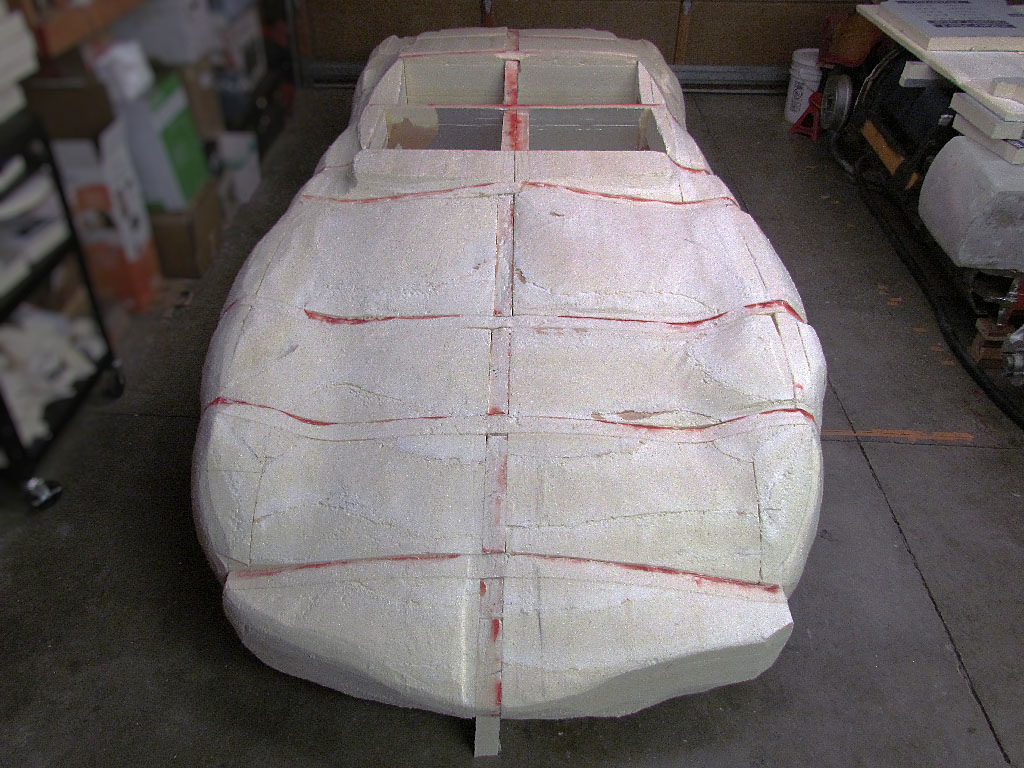
(CL) Vacuumed off and with both sides rough-shaped, it really begins to mimic the actual car.
(CR) Comparative front-quarter view.
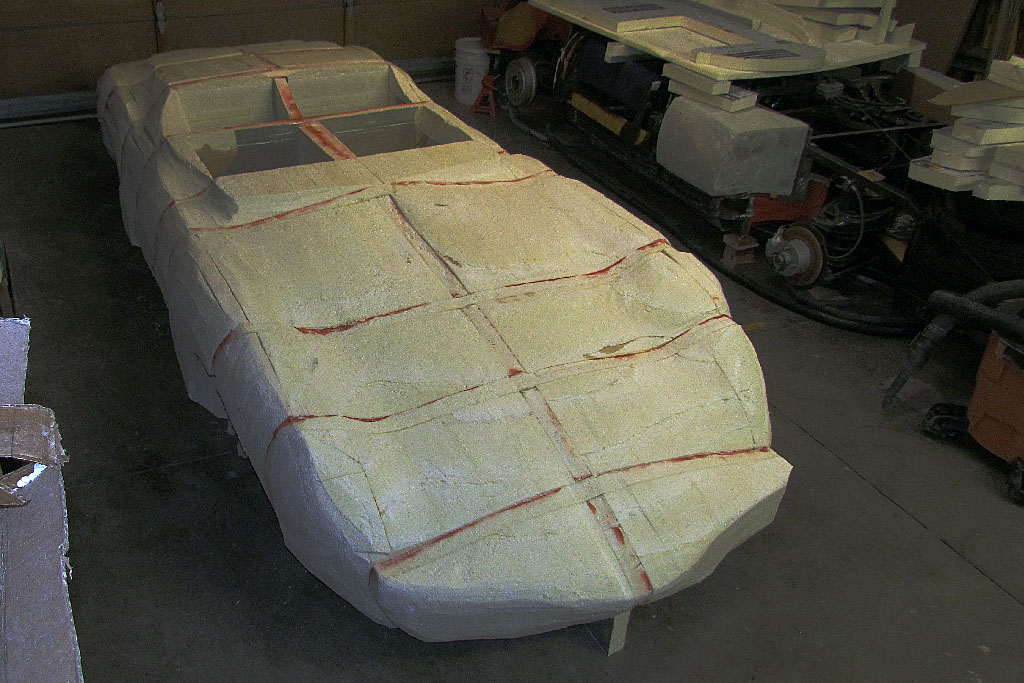
(R) ...and a nice looking view from the rear quarter.
2nd ROW - April 9
(L) IT HELD TOGETHER! Straight-on view of the underside before cleanup. The paper worked to keep the dripping glue off the floor and allow the body to be moved without having to chip it off.
If you look closely, you can see the yellow rasp under the body just in front of the rear wheel well. All my rasps were under there!
(C) Front view. I have positioned my pads to place the upside-down body onto. I am guessing I will need four people to safely flip it onto its back.
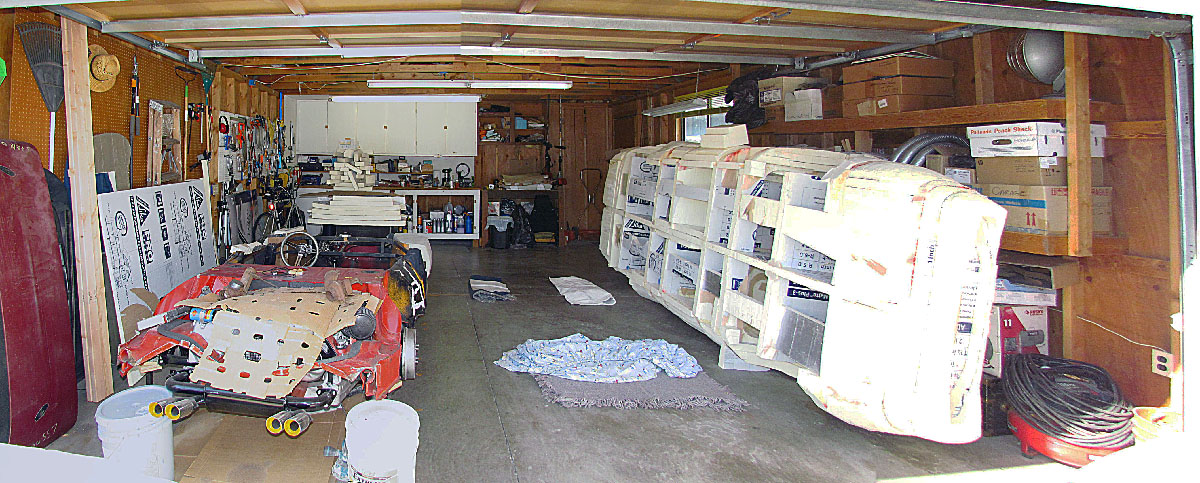
(R) A full garage. After taking this, I added missing foam pieces on the driver-side rocker panel. One is visible on top of the body.
3rd & 4th ROWS - April 10
(L) Another walk-around sequence.
(C) All in all, it WAS pretty sturdy and rigid while being manipulated by two men holding it on each end.
(R) It looks even larger on its back!
May - June


1st ROW - May 6
(L) My first contour guide in place for the nose.
(C) The front profile will have to be trimmed back for the guide to drop in place.
(R) This is why I put the time and effort into making these guides.
2nd ROW - May 14
(L) Finally got the time to trim back and reshape the nose so the guide fits down into position.
(CL) A front-on view of the guide in position.
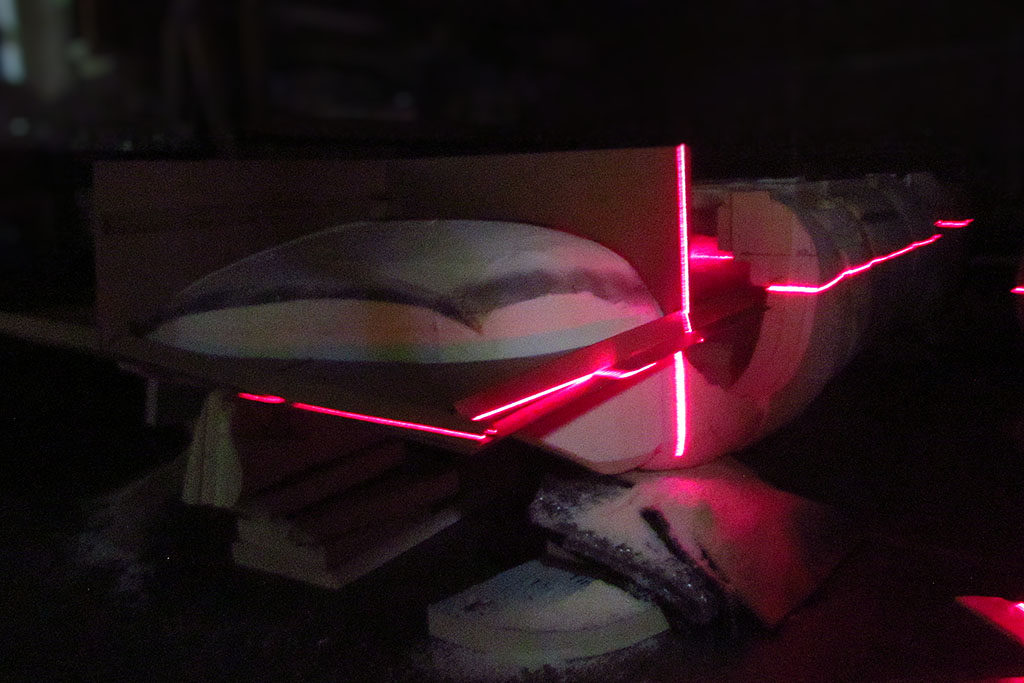
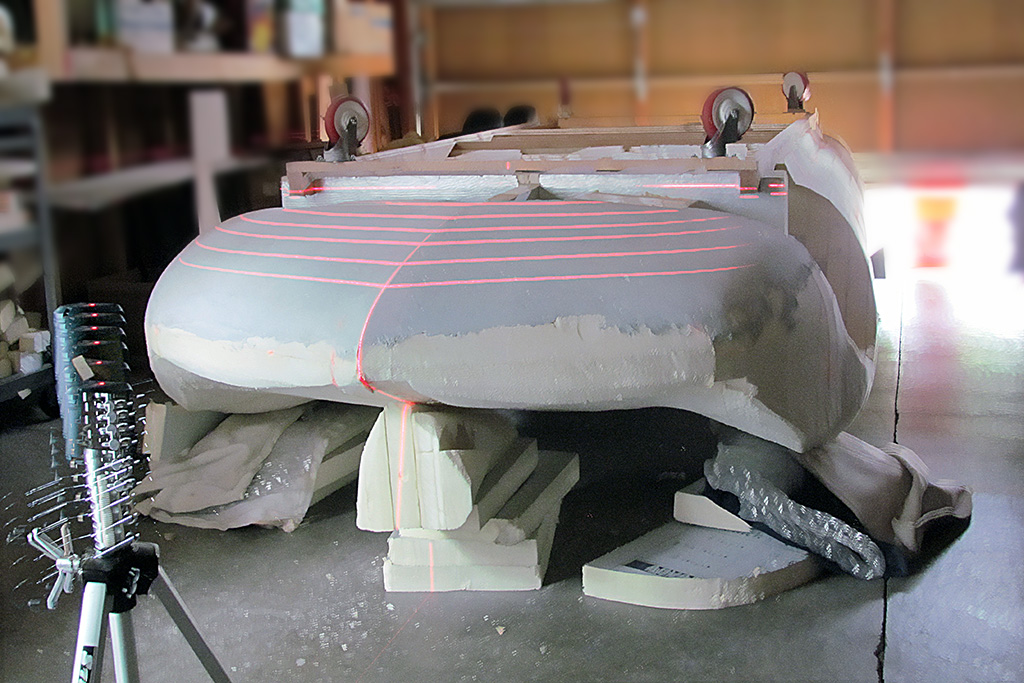
(CR) A laser-level check, with the laser set of the crease line of the nose.
This line will extend back along the flanks where it will make a crease line on the doors.
(R) Just for fun, a stereo view using my typical parallel viewing pair, a la stereopticon viewing cards.
3rd ROW - May 19 - June 6
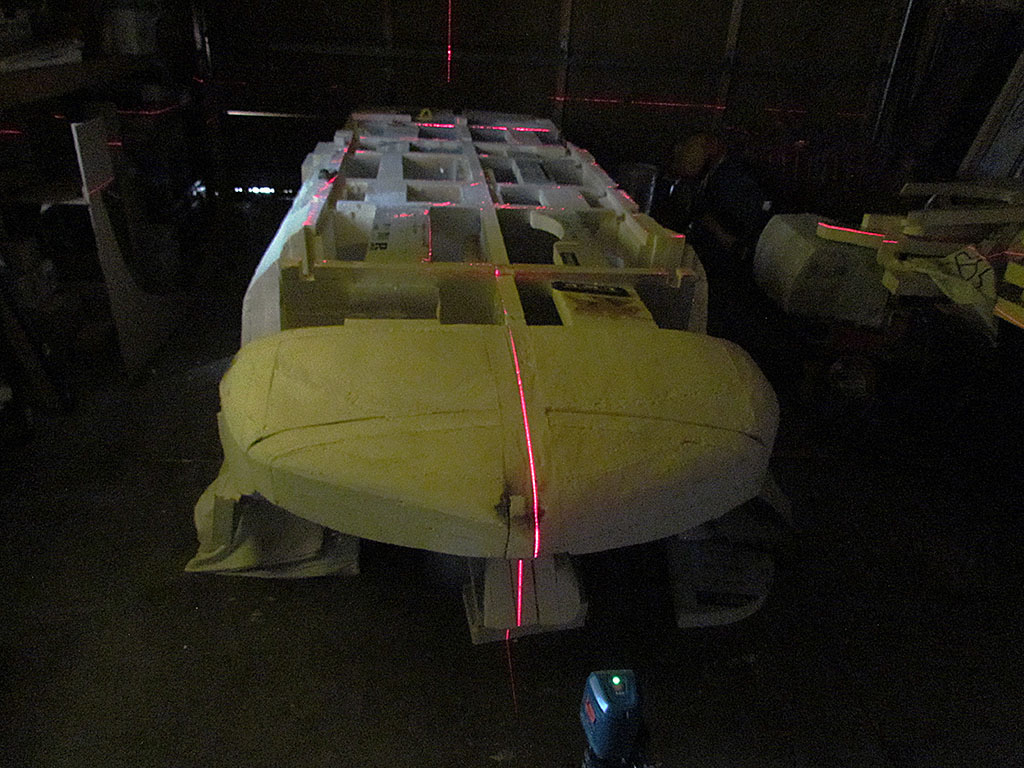
(L) I realized I needed to recheck if the body was set up at level. It was close but not quite, so level needed to be reestablished again.
(CL) I skimmed the horizontal beam across the bottom (now top) of the body. All the contours sections should be even, having all rested on the floor.
(CR) Where is was high, I gently sanded the bottom (now top) edge down. As I did so, the laser light would progress across the foam surface, telling when it was leveled.
(R) During all this, I created a simple, adjustable cross-section guide. It works, and I may improve the construction, but for the nose, I did not have enough cross-section lines to put it to use.
4th ROW - June 11 - 24
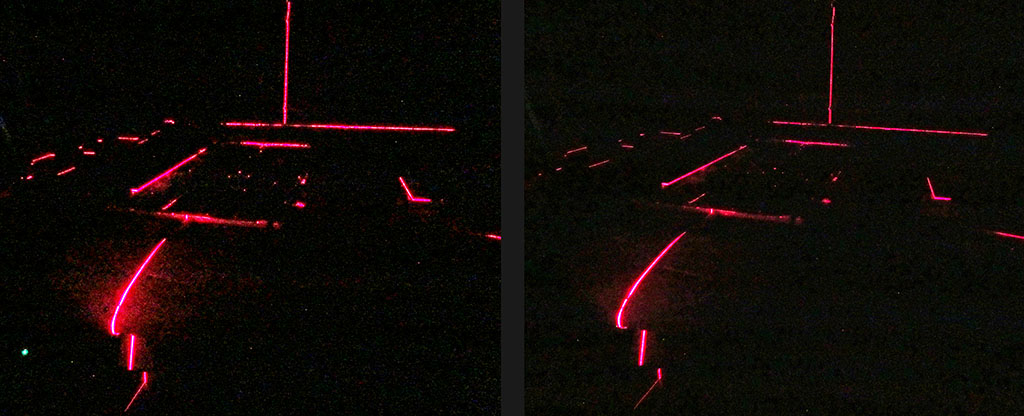
(L) A near tail-on view of the Kamm cove and taillights. This screen cap shows the guidelines and allow a comparison of the difference between the outer and inner taillights.
(CL) The outer are actually about 1-1/2 inch closer to the camera and therefore should be slightly larger IF all the bezels are the same size. But it is the opposite, and this overlay comparison shows it!
(CR) Here is the current state of the nose.
(R) and from the passenger side.
5th ROW - June 11 - 24
(L) After the nose, I did the wheel well contour shapes, then the rocker panels, and then attacked the Kamm tail.
(C) The tail is rather complicated to get both the outside and inside shapes. I am not sure how I will proceed.
(R) I put in about two weeks figuring out the best outline for the Kamm tail I could produce from my photos.
6th ROW - June 29
(L) Back up front, final-shaping the nose. Note the laser line at the crease/midpoint/beltline.
(C) Passenger side, and more of a side view.
(R) For comparison, the real article. Looks like mine is too blunt, or rounded at the very front.
July - December


1st ROW - July 4, The Dolley
(L) Anticipating moving the body about, I made a frame or the body.
(CR) View from rear
(CR) I added pivoting wheels and positioned them on the wheelbase & track.
(R) View from rear
2nd ROW - July 14, New Battery, Sealing Body
(L) Cleaned up the front well and painted it. Welded retainer screws for a battery hold-down bar.
(CL) The battery and retainer bar in place.
(CR) Trying out an artist material to fill the gaps in the foam. This one did not smooth out well and the feathered edges peeled up.
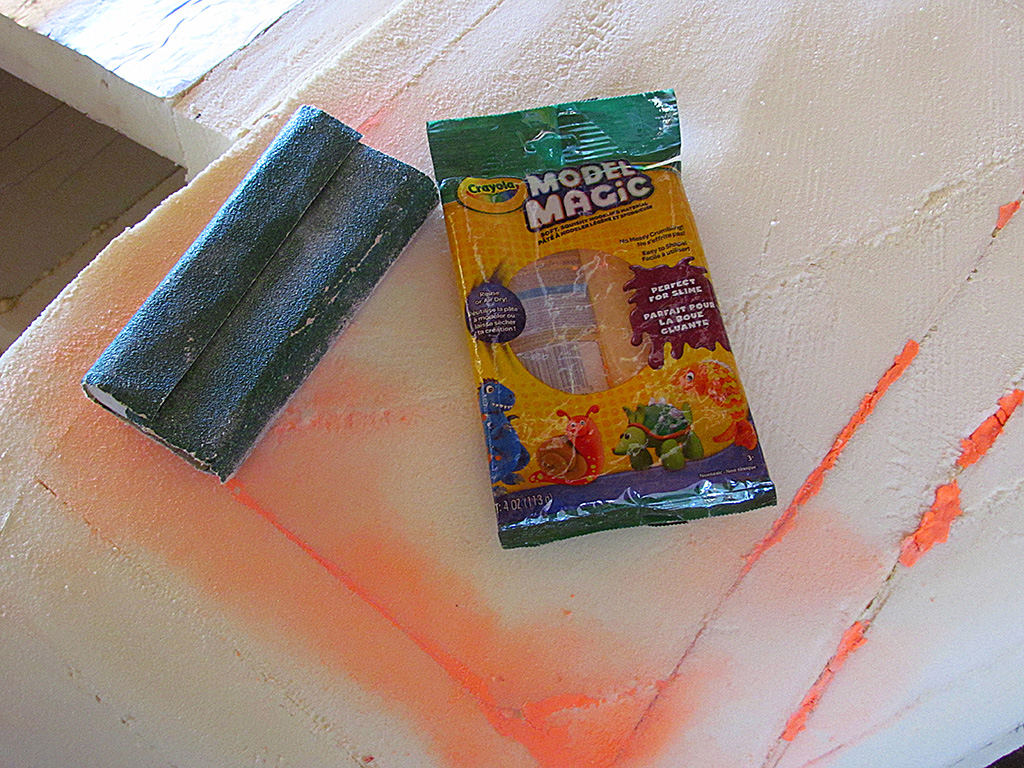
(R) This Crayola Model Magic worked much better and would sand down smoothly. Not sure if it's still made - this batch was on a reduced-for-sale rack.
3rd ROW - July 24, Bondo
(L) The time was close before moving. I wanted to bondo the front under pan before flipping the body over for the move. I had two brands of Bondo. The Home Depot product is on the left, the auto store product on the right. The H.D. product smoothed out better, as can be seen. Both, following mixing instructions, could only be worked for about five minutes.
(CL) I quickly projected a laser lever on it after sanding it down. This multiple-exposure shows that it is close to symetrical, left to right.
(CR) Meanwhile in the house, I worked on making patterns of the body ridgelines to check my progress while sanding in the future, when I get to that stage.
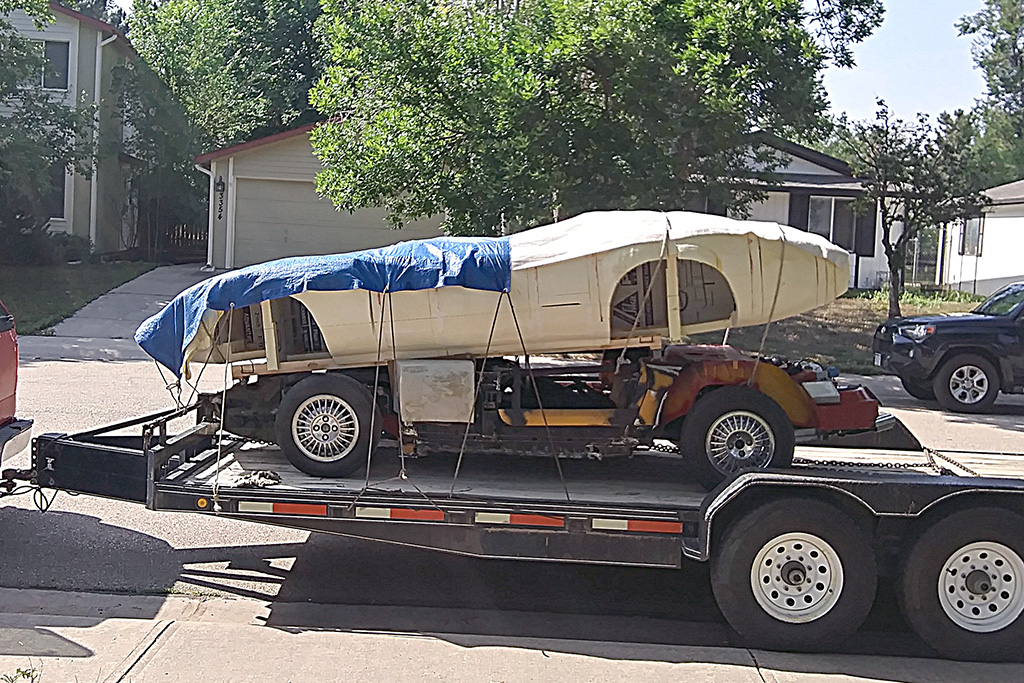
4th ROW - July 27, Moving Day
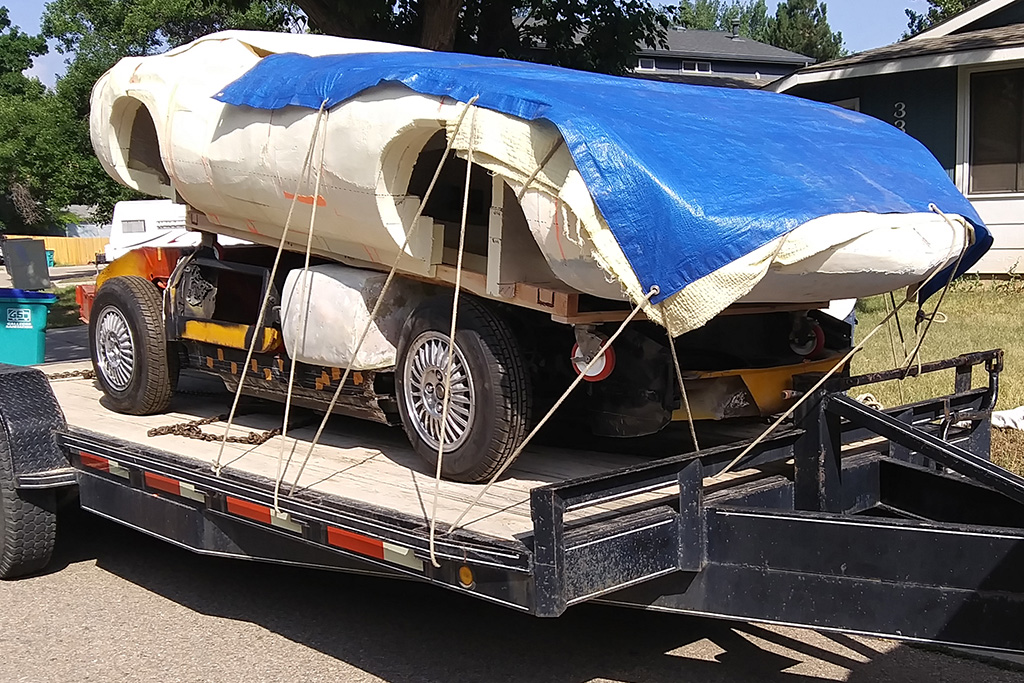
(L) The body after we finally got the chassis on the trailer and tied down the body on top of it.
(CL) The trip to its new temporay home would be about ten miles on a two-lane, 55 mph county road.
(CR) Would it hold up or blow off and into any car following behind?! Swallow hard, add more ropes, think positive thoughts, and then don't think about it till we get there.
(R) And so we were ready to set out...
5th ROW - September - December
(L) When we got there and parked the trailer, only then did I see how the body broke in two, yet still stayed in place. A month and a half later, it would arrive at its new home.
(C) It all fit and looked like this a month later after clearing out many boxes.
(R) November - It only took 35 minutes to glue the body back together. I used a 920, class 25 caulk. It worked great! But it needed 3 days to set and outgas the acetic acid curing smell.
Half the space holds the body with room to work on it. The other half holds the chassis and my 2nd car. It all fits!